





22 Primitive Christmas Decorating Ideas for a Cozy Home
Primitive Christmas decorating ideas draw their character from homespun fabric, worn wood, handmade figures, and greenery with room to spread. Think faded cranberry against cream, a dark cupboard behind pale Santa beards, or dried orange slices catching the light on a sparse tree.
- Quick Takeaways
- Primitive Christmas Trees with Natural Texture
- 1. Set a Sparse Christmas Tree in an Oversized Stoneware Crock
- 2. Build an Airy Wall Tree from Graduated Branches
- 3. Line a Windowsill with Citrus-Trimmed Trees in Clay Pots
- 4. Cover a Tabletop Cone Tree with Dried Citrus and Wool Discs
- Handmade Ornaments and Wall Decorations
- 5. Decorate a Small Tree with Folk Hearts and Yarn-Bearded Santas
- 6. String Dimensional Paper Stars Across a Primitive Shelf
- 7. Dress an Evergreen Wall Spray with Stitched Stars and Homespun Ribbon
- 8. Hang Burgundy Mittens on a Weathered Christmas Board
- 9. Suspend Pinecones over Frayed Burlap from a Twig Crossbar
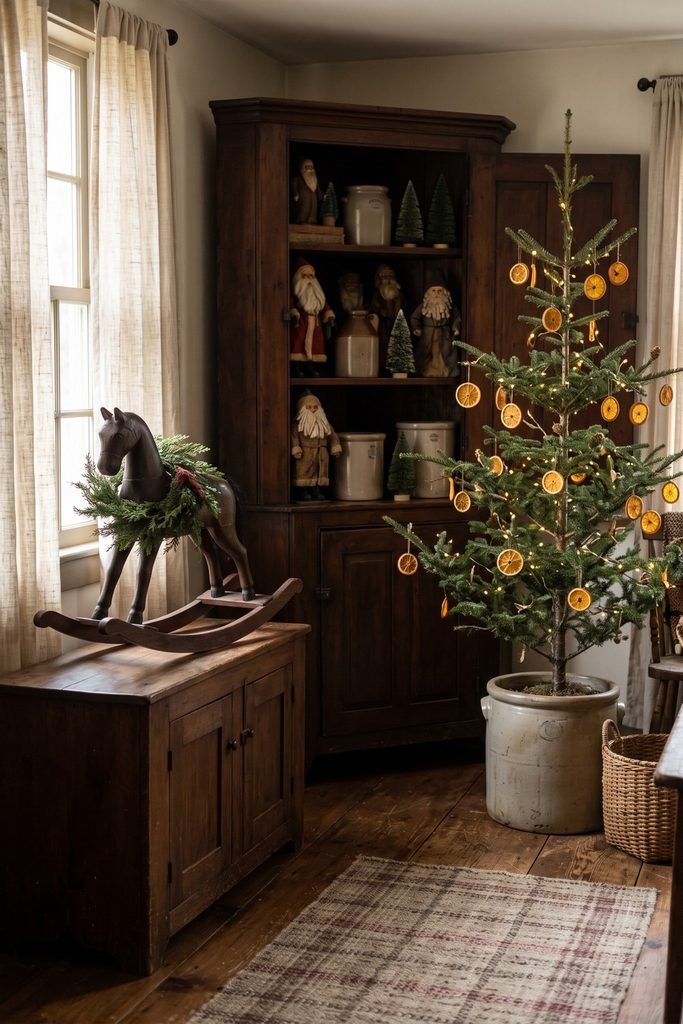
- 10. Frame a Pocket-Quilt Advent Tree in an Old Wooden Window Frame
- Collected Christmas Displays for Shelves and Cupboards
- 11. Layer a Primitive Snowman Vignette on Books and a Wooden Tray
- 12. Gather Folk Santas and Evergreen in a Long Wooden Trough
- 13. Style an Open Cupboard as a Primitive Christmas Collection
- 14. Dress a Wooden Rocking Horse with a Loose Evergreen Wreath
- Kitchen, Table, and Window Displays
- 15. Layer Cutting Boards with a Tiny Wreath and a Gingerbread Figure
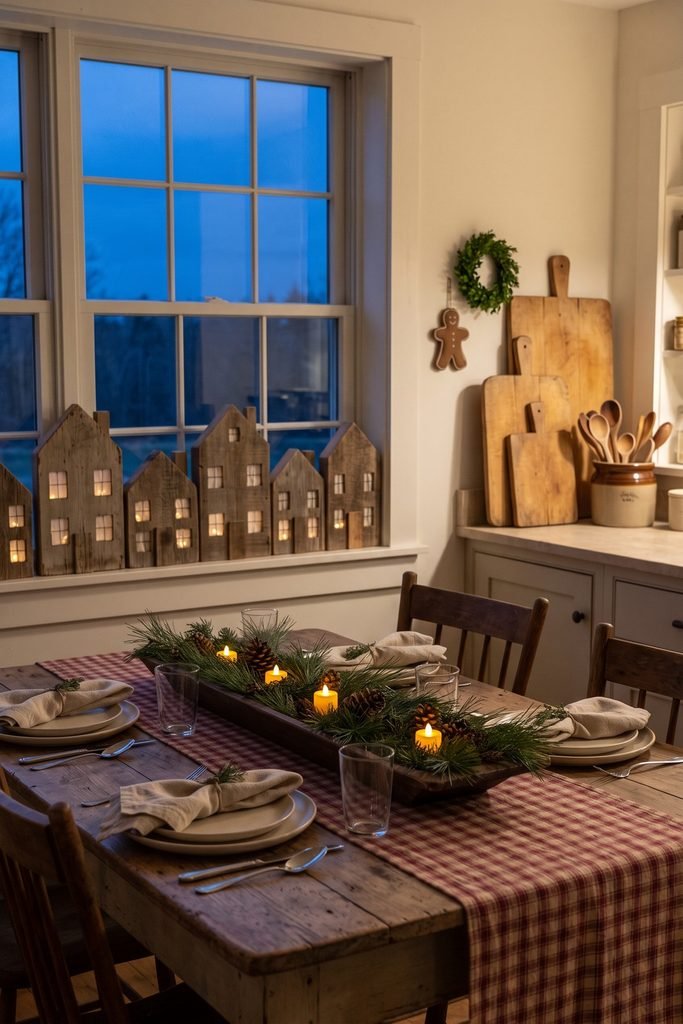
- 16. Set a Primitive Christmas Table with a Low Trough and Homespun Runner
- 17. Turn a Glass Jar into a Twig-Antler Reindeer Lantern
- 18. Build a Two-Sided Windowsill Village with Glowing Linen Windows
- Welcoming Entryways, Hearths, and Porches
- 19. Pair a Graduated Bell Rail with Evergreen on an Entry Chest
- 20. Frame a Stone Hearth with Vintage Skis and a Small Tree
- 21. Plant a Small Porch Tree in a Weathered Barrel
- 22. Shape a Rustic Outdoor Christmas Tree from Split Logs
- Keep Greenery, Textiles, and Lights Ready for the Season
- Choose One Focal Point and Repeat Its Textures
A rough tray beneath soft cloth, a large crock anchoring fine branches, and repeated checked ribbon create that collected feeling. The ideas below cover trees, wall decorations, kitchen corners, tables, and entryways. Choose the displays that suit your home, with practical guidance on arranging each one and keeping its defining details visible.
Quick Takeaways
- Repeat a few colors—faded red, cream, evergreen, and brown—while letting the materials provide variety.
- Pair soft textiles with firmer bases, such as stoneware crocks, wooden boards, and old trays.
- Give collections a boundary and a clear focal point, leaving useful surfaces and walking routes open.
- Use suitable flameless lighting around greenery and fabric, and plan for water access, secure support, and seasonal care.
Primitive Christmas Trees with Natural Texture
Begin with the tree shape and the surface supporting it.
1. Set a Sparse Christmas Tree in an Oversized Stoneware Crock
A substantial cream crock gives an airy tree enough visual weight to stand beside a dark chest or cupboard. The contrast is what makes this arrangement work: the vessel feels broad and grounded, while the branches remain fine and irregular above it.
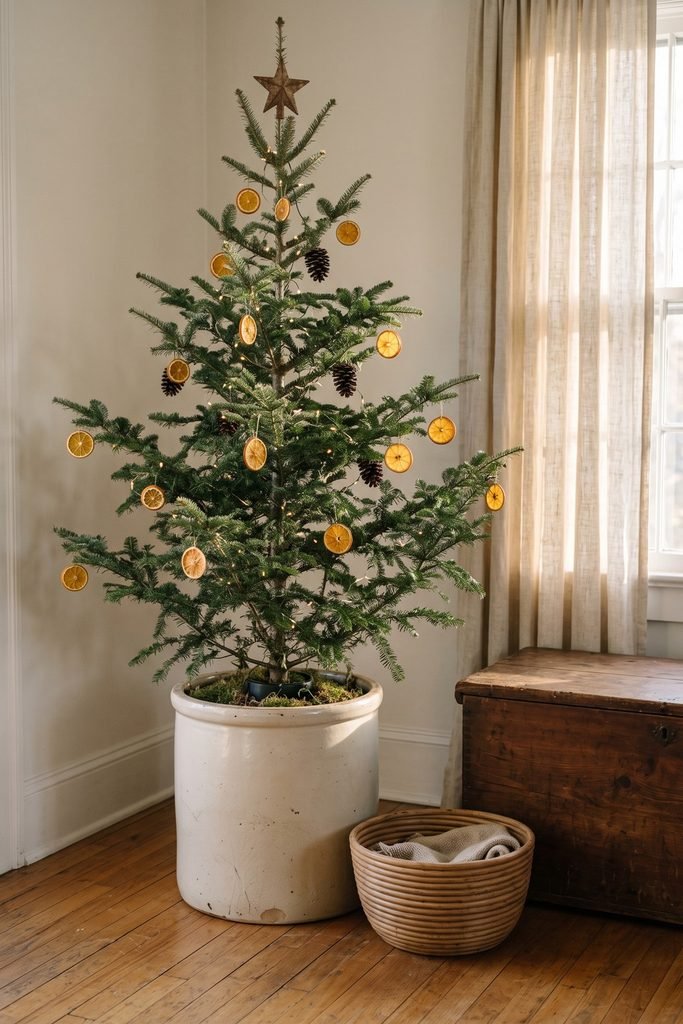
Keep the decorations scattered through the tree’s depth. Dried orange slices pick up the honey tones of nearby wood, and a few pinecones introduce darker spots among the needles. Bare branch tips help those natural Christmas ornaments remain distinct. Warm pinlights can trace the shape without turning every gap into another place to hang something.
A woven basket beside the crock supplies a lower, softer shape. Leave the crock’s rim and shoulders visible so its proportions remain part of the display.
For a cut tree, the crock conceals a properly fitted water-holding stand. Check that you can reach the reservoir; University of Minnesota Extension recommends checking cut-tree water levels daily. A smaller tree and crock can carry the same relationship into a tighter corner.
Find a Crock and Woven Basket
Cream stoneware and a woven basket repeat the tree corner’s solid base and softer texture.
2. Build an Airy Wall Tree from Graduated Branches
The blank wall between the branches is an important part of this tree. Graduated lengths establish the triangular outline, while the open spaces give each hanging ornament its own small frame.
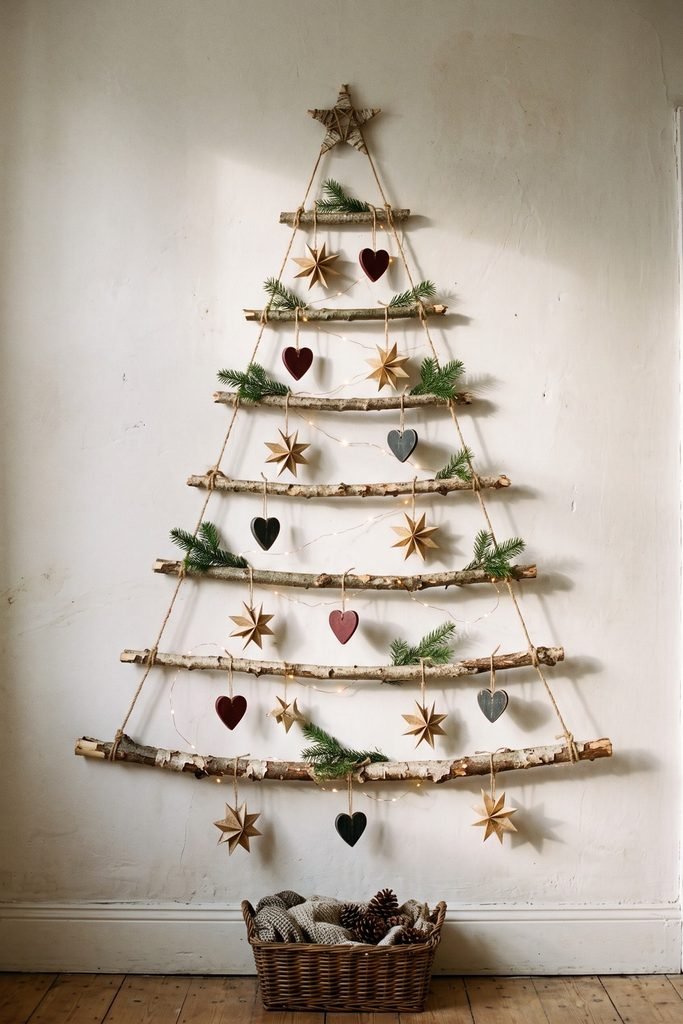
Lay the branches out before mounting them, working from a short top piece toward a broader base. Look at the arrangement from across the room to check the taper. Slightly uneven ends suit the rough wood; the overall tree shape should still be clear.
Choose a few light ornaments with contrasting surfaces, such as dark painted hearts and pale paper stars. Small evergreen sprigs can soften selected branches, with the rest left exposed. A simple star at the apex completes the outline.
This is a useful option for Christmas decorating in a small home because the main display occupies a wall. Keep anything beneath it low and optional. The finished assembly still needs hardware suited to its weight and wall surface, including the weight of its ornaments.
3. Line a Windowsill with Citrus-Trimmed Trees in Clay Pots
Terracotta and dried orange share a warm, earthy color that looks especially clear against dark needles. Repeating that pairing across three small trees gives a windowsill a rhythm you can see from either end of the room.
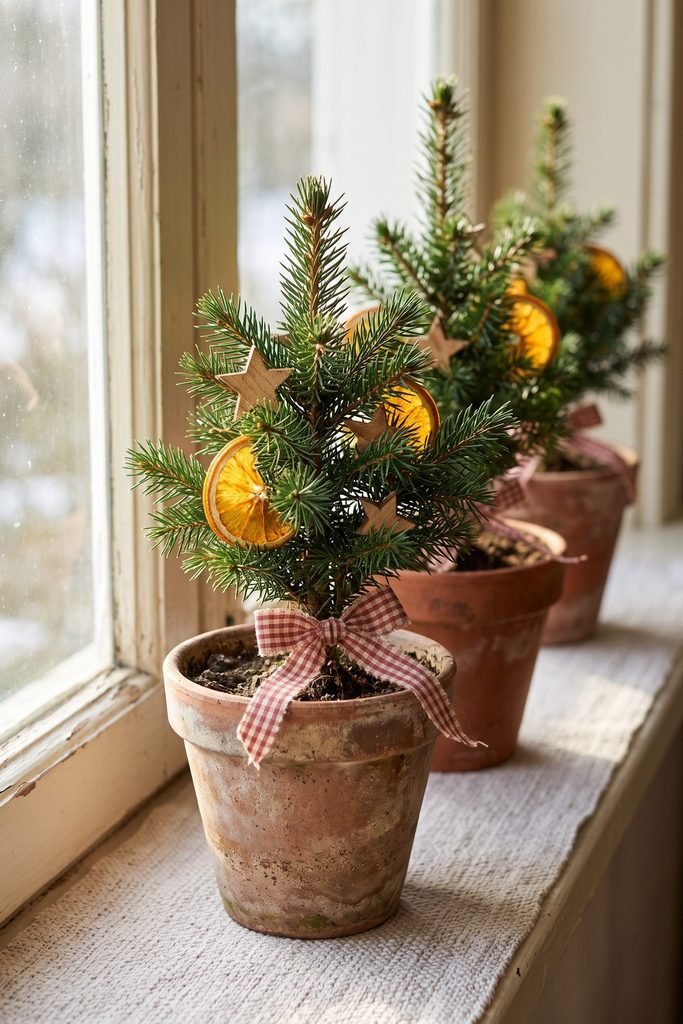
Slight differences in tree height make the group feel collected. Keep the pots related in color and finish, and tie faded red plaid below the main foliage so the bows leave the little triangular outlines visible. A small wooden star on each tree can repeat the shape without adding another strong color.
Let some sill remain visible between the pots. Fit matters more than filling the full width of the window.
Use fully dried citrus and protect the surface beneath each container. Rooted trees, cut branches, and faux trees require different care, so choose the version that suits the light and maintenance you can provide.
4. Cover a Tabletop Cone Tree with Dried Citrus and Wool Discs
Overlapping circles give this little tree its distinctive surface. Dried citrus supplies fine translucent edges, while wool discs contribute a flatter, softer texture.
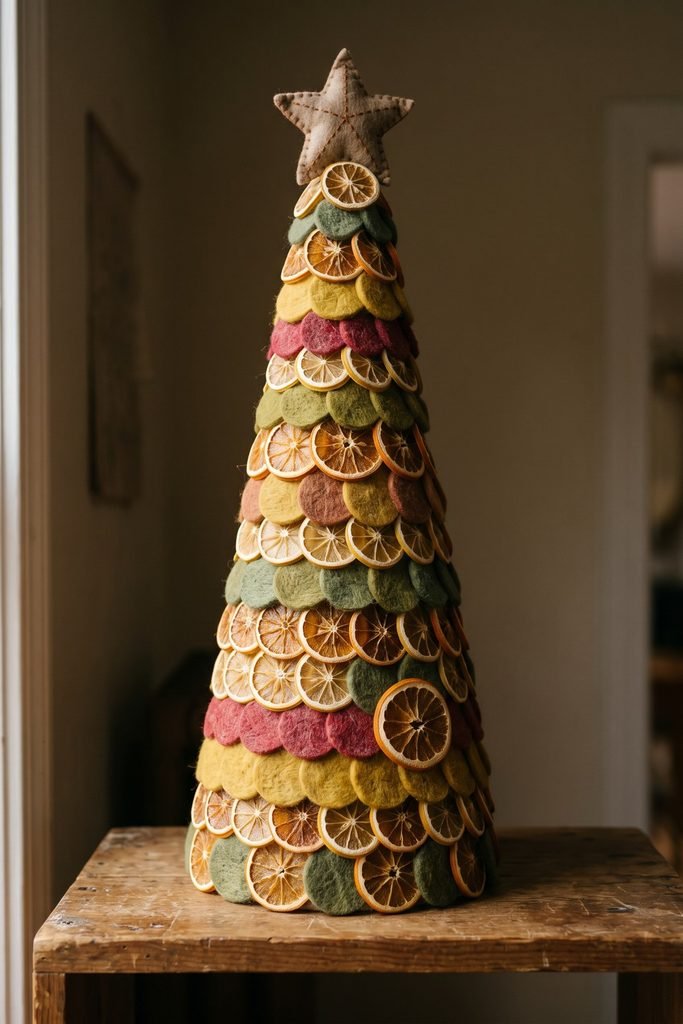
Work with dried orange, olive, mustard, and a little cranberry. Keeping most pieces small helps the cone remain readable; an occasional larger citrus slice breaks up the repetition. A soft fabric star at the top repeats the wool texture and finishes the narrow silhouette.
For a handmade version, arrange the pieces around a stable cone base, overlapping the rows enough to conceal the support. Follow the adhesive’s directions for the materials involved, and begin with purchased dried citrus if you prefer to skip preparing it.
Give the finished tree a quiet place on a plain wood shelf. Its patterned surface benefits from an uncluttered background, where the difference between the thin citrus edges and matte wool stays visible.
Gather the Citrus and Wool Textures
Dried orange slices and wool felt circles provide the contrasting surfaces for this small cone tree.
Handmade Ornaments and Wall Decorations
Small handmade pieces can repeat the palette beyond the main tree.
5. Decorate a Small Tree with Folk Hearts and Yarn-Bearded Santas
Dark painted hearts and soft Santa faces offer two different kinds of contrast on a little evergreen. The hearts have crisp, flat outlines; the pale yarn beards have volume and irregular edges. Faded red connects the two through hat fabric and painted borders.

Limit the collection to those two main ornament families. That gives the tree a recognizable theme while allowing individual pieces to vary. Separate the faces enough that each beard reads clearly against the needles, and let a few bare tips extend beyond the ornaments.
Simple floral marks on black hearts can supply the smallest accents of ochre or green. If you make them yourself, develop your own loose motifs. The relationship between dark paint, red edging, and pale yarn matters more than matching a particular illustration.
Existing handmade Christmas decorations work here too. Try removing unrelated shiny ornaments first, then check whether a few checked bows are needed. The small tree may already have enough pattern in its hearts and hats.
6. String Dimensional Paper Stars Across a Primitive Shelf
Folded ridges let paper stars catch side light in a way flat cutouts cannot. A short strand beneath a wooden shelf gives those creases space to show, with the shelf above remaining available for a crock or another everyday piece.
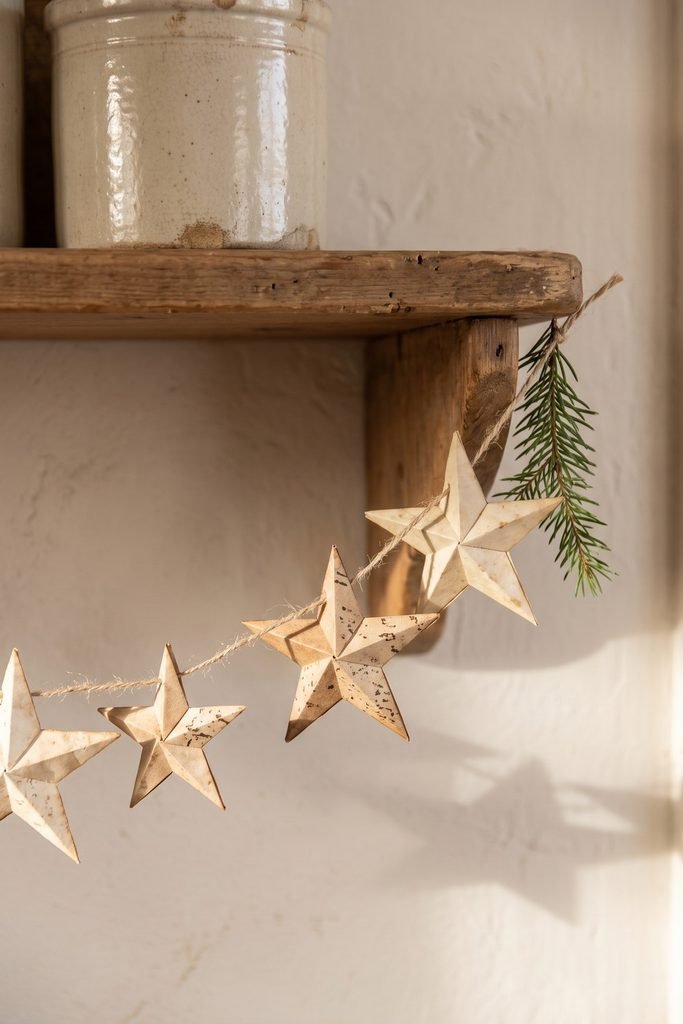
Discarded printed pages or kraft paper supply a parchment-and-brown palette. Choose expendable paper, keeping valuable books intact.
For this Christmas garland craft, make the stars dimensional, attach their hangers, and space them along twine with visible gaps between the points. Varying their size slightly makes the strand less rigid.
Keep the wall behind them quiet. A small evergreen sprig at one end is enough additional texture. Paper decorations belong away from open flames, hot bulbs, and electrical connections.
7. Dress an Evergreen Wall Spray with Stitched Stars and Homespun Ribbon
Cream stars become especially noticeable against deep green needles. Their padded shapes and visible stitches soften an evergreen spray, while cranberry stars and checked ribbon carry the color downward.
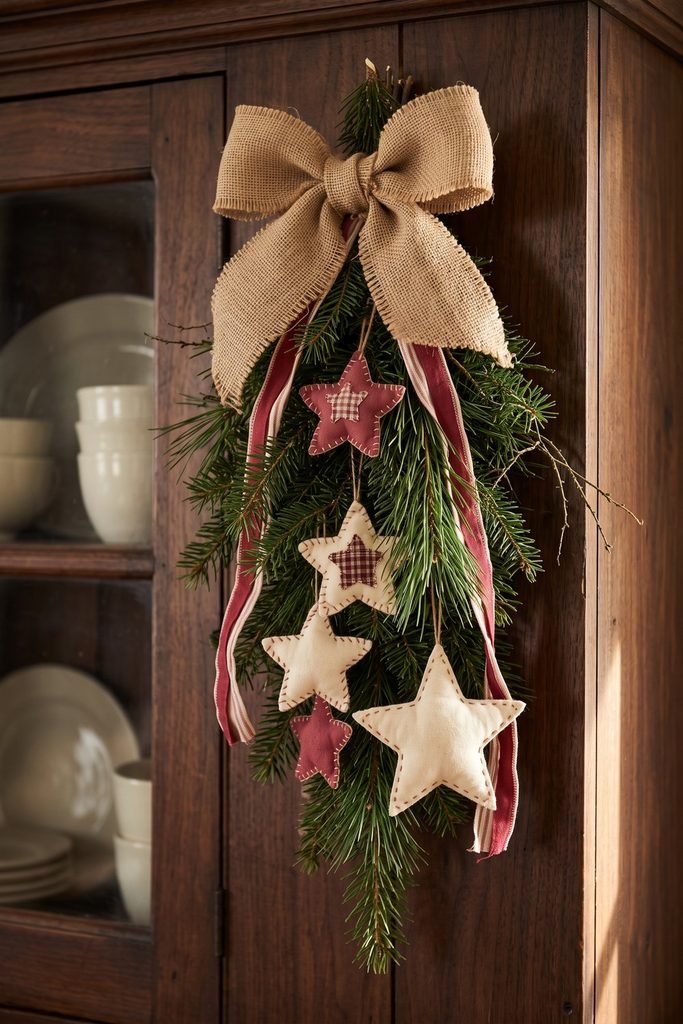
Build the spray around a clear taper. The broadest greenery sits beneath the main bow, and the lower branches narrow toward the ribbon tails. Attach light stars at different heights, leaving enough foliage visible to retain that shape.
A coarse burlap bow supplies the largest knot. Smaller fabric ties can stay relaxed, with their ends falling naturally between the stars. Too many equally large bows would interrupt the descending arrangement.
This treatment suits a cupboard end or an indoor door where the textures can be seen close up. Purchased stitched stars work here too; vary their size and placement.
Find Stitched Stars and Checked Ribbon
Soft fabric stars and red-and-cream checks echo the wall spray’s layered textile details.
8. Hang Burgundy Mittens on a Weathered Christmas Board
An old mitten pair already has the drooping cuffs and soft folds this arrangement needs. Against a rigid gray-brown board, those familiar shapes become the focus of a narrow wall display.
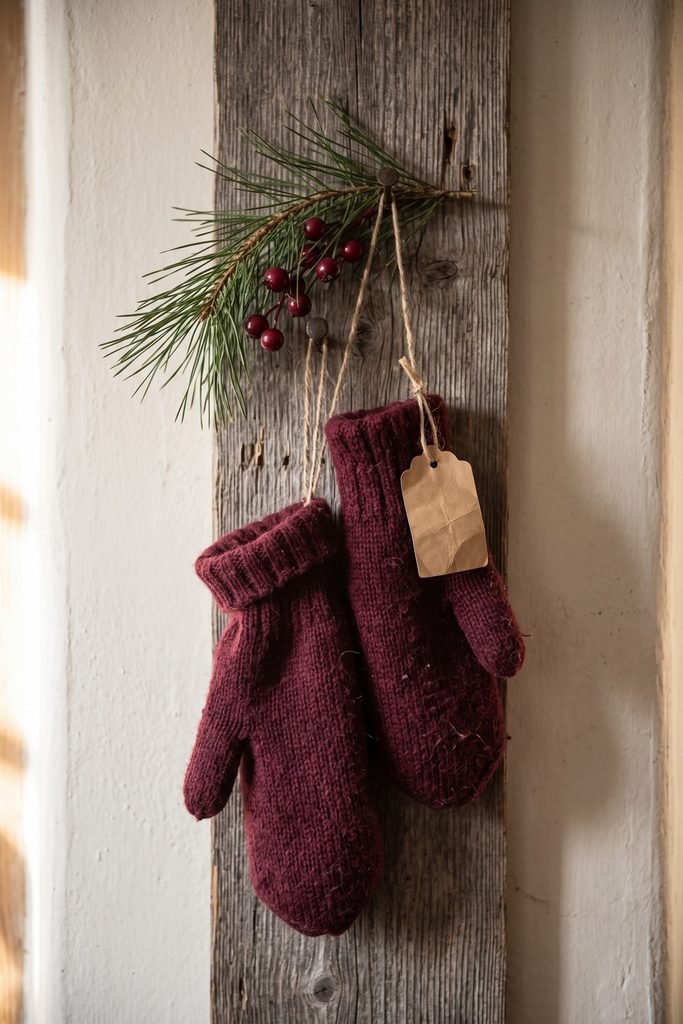
Position the mittens low enough to show both cuffs, then carry one loose evergreen sprig diagonally above them. Burgundy berries repeat the fabric color in smaller points. A plain tag can fill a gap, but the mittens should remain the first thing you notice.
The greenery should cross the board’s vertical line, with some bare wood still showing beside the fabric.
Use a sound board with a known-safe finish and fittings appropriate to the assembly. Existing wear supplies plenty of texture; preparing unknown old paint is a separate job from arranging the display.
9. Suspend Pinecones over Frayed Burlap from a Twig Crossbar
Pinecone scales can disappear against a dark wall. A pale burlap panel gives them a lighter background, making their texture easier to see without adding paint or glitter.
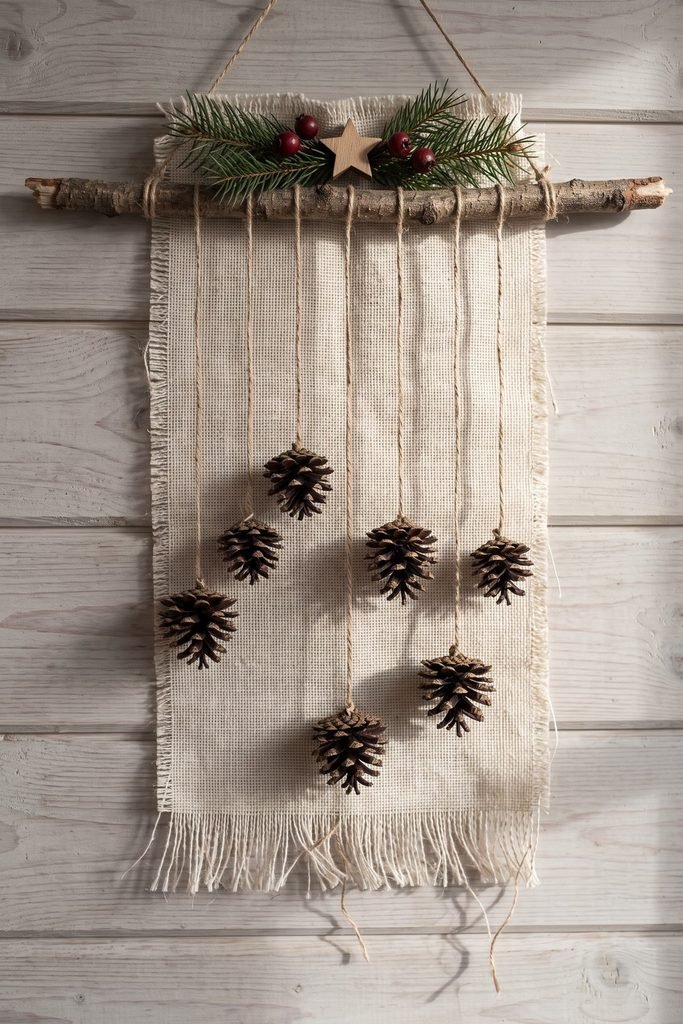
Suspend clean, dry cones on twine at staggered lengths. Leave room between their outlines, and let the cloth’s frayed lower edge remain visible. The rough twig across the top acts as a clear horizontal starting point for the hanging strings.
A narrow evergreen line along that crossbar joins the separate drops. Add a small wooden star near the top if the arrangement needs a finishing shape.
The result brings woodland Christmas decor to a slim wall strip. Keep the assembly light, secure it with suitable support, and place it clear of heaters and other heat sources.
10. Frame a Pocket-Quilt Advent Tree in an Old Wooden Window Frame
A tree made from working fabric pockets can serve as both a Christmas picture and a daily countdown. From across the room, the stepped rows form an evergreen silhouette. Up close, the open pocket tops and small removable tokens give the textile a purpose beyond its pattern.
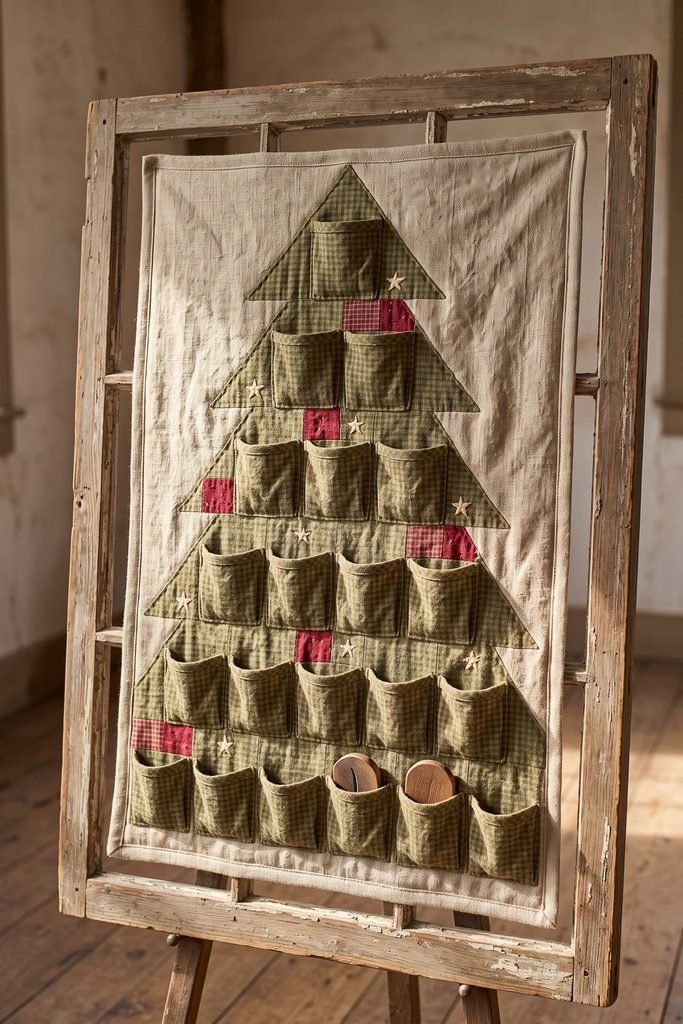
For this design, plan 24 pockets on a linen backing inside a sound, glass-free wooden window frame. Arrange broader rows toward the bottom, tapering upward. Faded olive checks can carry most of the tree, with a few cranberry patches and cream stars distributed through it. Leave a border of plain linen so the pocket edges remain legible.
The openings need enough room for the intended contents and comfortable access. A wooden token partly withdrawn from one pocket makes the idea immediately understandable. For a family countdown, choose age-appropriate contents; small removable pieces need particular care around young children.
A detachable textile panel can be rolled for storage after it is emptied. A smaller version with 12 pockets becomes a 12-day countdown, clearly identified as such.
Choose the frame before planning the pocket layout, and have its condition and mounting needs assessed as appropriate. The EPA’s lead-safe guidance explains why disturbing old painted architectural surfaces can create hazardous dust. Use a known-safe finish or a suitable reproduction frame, retaining the worn-wood character without casually sanding unknown paint.
Collected Christmas Displays for Shelves and Cupboards
Give favorite figures a shared base and a clear hierarchy.
11. Layer a Primitive Snowman Vignette on Books and a Wooden Tray
A pale snowman with a broad dark hat already has a strong outline. Build the rest of the display around that contrast, letting a small lantern and a crock of greenery occupy secondary positions.
Books are useful here because they can raise the smaller light to a better height. Keep the stack compact and dry, with some uneven page edges visible. A weathered tray underneath contains the arrangement and separates it from the wider chest surface.
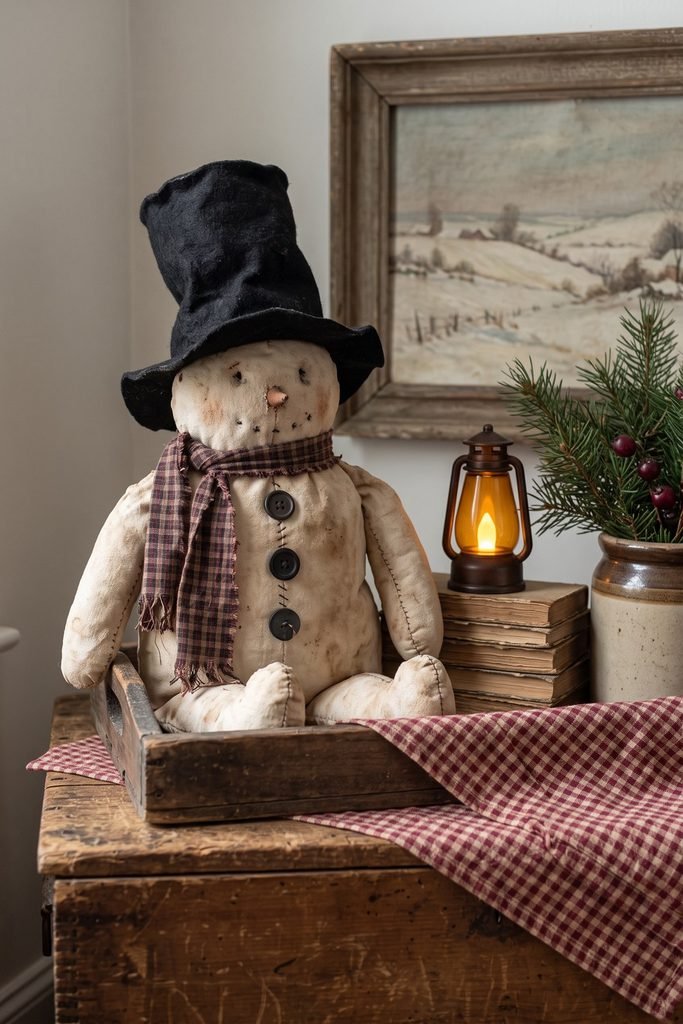
The checked scarf offers a place to introduce faded red. Repeat that color in a few berries, then let the snowman’s cream body and dark buttons remain dominant. A runner falling over the chest edge carries the textile beyond the tray without requiring more figures.
Winter artwork behind the group can add depth, particularly if its colors stay subdued. Leave part of the tray’s front edge exposed so the display still has a readable boundary.
For a shelf-sized version, reduce the greenery and use a smaller snowman. A battery candle supplies the low glow; protect the books from any moisture in the nearby vessel.
Choose Pieces for the Snowman Tray
A primitive snowman figure and a rustic wooden tray form the main pairing in this contained winter display.
12. Gather Folk Santas and Evergreen in a Long Wooden Trough
Several Santa figures can look scattered when each occupies a separate patch of furniture. A long trough gives the collection one base, allowing different hats, beards, and materials to read as related pieces.
Set the tallest Santa slightly off center, then work outward with lower figures. The repeated hat triangles create a rising and falling line across the vessel. Cream yarn beards punctuate the faded red, keeping the individual faces visible against dark greenery.
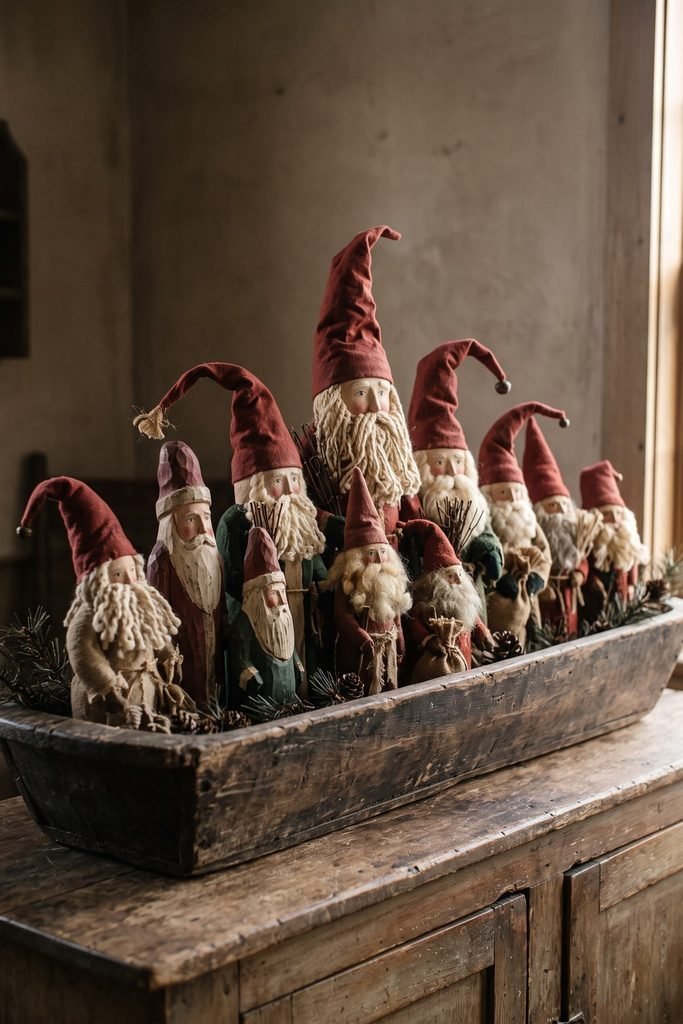
Use evergreen sparingly to bridge awkward gaps. Some trough edge should remain exposed, and each figure needs space around its face. Soft hats bent in different directions add variation without introducing another type of ornament.
Fewer Santas in a shorter trough suit a narrow sideboard. On a covered porch bench, use figures and textiles suited to that exposure, and secure anything tall. Indoor cloth collectibles can stay inside while the worn wooden container provides the country character.
13. Style an Open Cupboard as a Primitive Christmas Collection
A dark cupboard can hold a generous Christmas collection because its shelves already divide the display into smaller views. The task is to give each level a focal group, with enough exposed wood to distinguish one cluster from the next.
Choose a taller Santa, crock, or framed collectible for each shelf, then balance it with lower objects. Little green trees are useful connecting pieces: repeating them across the levels makes the collection feel related even when the figures differ.
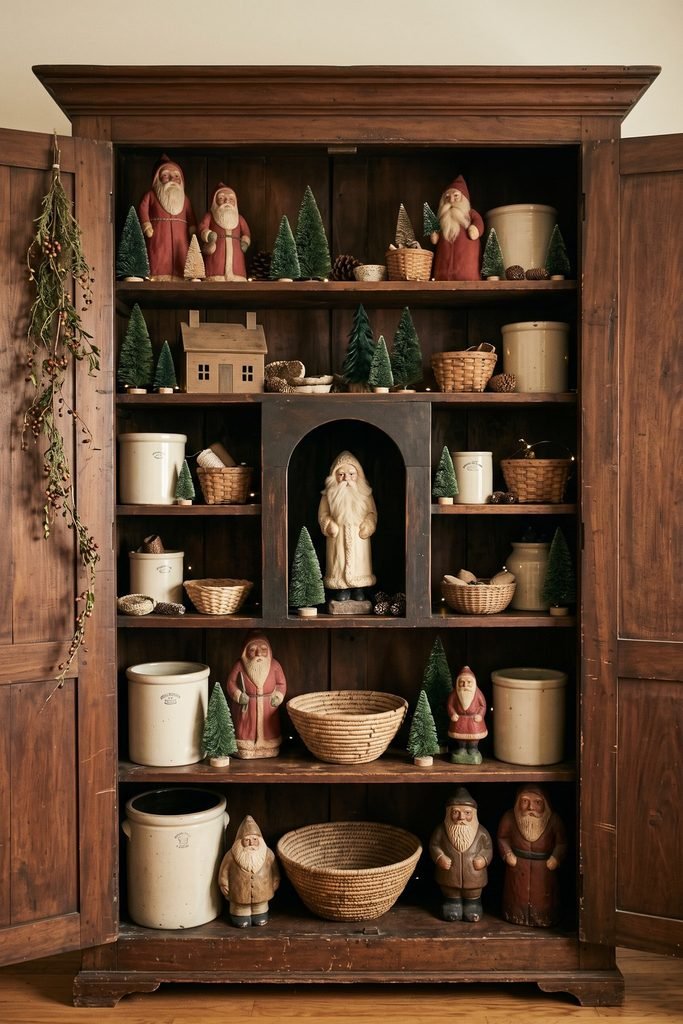
Keep the palette close to walnut, faded red, pine, and aged cream. That limited range gives patterned cloth, painted faces, pottery, and baskets room to coexist. One small house or an arched display box can introduce a different silhouette among the upright figures.
Leave a quiet patch on each shelf. It might be bare wood beside a crock or an open space above a low bowl. These pauses help the detailed pieces remain readable.
Put heavier pottery low, retain access to anything used daily, and follow the cupboard’s support and anchoring guidance.
14. Dress a Wooden Rocking Horse with a Loose Evergreen Wreath
The curved rocker and long horse profile provide most of the character in this display. A loose wreath around the neck adds a contrasting circle while leaving the head and wooden body exposed.
Choose a wreath small enough to sit comfortably within that outline. A modest cluster of red berries can mark the neck, with low sprigs below following the curve of the rocker. Preserve some empty surface around the horse so its familiar shape remains easy to recognize.
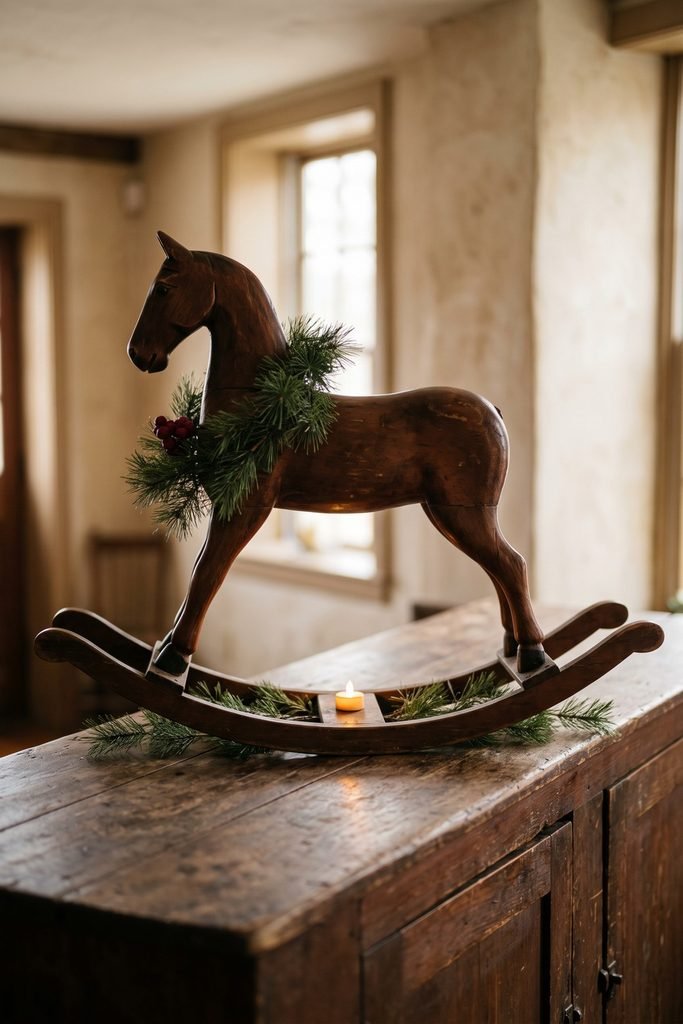
This works especially well on a long sideboard where the full base is supported. A single low battery light can catch the worn edges of the wood in the evening.
Keep greenery and moisture away from valuable finishes. The horse’s existing surface supplies the vintage rustic Christmas feeling; it needs very little attached to it.
Kitchen, Table, and Window Displays
Keep working surfaces, place settings, and window access in the plan.
15. Layer Cutting Boards with a Tiny Wreath and a Gingerbread Figure
Breadboards create a useful backdrop for small kitchen decorations. Their rounded tops and visible grain frame a little gingerbread figure, giving it enough presence to stand beside a crock of wooden spoons.
Layer the boards at different heights in a counter corner, then hang or secure a tiny wreath to the tallest one. The wreath’s circle breaks up the upright shapes, and a plain red tie repeats the gingerbread figure’s small fabric accent.
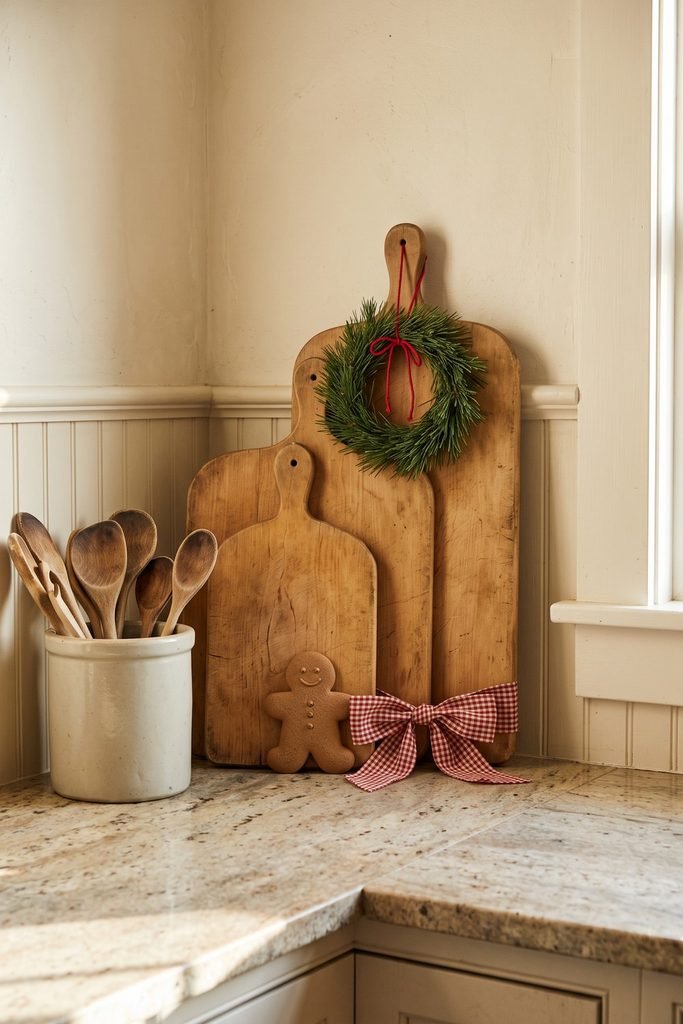
Keep the figure low, where it stays visible beneath the greenery. One broad checked bow can supply the pattern; extra labels and ornaments may hide the board shapes that make the arrangement work.
Reserve clear preparation space beside the group and locate it away from burners and hot appliances. Decorative boards have a different job from the boards used for preparing food.
16. Set a Primitive Christmas Table with a Low Trough and Homespun Runner
Lay out the plates and glasses before building the centerpiece. Their positions show how much room the greenery can occupy, including space for serving dishes and comfortable conversation across the table.
A narrow wooden trough gives loose evergreen a defined edge. Set it on a faded cranberry checked runner, leaving portions of the pattern visible at both ends. Plain cream stoneware gives the eye a quieter surface beside all that fabric and needle texture.
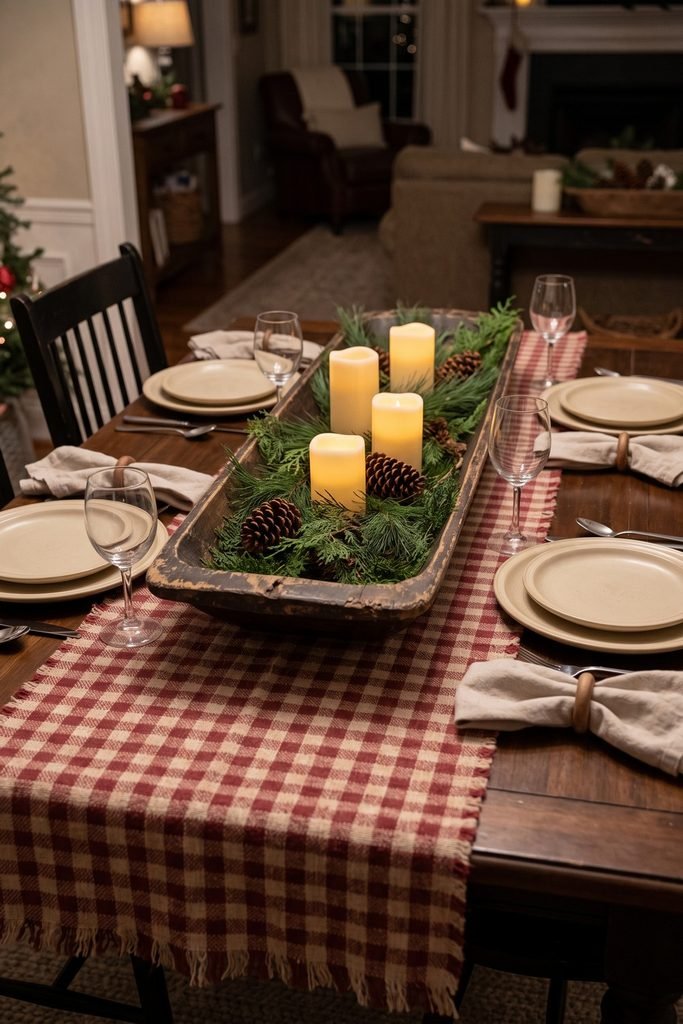
Keep the arrangement low for your actual seating positions. A few cones and unequal low LED candles can create a gentle rhythm along the trough; taller ornaments would compete with the people seated opposite each other. Simple linen napkins and wooden ties carry the materials outward to the place settings.
For related combinations beyond this primitive palette, explore these farmhouse Christmas decor ideas. Protect the tabletop beneath the arrangement and keep the lighting flameless among the greenery.
Find the Table’s Wood and Homespun Layers
A narrow wooden trough and a red-and-cream runner echo the centerpiece’s long shape and checked foundation.
17. Turn a Glass Jar into a Twig-Antler Reindeer Lantern
Transparent glass gives this reindeer its evening glow. Rough twig antlers extend the outline above the jar, while a small muted-red nose and two dark eyes supply just enough detail to suggest the face.
An intact jar, a restrained twine collar, and short forked twigs keep the materials clear. A large hat or heavy band of foliage would cover the glass and reduce the effect of the light. A few evergreen tips at the neck are plenty.
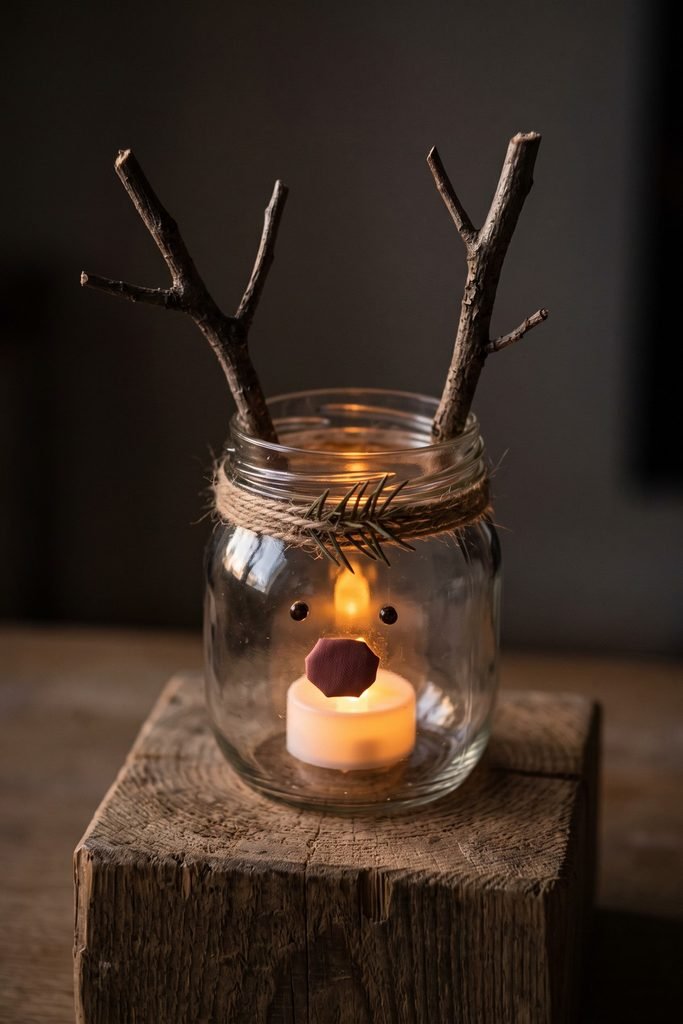
Choose a battery light suitable for the intended display and follow its instructions, including any limits on covering or enclosure. Keep the battery compartment accessible and its closure secure.
Set the lantern on a low wood block against a darker background. The broad block grounds the narrow jar, and the amber glow makes the twig fork visible above it. A plain shelf leaves room for that small silhouette to stand on its own.
18. Build a Two-Sided Windowsill Village with Glowing Linen Windows
A narrow village can decorate both sides of a window when its houses have finished fronts and backs. The defining detail is the light passing through actual linen-covered window openings, with the irregular roofline visible from the room and the street.
Plan a short row of three to five simple wooden house silhouettes on a shallow slotted base. Vary the roof heights, leaving gaps that distinguish one building from the next. Matte weathered brown and soot-black surfaces give unbleached linen a pale frame. A little greenery at the ends can finish the row while leaving the windows unobstructed.
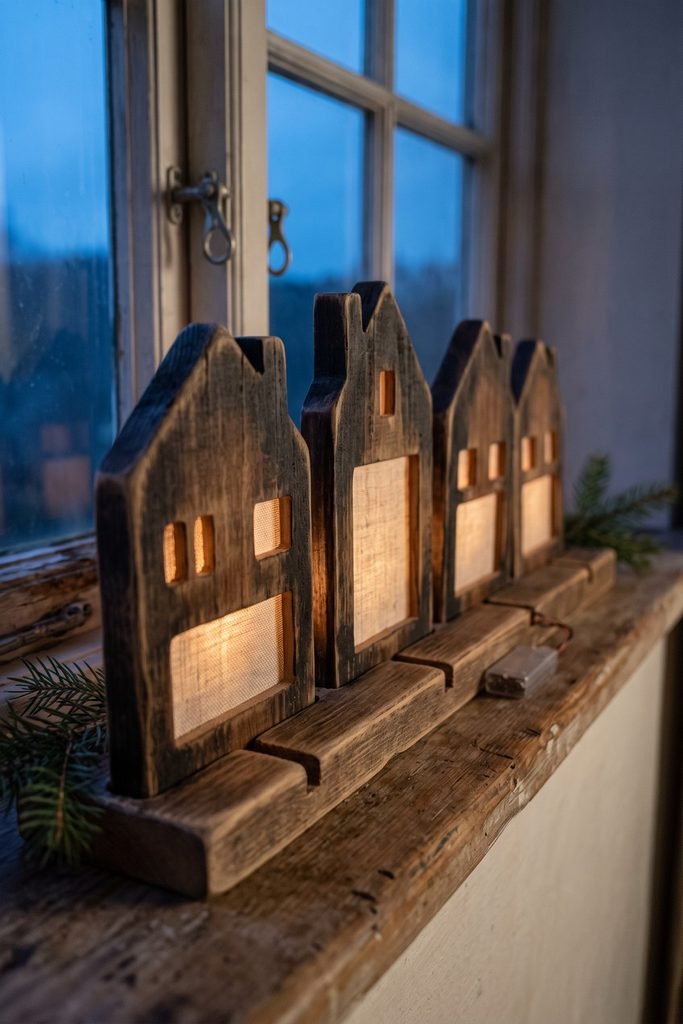
Use precut pieces or have an adult with the appropriate woodworking skills prepare them. The base and slots need to fit the chosen pieces securely. Linen goes behind the window apertures, and both exposed faces receive a finished surface. A painted rectangle on solid wood will not produce the same transmitted glow.
Position a suitable battery LED strand behind or between the silhouettes, following its placement instructions and keeping the battery unit uncovered and accessible. Test the arrangement at dusk from indoors and outdoors; glazing and reflections affect what is visible from each side.
If the sill is too shallow, place the village on a narrow console in front of the window. Keep handles and window openings usable. Removable houses allow the pieces to lift out of the base and store flat, with the linen windows protected between seasons.
Welcoming Entryways, Hearths, and Porches
Larger winter objects give the final displays a stronger outline.
19. Pair a Graduated Bell Rail with Evergreen on an Entry Chest
Hanging bells connect the empty wall above a chest to the greenery below. Their repeated metal shapes provide a steady rhythm, while one generous cascade of evergreen introduces movement down the side.
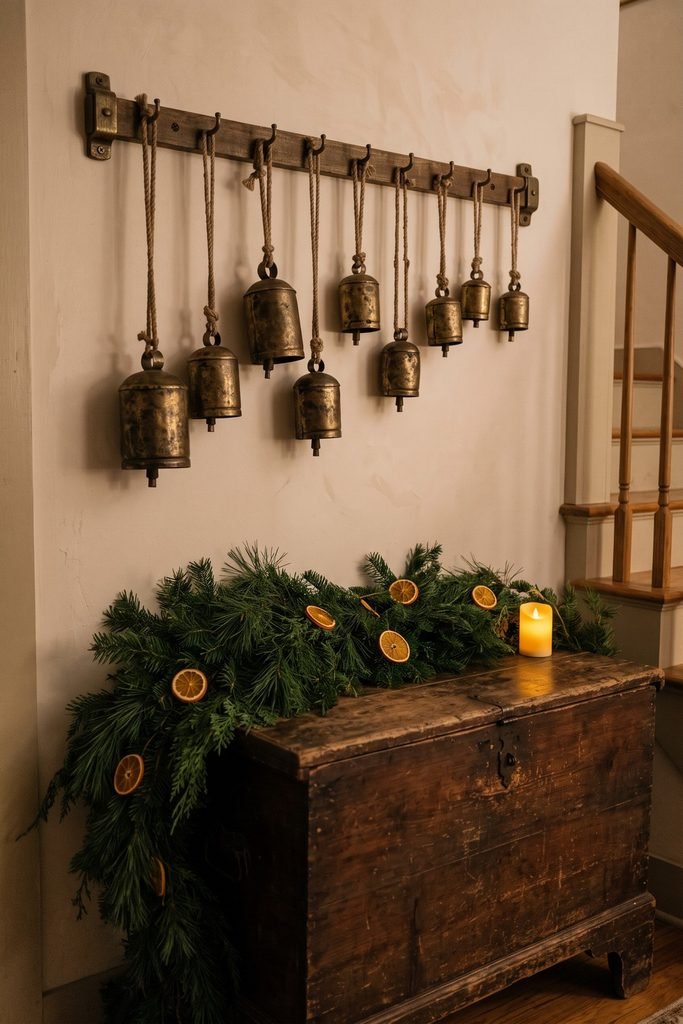
Position the rail in relation to the chest’s width, then vary the bell drops. Aged brass stays visible against a pale wall and catches enough light to lift the darker wood underneath. Dried orange slices can repeat small warm circles within the green.
Let the foliage fall on the side away from the walking route. Keep the other end of the chest simpler, perhaps with one low battery light, so the cascade retains its emphasis. Protect the wood from sap and moisture.
The rail needs fittings suited to the bells and wall; decorative string alone is not a mounting plan. If your entrance needs a different scale or palette, these Christmas entryway ideas offer other ways to arrange the space.
Browse Bells and Evergreen Garlands
Look for aged brass tones and loosely shaped greenery to echo the contrast above and across the entry chest.
20. Frame a Stone Hearth with Vintage Skis and a Small Tree
Long wooden skis draw attention to the height of a stone hearth. Their honey-colored runners stand out against gray masonry, and a checked greenery tie softens the straight lines near the middle.
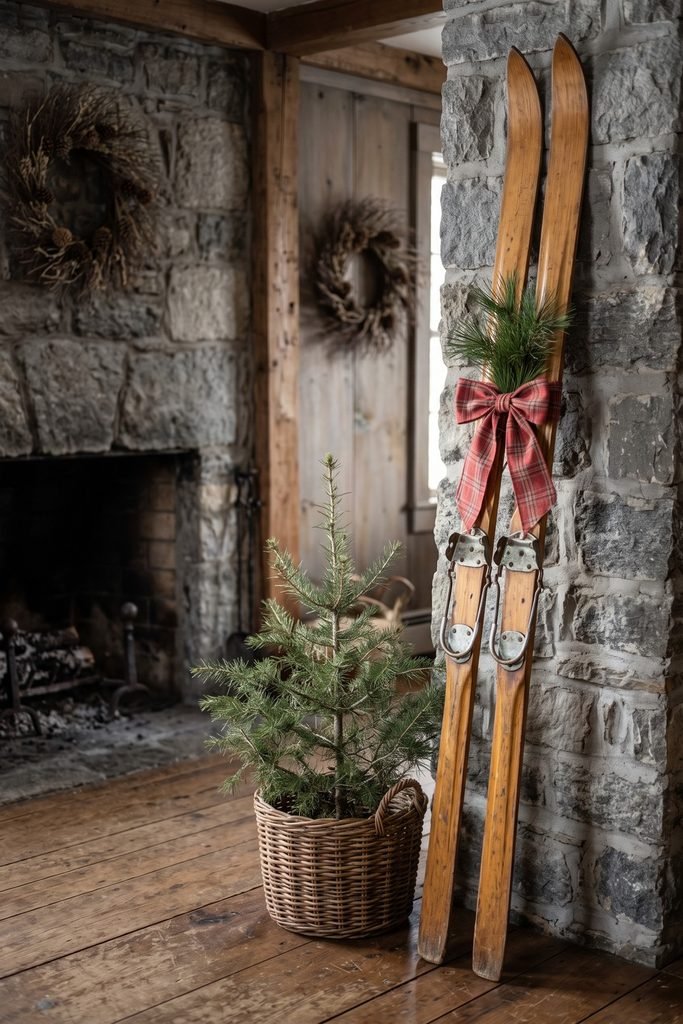
Keep the accompanying tree lower than the ski tips. Its fine branches and low basket connect the tall winter objects to the floor, so the corner has a clear progression of heights. A modest wreath farther along the wall can repeat the greenery without becoming another large focal point.
Secure the skis against tipping, and check the arrangement in relation to any operating fireplace. The CPSC advises clearing greens and other decorations from the fireplace area before lighting a fire. An unlit hearth is an option for retaining this grouping; an active appliance requires its specified clearances.
21. Plant a Small Porch Tree in a Weathered Barrel
A whitewashed barrel makes a small evergreen noticeable against a sheltered porch wall. Dark hoops outline the container, while a broad faded-red plaid bow adds a soft horizontal accent below the branches.
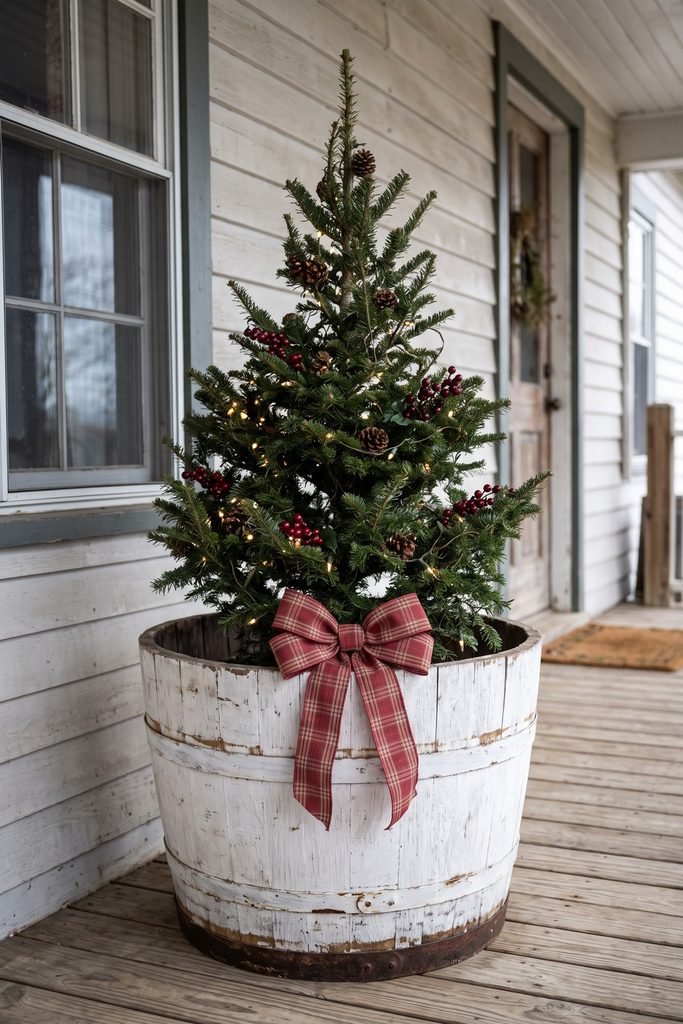
Let the tree retain its natural outline. A few cones and restrained berry clusters are enough to distribute detail through the green. Exposing the barrel’s staves and rim preserves the relationship between a substantial base and a lighter tree above it.
Use a secure inner stand for a cut tree or a suitable inner container for a rooted tree. The outer barrel can remain decorative, with water containment or drainage planned for the specific arrangement. Select lighting intended for the outdoor exposure and keep its connections as directed.
Check the display from the approach to the door, including the space needed to enter. A smaller barrel and tree can repeat the idea where the porch corner is narrow.
22. Shape a Rustic Outdoor Christmas Tree from Split Logs
Alternating pale cut faces and dark bark gives a split-log tree enough pattern to stand out among evergreens. A broad base tapering toward a small star establishes the Christmas outline before any lights or foliage are added.
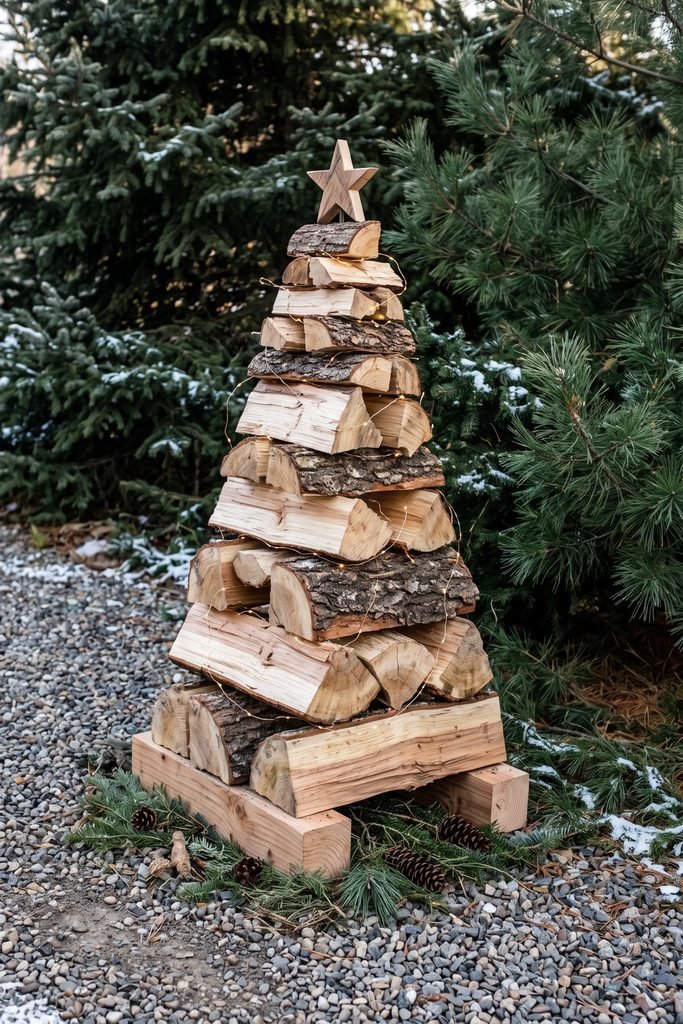
Treat this as a supported arrangement, with its construction worked out for the actual logs and location. A short, stable display is the starting point. Level ground, secure pieces, and visible contact points matter more than creating a tall silhouette for a photograph.
Alternate the direction of the split wood to vary the exposed surfaces, keeping the progression from broad to narrow clear. Low evergreen around the base connects the rough stack to the surrounding landscape. A few cones can continue the bark-brown accents onto the ground.
Use lighting suitable for outdoor conditions if you want an evening outline. Keep wires and the arrangement out of walking routes.
Keep Greenery, Textiles, and Lights Ready for the Season
Fresh-cut greenery needs attention indoors, where heat can dry it quickly. Keep it away from vents and heat sources, maintain water access for a cut tree, and replace material that becomes dry and brittle. Protect books, cloth, and furniture finishes beneath wet containers.
For displays containing paper, fabric, or evergreen, choose suitable flameless lighting. The CPSC recommends flameless candles where possible. Inspect lights, follow their placement instructions, and use the intended indoor or outdoor type. Battery lighting still requires care: the CPSC’s coin-battery guidance emphasizes secure compartments and keeping loose cells inaccessible to children.
Pack only dry pieces, with fragile paper and linen details supported. Remove seasonal greenery from reusable textile arrangements before storing them. For old painted frames or boards, retain the known-safe finish used for the display; creating more wear by scraping unknown paint adds a different preparation task.
Choose One Focal Point and Repeat Its Textures
Choose a display you want to see every day, then repeat a few of its materials elsewhere. A checked bow can reappear on a small tree; a cream crock can echo the pale cloth in a snowman. Those modest connections give primitive Christmas decorating its collected feeling, with room for the pieces you already love and the home you use throughout the season.