




21 DIY Garden Ideas for a Beautiful, Useful Growing Space
A garden becomes easier to use when every project solves a clear problem. A line of containers can define an empty patio edge, a freestanding support can create growing room without drilling into a fence, and a simple path can keep wet soil away from the main walking route.
- Quick Takeaways
- How to Choose the Right DIY Garden Project
- Portable Planters and Compact Growing Projects
- 1. Paint and Group Mismatched Pots
- 2. Build a Portable Crate Herb Garden
- 3. Arrange Grow Bags as a Modular Garden Grid
- 4. Add a Railing or Window-Box Garden
- 5. Make a Rolling Base for Heavy Planters
- Freestanding Supports That Grow Up, Not Out
- 6. Tie a Bamboo Teepee for Climbing Plants
- 7. Build a Freestanding Mesh Trellis Panel
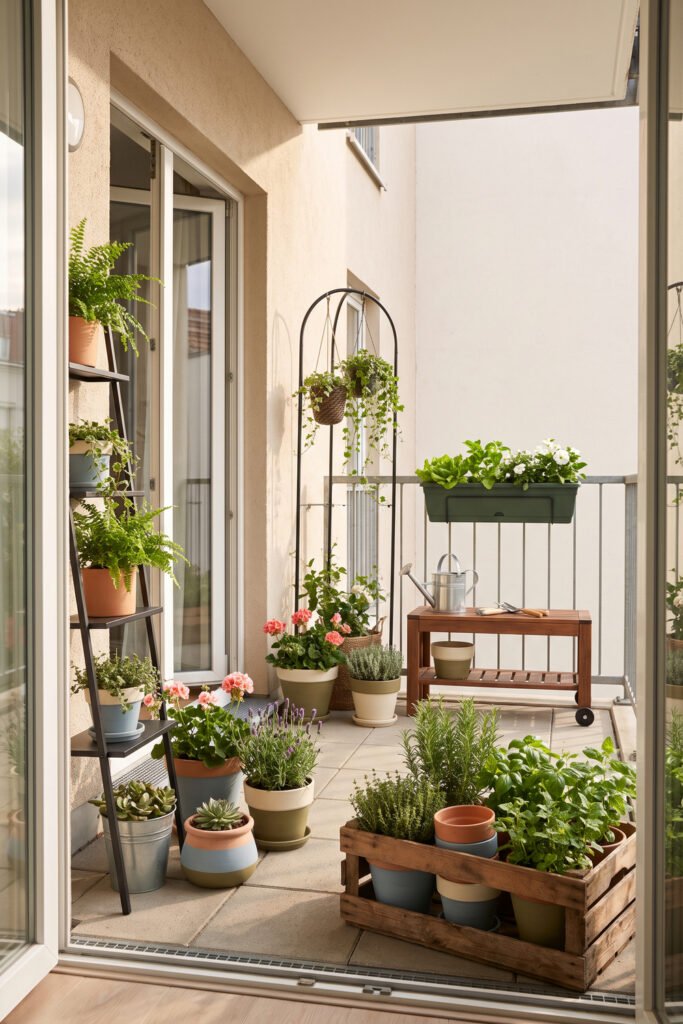
- 8. Turn a Ladder Into a Tiered Plant Stand
- 9. Create a Freestanding Hanging-Planter Frame
- DIY Edges and Paths That Give the Garden Structure
- 10. Edge a Bed With Reclaimed Brick
- 11. Weave a Low Wattle Border
- 12. Lay a Mulch Path With Stepping Stones
- 13. Stencil Plain Pavers as Garden Path Accents
- DIY Garden Work Zones That Keep Tasks Easier
- 14. Convert a Small Console Into a Potting Station
- 15. Make a Freestanding Tool Organizer
- 16. Build a Compact Hose Guide and Watering Station
- 17. Set Up a Lidded Two-Bin Compost Corner
- Functional Garden Details Worth Making Yourself
- 18. Make Durable Plant Markers
- 19. Add a Removable Hoop-and-Mesh Plant Cover
- 20. Build a Small Bug Hotel From Dry Natural Materials
- 21. Assemble a Shallow Container Water Feature
- Before You Start: A Five-Point Garden Project Check
- Frequently Asked Questions
- What are the easiest DIY garden ideas for beginners?
- How can I create a DIY garden on a small budget?
- Which DIY garden projects work in a small space?
- What can renters change in an outdoor garden?
- Do outdoor garden containers need drainage holes?
- Can reclaimed pallets or treated wood be used for edible garden projects?
- Choose One Project That Solves a Real Garden Problem
These DIY garden ideas are designed for small yards, rental gardens, balconies, patios, courtyards, and larger outdoor spaces that need more structure. The projects range from low-tool updates to more involved weekend builds, but none requires a complete landscape redesign.
Use the list to identify what your garden lacks most: planting capacity, vertical support, clearer boundaries, a practical work zone, or one useful finishing detail.
Quick Takeaways
- Start with the problem you notice every day, such as scattered tools, nowhere to grow herbs, or an undefined walking route.
- Choose portable containers and freestanding supports when permanent installation is not possible.
- Repeat one material or finish across several small projects to make the garden look organized.
- Check drainage before converting any box, tub, or found object into a planter.
- Treat reclaimed wood cautiously when you cannot identify its previous use or preservative treatment.
- Complete one high-use project before adding several decorative crafts.
How to Choose the Right DIY Garden Project
The most attractive project is not always the most useful one. A large raised structure may look impressive in a photograph, but a portable herb garden could work better on a narrow patio or in a rental where permanent changes are restricted.
Use this quick comparison to narrow the list.
| Garden Need | Good Starting Project | Tools and Effort | Portability |
|---|---|---|---|
| More planting room | Grow-bag grid or crate herb garden | Low to moderate | High |
| More vertical space | Bamboo teepee or ladder plant stand | Low to moderate | High |
| Clearer garden beds | Brick or woven branch edging | Moderate | Low |
| Better circulation | Mulch path with stepping stones | Moderate | Low to medium |
| Organized tools | Freestanding tool panel | Moderate | High |
| Stronger focal point | Hanging-planter frame or water basin | Moderate | Medium |
Before buying materials, look at the garden during the hours when you normally use it. Note where water collects, which surfaces must remain clear, where plants receive suitable light, and how you move between the door, hose, beds, and seating.
Renters should also check the lease or ask the property owner before attaching anything to a wall, fence, railing, or other permanent surface. Freestanding canes, obelisks, shelves, and supports can provide similar growing space without fixed installation.
Portable Planters and Compact Growing Projects
Containers are useful when the soil is unavailable, unsuitable, or simply too far from the door for everyday care. They also let you reorganize the garden as plants grow or seasonal conditions change.
Any container used for planting needs a reliable route for excess water to escape. Use an appropriate potting medium and avoid allowing the container to remain in collected water.
1. Paint and Group Mismatched Pots
Turn a scattered collection of terracotta, resin, and plain nursery pots into one intentional planting zone by repeating a limited finish.
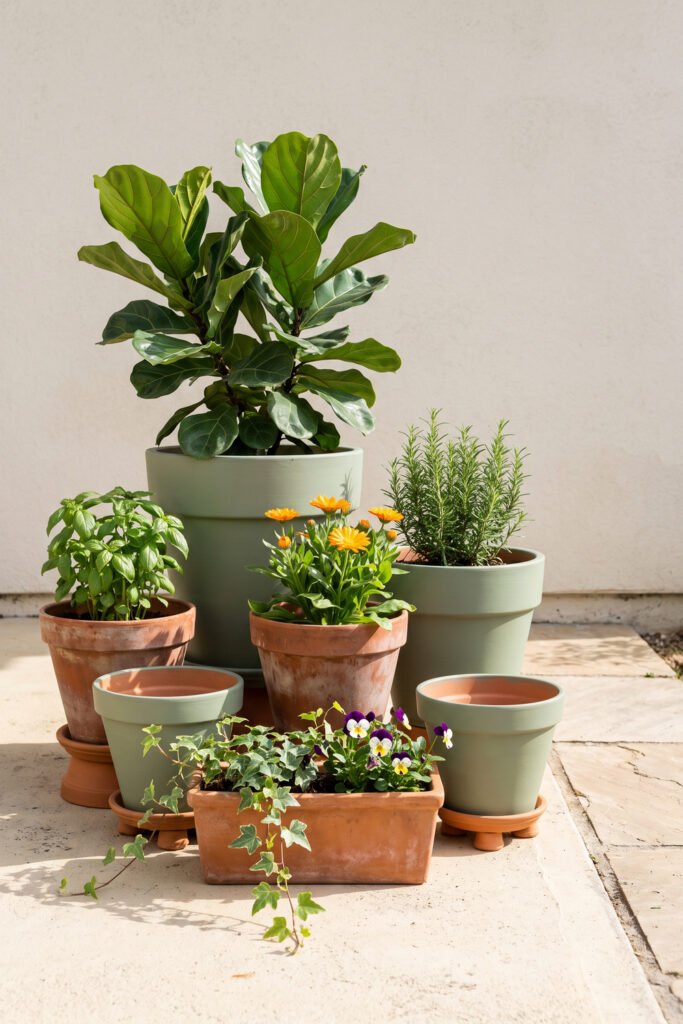
Choose one or two colors that suit the surrounding materials. Chalky sage can soften a concrete patio, while warm cream works well beside brick or weathered wood. Leave a few terracotta pots unpainted so the grouping does not look overly matched.
Arrange the pots in a tight cluster rather than spacing them evenly along the wall. Place the tallest container toward the back, use medium pots to fill the center, and bring one low bowl or trailing plant toward the front. This low-to-high arrangement creates a fuller garden composition without consuming much floor space.
Keep drainage openings clear, and use pot feet or suitable saucers where the surface underneath needs protection.
Paint and Prep
- Outdoor Acrylic Paint for Planters: coordinates mismatched pots with one repeated finish.
- Foam Paint Brush Set: applies paint across small pots and detailed edges.
- Terracotta Pot Feet: lifts containers above the patio surface.
2. Build a Portable Crate Herb Garden
A sturdy wooden crate can hold a collection of individual herb pots while making them easier to move as one unit.
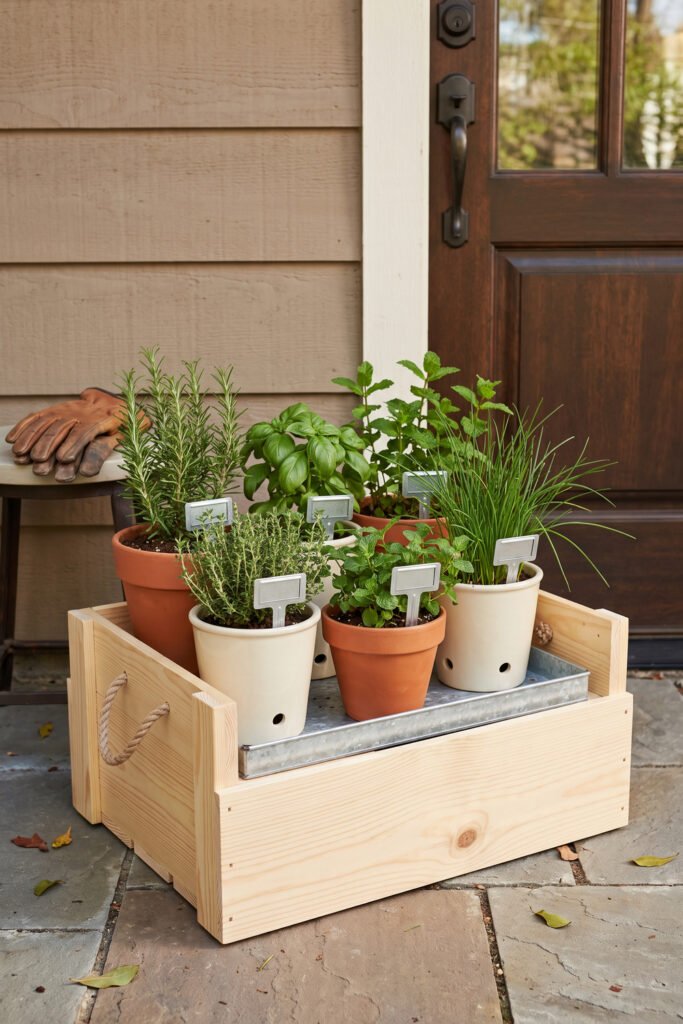
Rather than filling an unknown crate directly with soil, place properly drained pots inside it or use a liner designed for the planting method. Add short handles or set the crate on a stable outdoor-rated base if it needs to move frequently.
Keep the styling simple: one wood finish, matching plant markers, and a restrained group of herbs selected for the available light. A narrow crate can sit against a patio edge, beside an outdoor door, or beneath a freestanding plant shelf.
Do not assume reclaimed lumber or a discarded pallet is suitable for growing food. Wood preservatives vary, and older or unidentified treated wood may require additional caution.
Build the Herb Crate
- Wooden Crate With Handles: creates a contained and movable herb-growing zone.
- Nursery Pots With Drainage: keep herbs individually potted inside the crate.
- Plant Pot Liner Trays: help contain loose soil during rearranging.
3. Arrange Grow Bags as a Modular Garden Grid
Fabric grow bags can turn an unused paved corner into a flexible growing area without building permanent beds.
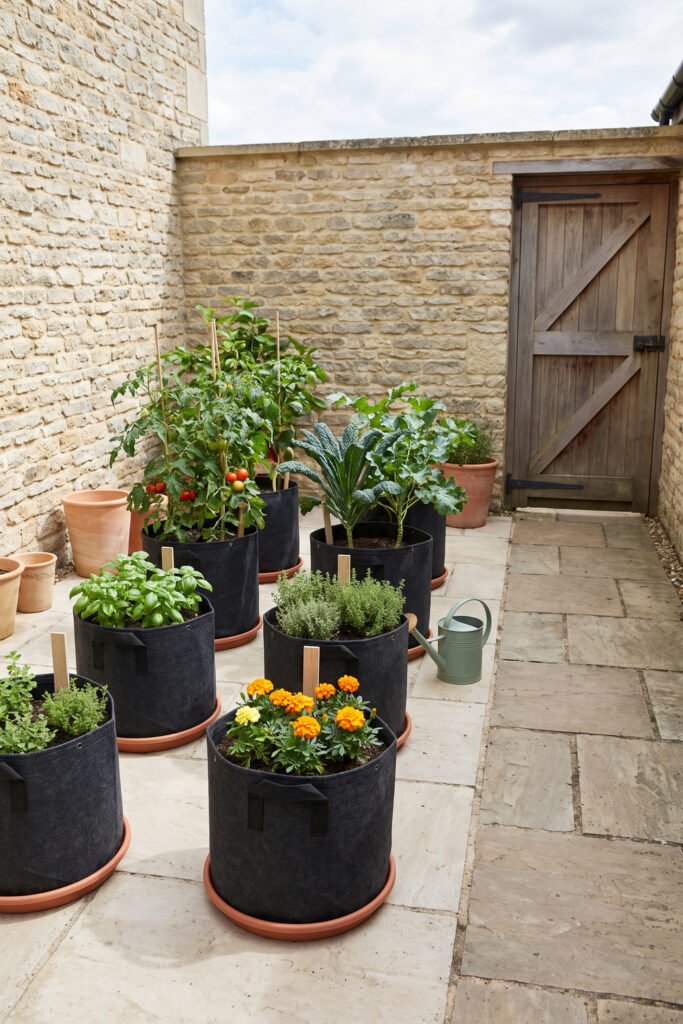
The key is arrangement. Instead of placing bags wherever they fit, create a small grid or staggered block with even gaps between containers. Repeat the same bag style and add matching labels so the setup reads as one planned garden rather than temporary storage.
Place taller plants where they will not block light from shorter ones. Leave enough space to reach each bag for watering and harvesting, and keep the main walking route open.
Because containers can dry at different rates depending on their material, size, exposure, and plants, check the growing medium rather than relying on one universal watering schedule.
Set Up the Grid
- Fabric Grow Bags With Handles: form the repeated containers within the modular layout.
- Large Plant Saucer Trays: help manage drainage on suitable finished surfaces.
- Weatherproof Garden Plant Labels: keep crops identifiable across a repeated grid.
4. Add a Railing or Window-Box Garden
A railing planter brings flowers, herbs, or compact foliage up to eye level while preserving valuable floor space.
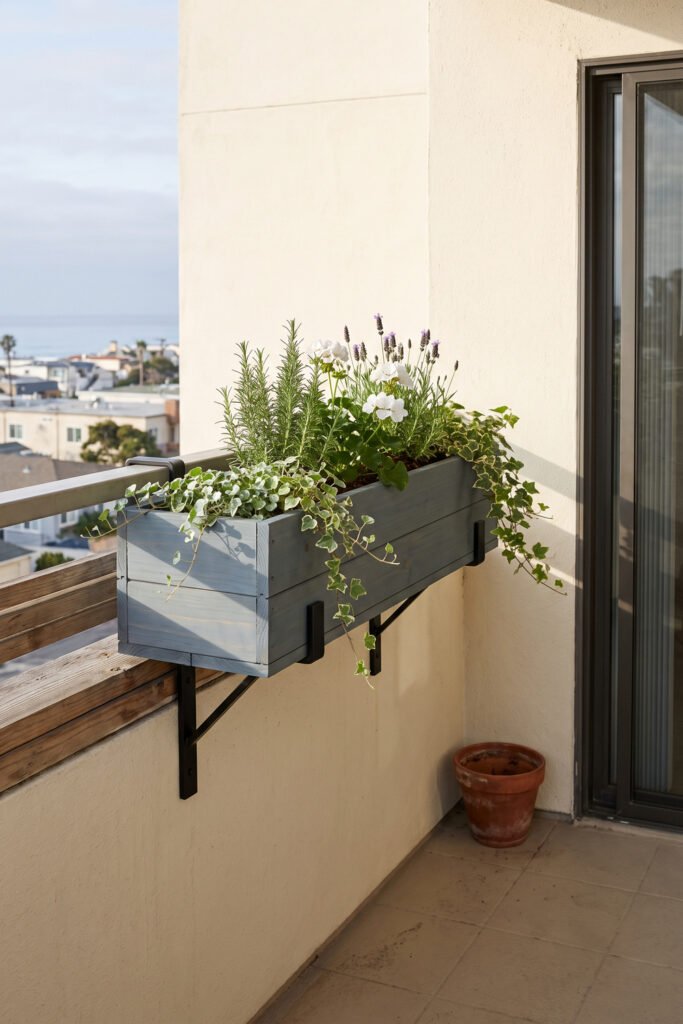
Use one long box for a clean horizontal line or repeat two smaller boxes at equal intervals. Combine upright plants with softer trailing forms so the arrangement has height at the center and movement along the edge.
Before installation, confirm that the planter and bracket system are compatible with the railing. Consider the combined weight of the container, wet growing medium, plants, and water rather than judging the empty box alone. Wind exposure and drainage also matter, especially above neighboring balconies or shared walkways.
In a rental, obtain permission when required and follow the property’s rules rather than assuming a removable bracket is automatically acceptable.
Support the Rail Planter
- Adjustable Railing Planter Box: adds planting space without occupying the floor.
- Railing Planter Brackets: support a compatible box on the railing.
- Coco Coir Window-Box Liners: line compatible baskets while preserving a natural finish.
5. Make a Rolling Base for Heavy Planters
Large pots can be difficult to shift when you need to clean the patio, protect a plant from severe weather, or adjust its light exposure. A low rolling base makes the container more adaptable.
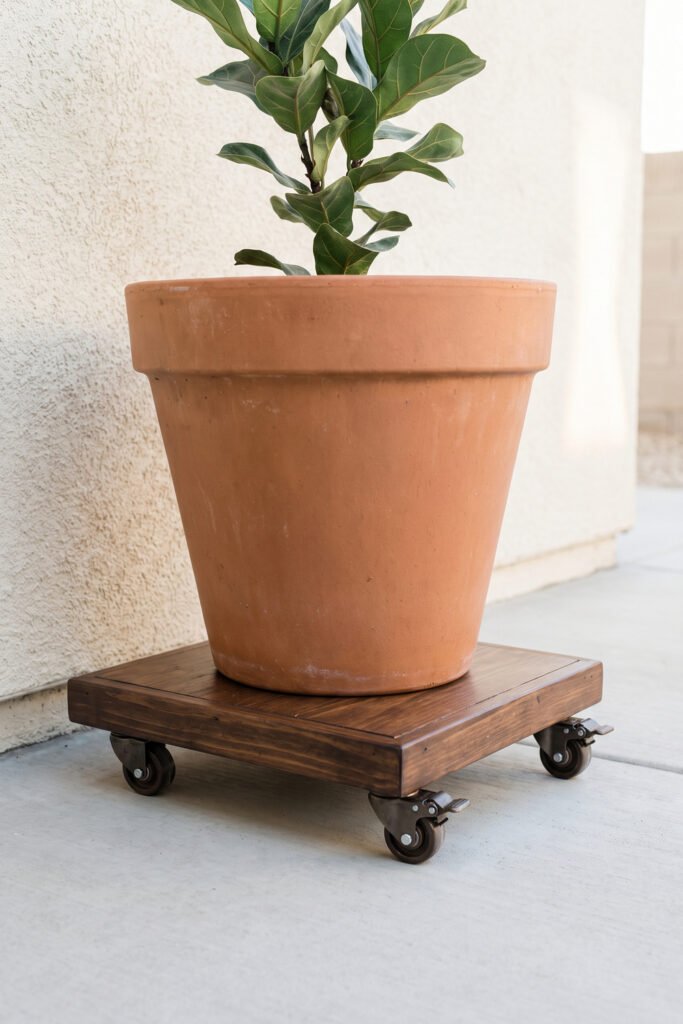
Build or buy a platform that sits inside the pot’s footprint so the wheels remain visually quiet. A simple square of outdoor-suitable wood works beneath a straight-sided planter, while a circular base suits a wide tapered pot.
Use locking, outdoor-rated casters with verified load ratings, and check that the finished platform remains stable on the actual surface. Uneven pavers, sloped balconies, and loose gravel require more caution than smooth, level concrete.
Avoid making the base noticeably wider than the pot. A concealed platform keeps the planter—not the hardware—as the focal point.
Make It Mobile
- Locking-Wheel Plant Caddy: provides a ready-made movable base for a planter.
- Outdoor Locking Caster Wheels: add controlled movement to a DIY platform.
- Clear Exterior Wood Sealer: finishes an exposed wooden planter base.
Freestanding Supports That Grow Up, Not Out
Vertical projects help a compact garden use height instead of spreading every plant across the floor. They also add a strong silhouette above the low line created by pots and beds.
Keep these structures proportional to the plants they will support. A lightweight annual vine may suit a narrow cane frame, while heavier, vigorous crops need a support selected for their mature weight and growth habit.
6. Tie a Bamboo Teepee for Climbing Plants
A bamboo teepee creates a clear vertical focal point with only a small footprint.
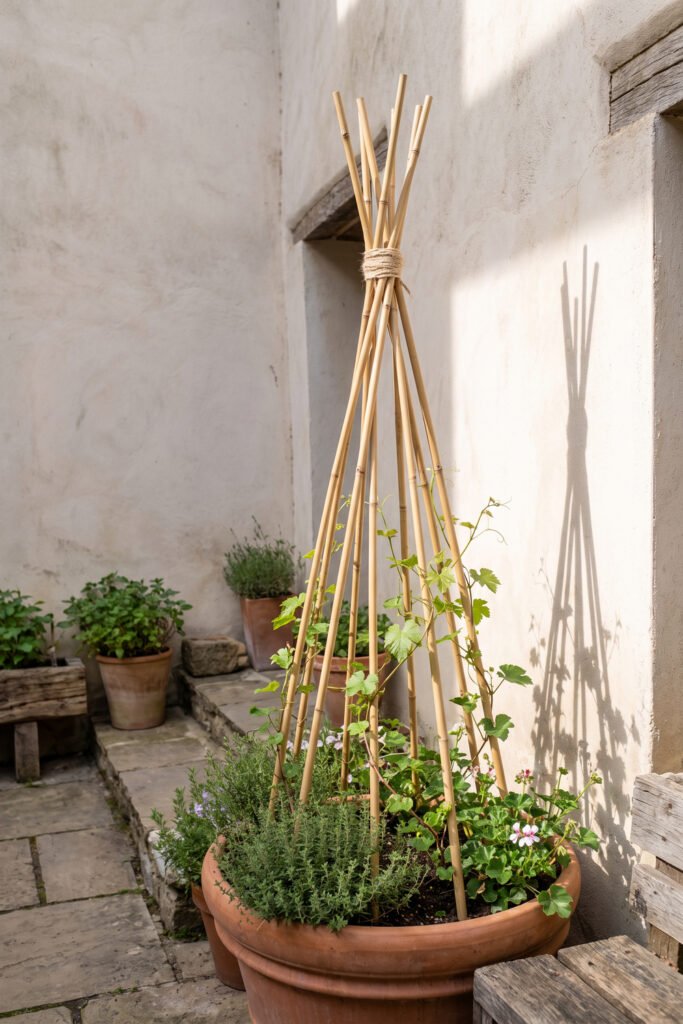
Gather several straight canes, angle them inward, and secure them near the top with garden twine. Place the structure in a large container or suitable planting area, then guide young climbers toward the base.
The cone shape looks most intentional when it stands alone rather than competing with several other tall structures. Position it behind lower herbs or flowers so the eye moves from the planting at ground level to the narrow peak above.
The frame must be anchored for the location and chosen plant. A loose structure can shift under foliage, rain, or wind, so do not treat a decorative tie at the top as the only form of stability.
Tie the Support
- Bamboo Garden Stakes: create the teepee’s narrow vertical framework.
- Natural Jute Garden Twine: binds the canes near the upper crossing point.
- Soft Reusable Plant Ties: guide young stems toward the support.
7. Build a Freestanding Mesh Trellis Panel
A flat mesh panel provides vertical growing space without attaching wires or hooks to a landlord’s fence.
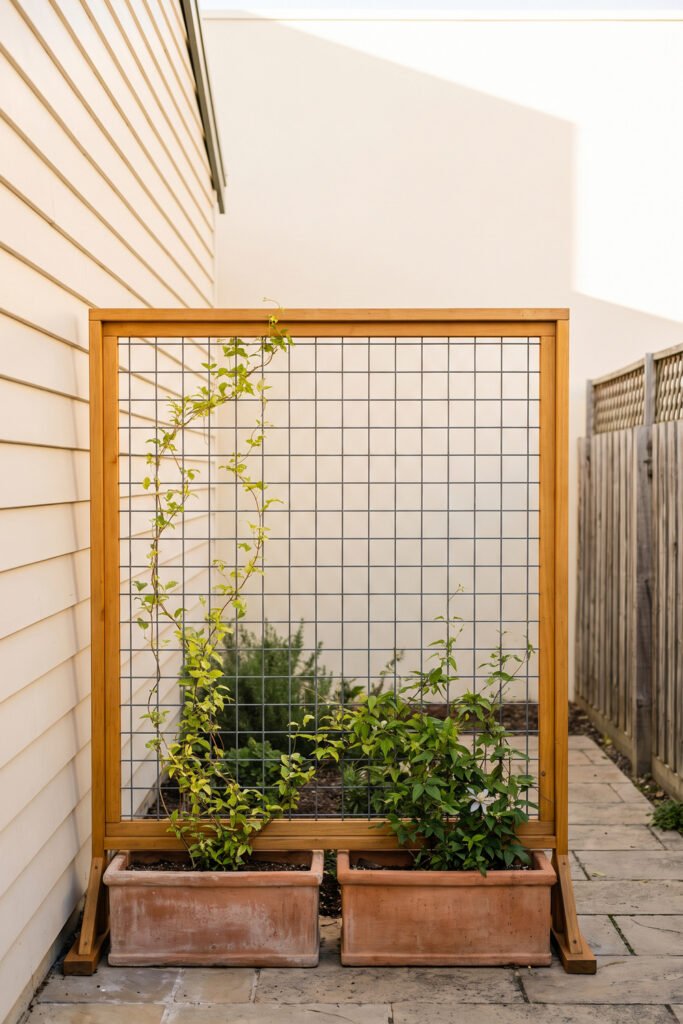
Create a simple rectangular frame with mesh secured inside it, then stabilize the frame with a weighted base or a pair of substantial planters. The finished panel can sit parallel to a wall while leaving a small gap for air movement and plant access.
Paint the frame to match nearby pots, or leave suitable wood in a natural finish for a softer garden backdrop. Dark mesh tends to visually recede once foliage develops, while a lighter frame becomes part of the garden’s design.
Keep this project at concept level until you have selected the crop, location, base, and mesh. The plant’s eventual weight should guide the support—not the appearance of the empty frame.
Frame the Trellis
- Freestanding Garden Trellis Panel: offers a ready-made alternative to a wall attachment.
- Galvanized Welded Wire Mesh: forms the climbing surface inside a DIY frame.
- Exterior Wood Screws: join suitable frame components for outdoor use.
8. Turn a Ladder Into a Tiered Plant Stand
A narrow ladder-style stand can hold several small pots in the floor area normally used by one large planter.
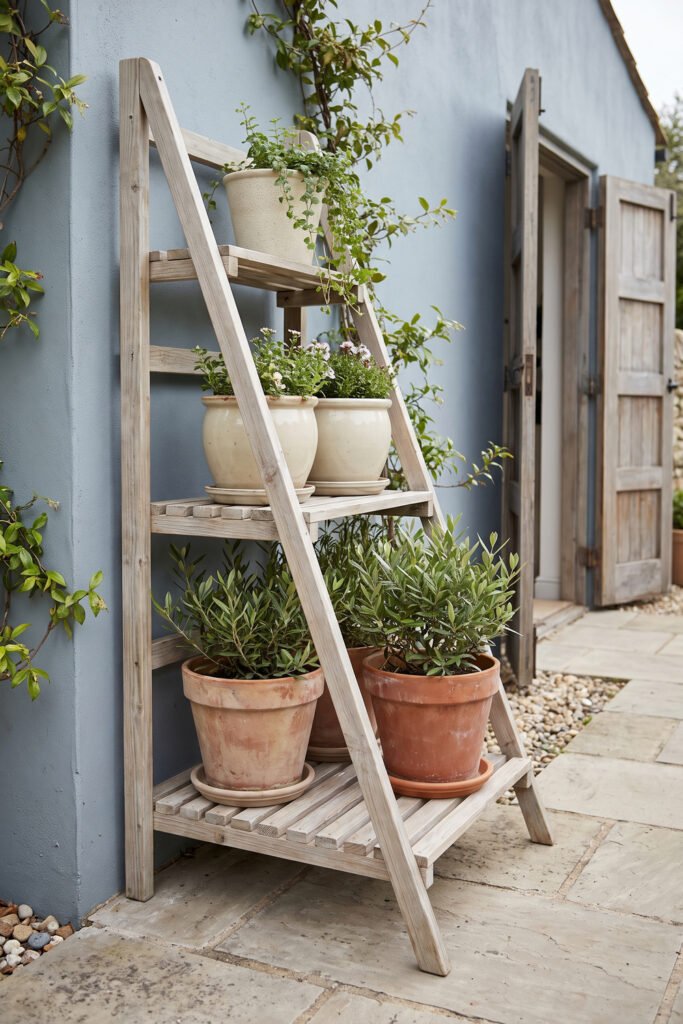
Choose a stable structure designed or properly prepared for outdoor use. Place larger pots on the lower levels and lighter containers toward the top. This creates a grounded base and reduces the top-heavy look that can make a narrow display feel precarious.
Repeat one container material across the shelves, such as terracotta or matte metal, while varying the plant shapes. A trailing plant can soften the upper edge, but avoid allowing long stems to obstruct steps or doorways.
Use saucers or trays suited to the surface below, and leave enough room to lift each pot out for watering, pruning, or seasonal storage.
Build the Vertical Display
- Outdoor Ladder Plant Stand: creates several planting levels in a narrow footprint.
- Large Outdoor Plant Saucers: help protect the shelves beneath individual pots.
- Rubber Leveling Feet: help steady a compatible stand on firm surfaces.
9. Create a Freestanding Hanging-Planter Frame
A freestanding frame offers the layered look of hanging baskets without drilling into a ceiling, beam, or exterior wall.
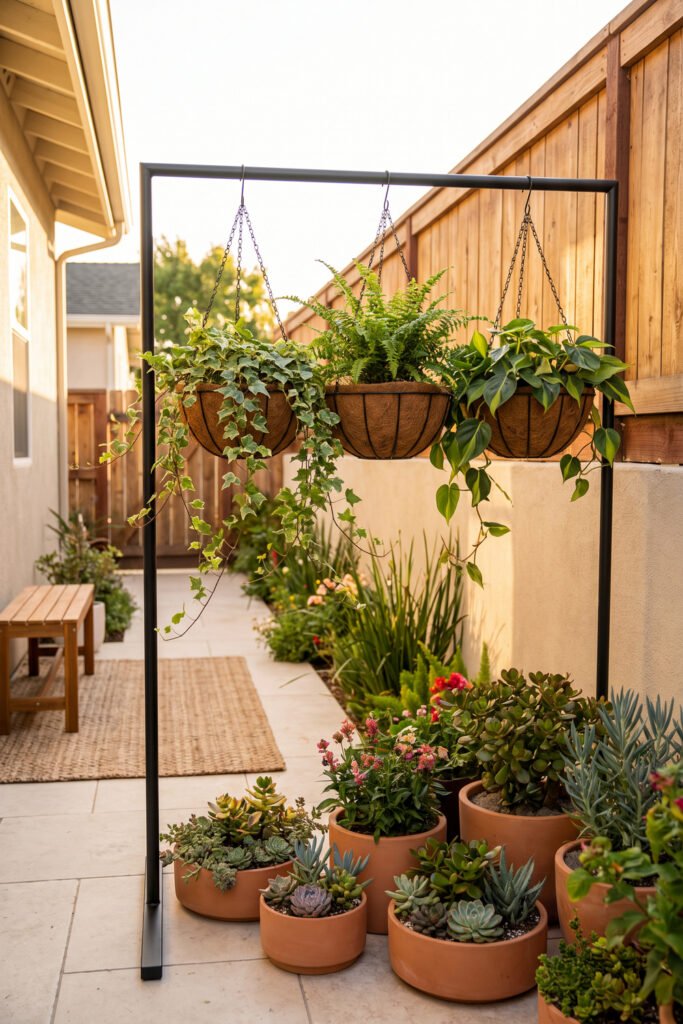
Keep the silhouette simple: two vertical supports, one top rail, and a stable base. Hang two or three containers rather than filling the entire bar. The open space between baskets makes each plant easier to see and prevents the structure from becoming a dense wall of foliage.
Pair trailing plants with a low group of pots at the base to create foreground, middle, and upper layers. Repeating the basket material—such as black metal, coir, or woven fiber—helps unite the composition.
Verify the frame, hooks, base, total wet weight, and wind exposure before use. Place it where movement from the baskets will not interfere with doors or circulation.
Hang It Securely
- Freestanding Hanging Plant Stand: adds overhead planting without drilling into a wall.
- Stainless Steel Plant S-Hooks: connect compatible baskets to the upper rail.
- Coir Hanging Basket Set: repeats one material across the suspended arrangement.
DIY Edges and Paths That Give the Garden Structure
A garden often feels unfinished because the eye cannot tell where planting ends and circulation begins. Edging creates a clear boundary, while a path guides movement through the space.
These projects are especially useful when plants, mulch, gravel, and lawn appear to merge into one irregular surface.
10. Edge a Bed With Reclaimed Brick
A single repeated line of brick can make a loosely planted bed look deliberate.
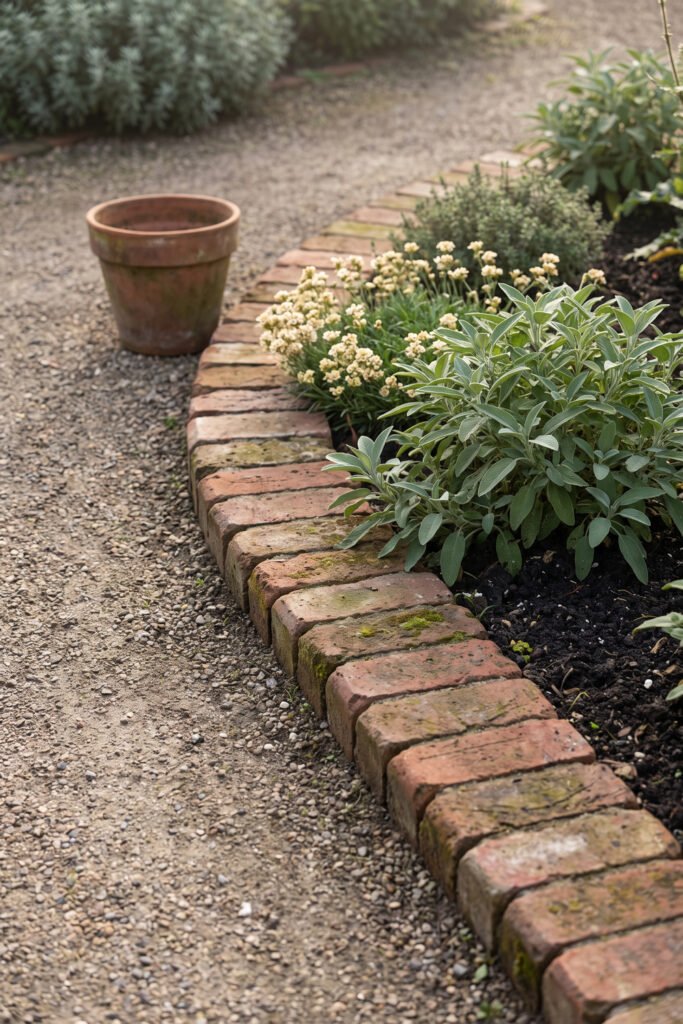
Choose bricks with compatible dimensions and arrange them in one consistent orientation. A flat row creates a quiet edge, while bricks placed on end create a stronger vertical line. The best choice depends on the surrounding surface and how much visual emphasis the boundary needs.
Warm, weathered brick works particularly well with terracotta pots, dark soil, herbs, and cottage-style planting. Leave the plants slightly behind the edge so foliage can soften it without hiding the entire line.
Prepare the base carefully enough to avoid obvious rocking or raised corners. Uneven bricks can create maintenance problems or a trip point beside a walking route.
Set the Brick Edge
- Mason Line and Stakes: help establish a consistent edging line.
- Rubber Landscaping Mallet: adjusts bricks without a metal striking face.
- Garden Hand Tamper: compacts a small prepared edging base.
11. Weave a Low Wattle Border
Flexible branches woven between short upright stakes create a soft, handmade boundary around herbs, flowers, or a compact garden bed.
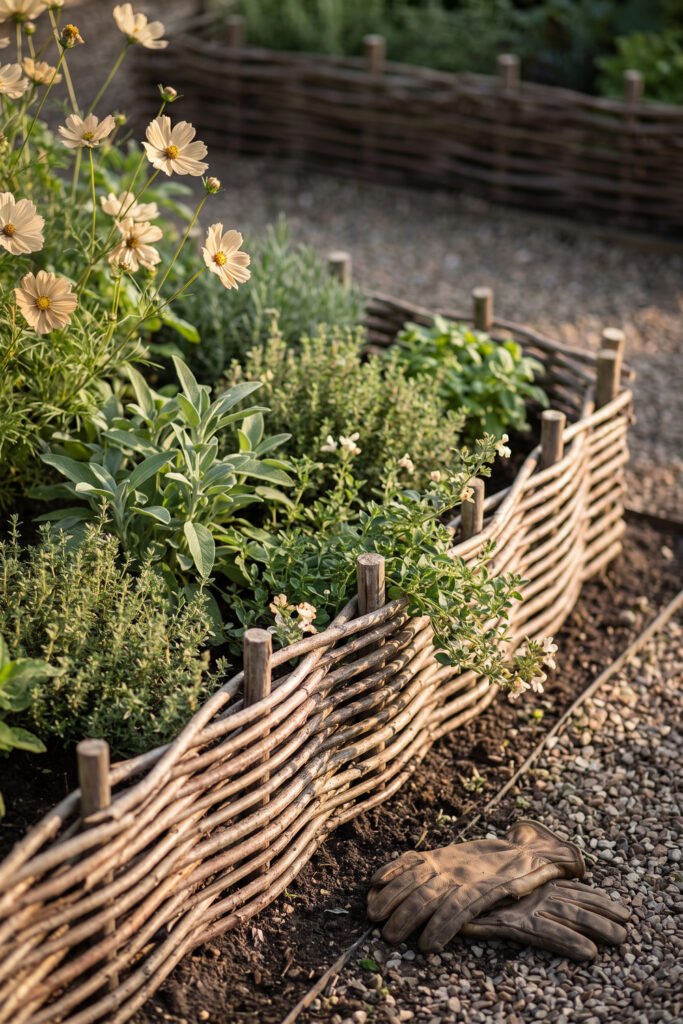
Use the technique where a low edge is sufficient. The woven pattern adds texture without creating the visual weight of a tall fence, and its irregular natural finish works well beside gravel, aged pots, and informal planting.
Keep the height consistent and finish the ends neatly. A border that changes height unexpectedly or leaves long branches projecting into the path can look unfinished.
Natural materials weather differently depending on species, thickness, climate, and soil contact. Treat the border as a garden feature that may need periodic repair rather than promising permanent durability.
Weave the Border
- Wooden Garden Stakes: create the upright structure for woven branches.
- Bypass Pruning Shears: trim flexible branches to manageable lengths.
- Leather Garden Work Gloves: protect hands while handling rough branches.
12. Lay a Mulch Path With Stepping Stones
A mulch path with repeated stepping stones creates a usable route without the visual heaviness of a fully paved walkway.
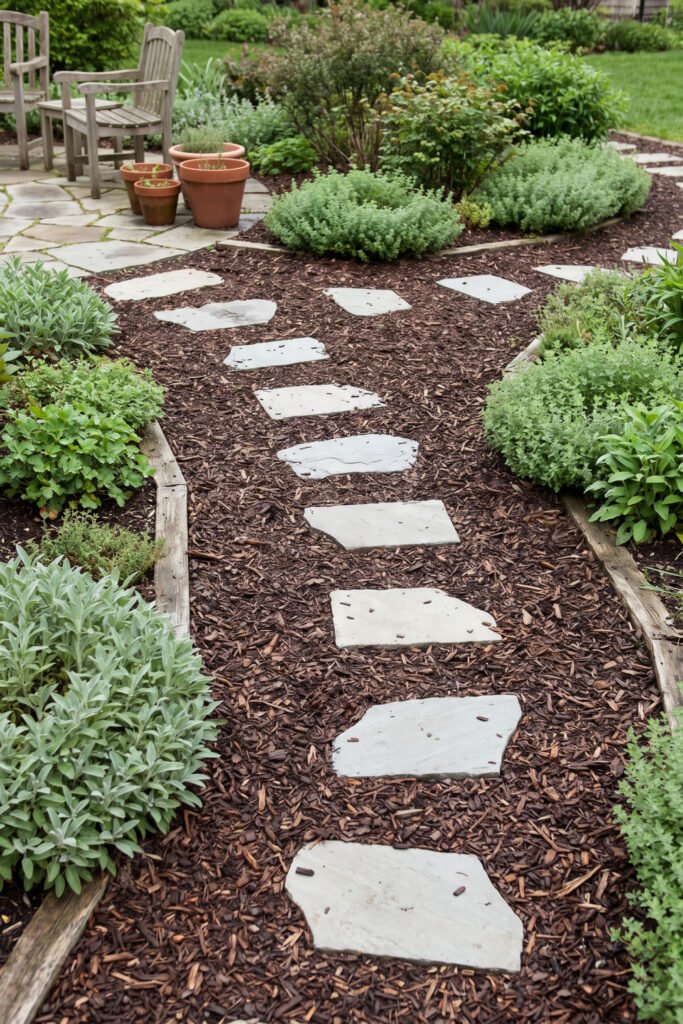
Begin with the actual walking line rather than forcing a decorative curve that no one will follow. Position the stones where your natural steps fall, then use mulch or bark to define the surrounding path.
Repeat one paver shape for visual rhythm. Irregular stone can suit a relaxed garden, while square concrete pavers give a compact courtyard a cleaner structure.
The surface beneath the path, local drainage, weeds, and accessibility needs all affect the preparation required. Keep stones stable and level enough for the intended users, and avoid placing a loose path where wheeled access is necessary.
Build the Path
- Outdoor Garden Stepping Stones: establish the repeated walking points along the route.
- Natural Cedar Mulch: defines the softer surface surrounding the stones.
- Landscaping Bow Rake: spreads and levels loose path material.
13. Stencil Plain Pavers as Garden Path Accents
A few painted pavers can bring pattern into the garden without turning the path into a patchwork of competing designs.
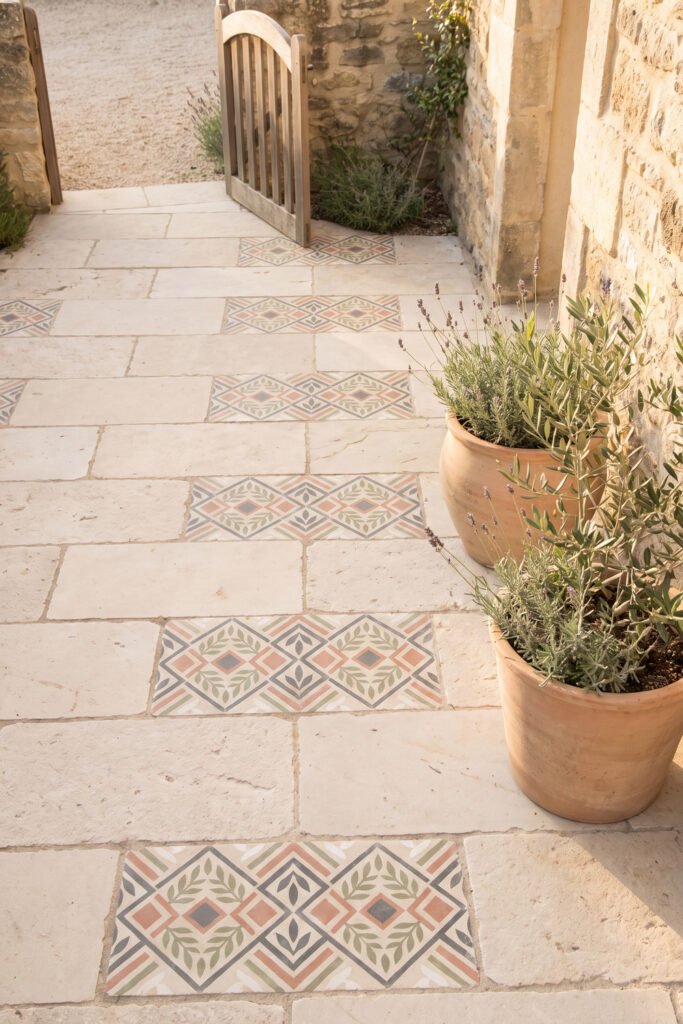
Choose one restrained motif, such as a simple geometric border or small botanical form. Repeat it on every third or fourth paver rather than decorating each stone. The unpainted sections give the pattern breathing room.
Use colors already present in the garden—terracotta, olive, cream, muted blue, or charcoal—so the path connects to nearby pots and furniture.
Select a coating intended for the paver material and exterior conditions, and follow its preparation and curing instructions. Avoid painting surfaces in a way that could create an unsuitable or slippery walking finish.
Stencil and Finish
- Reusable Patio Stencil: repeats one controlled motif across selected pavers.
- Exterior Masonry Paint: adds color to a compatible prepared surface.
- Stencil Brush Set: applies paint within smaller patterned areas.
DIY Garden Work Zones That Keep Tasks Easier
Garden tools, soil, watering cans, and empty pots create visual clutter when they do not have a defined home. A compact work zone keeps frequently used items together and makes routine care less frustrating.
Place these active supplies near the point of use. Bulky seasonal items and backup materials can remain in a more passive storage area.
14. Convert a Small Console Into a Potting Station
A narrow console or utility table can become a compact place for repotting, mixing soil, labeling plants, and storing everyday supplies.
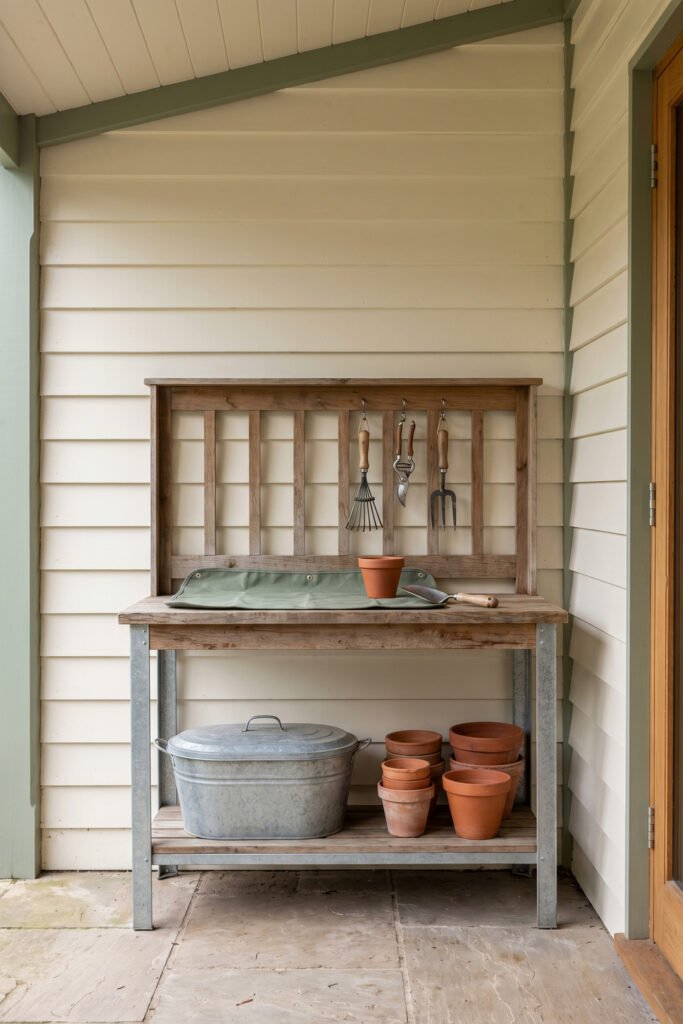
Use the top as the clear working surface. Store potting mix in a lidded tub below, add one shelf for empty pots, and hang a small number of hand tools from the side or a freestanding back panel.
A shallow galvanized tray or washable potting mat can help contain loose material during small jobs. Leave part of the surface empty rather than covering it with decorative pots; the station must still function as a workspace.
Choose a table suited to its exposure or keep it under cover. Indoor furniture placed outdoors without preparation may swell, rust, fade, or become unstable.
Create the Work Zone
- Narrow Outdoor Potting Bench: provides a compact planting and storage surface.
- Silicone Potting Mat: contains loose soil during small planting tasks.
- Galvanized Storage Tub With Lid: holds suitable supplies beneath the worktop.
15. Make a Freestanding Tool Organizer
A freestanding slatted or peg-style panel stores hand tools vertically without fastening a rack to the exterior wall.
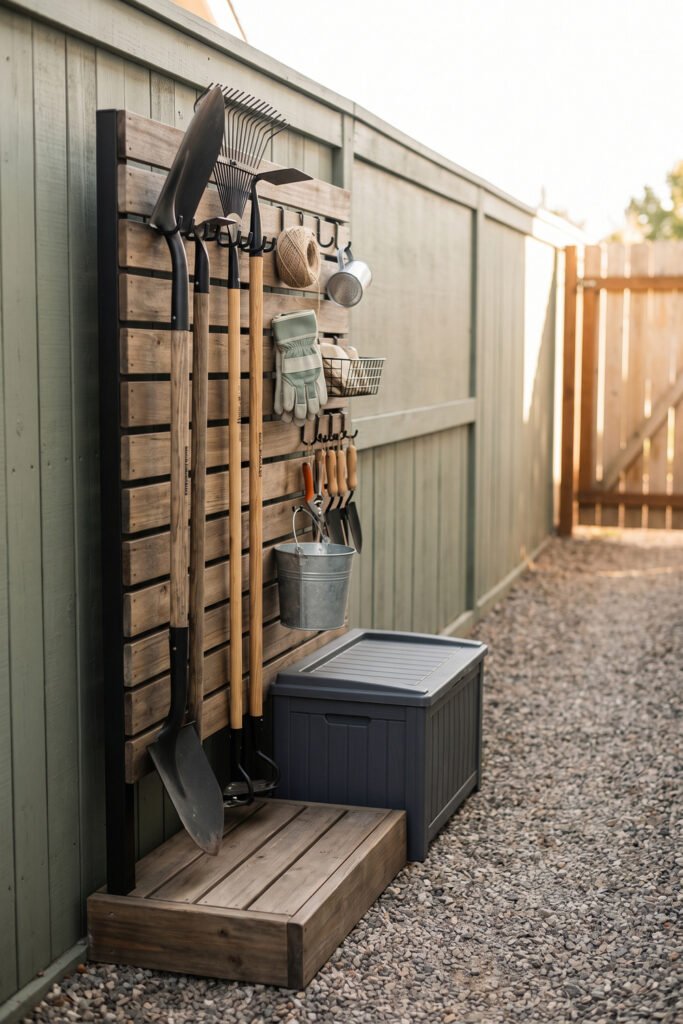
Attach the panel to a stable base or integrate it with a narrow outdoor cabinet. Use hooks for trowels and pruners, a cup or rail for labels and twine, and a lower section for gloves or a small watering can.
Group tools by task rather than filling every available hook. Frequently used items should remain within easy reach, while sharp or heavy tools need placement that does not create a hazard for children, pets, or people moving through the area.
Choose hardware appropriate for outdoor exposure, and keep the organizer out of the main path. A slim profile only saves space when doors, gates, and walkways still open freely.
Organize the Tools
- Freestanding Garden Tool Organizer: consolidates long-handled tools without wall installation.
- Pegboard Hook Assortment: holds hand tools on a compatible panel.
- Lidded Outdoor Storage Bins: contain gloves, labels, and smaller accessories.
16. Build a Compact Hose Guide and Watering Station
A hose, nozzle, watering can, and plant food can quickly spread across a small outdoor area. Combining them in one watering zone keeps the equipment visible but controlled.
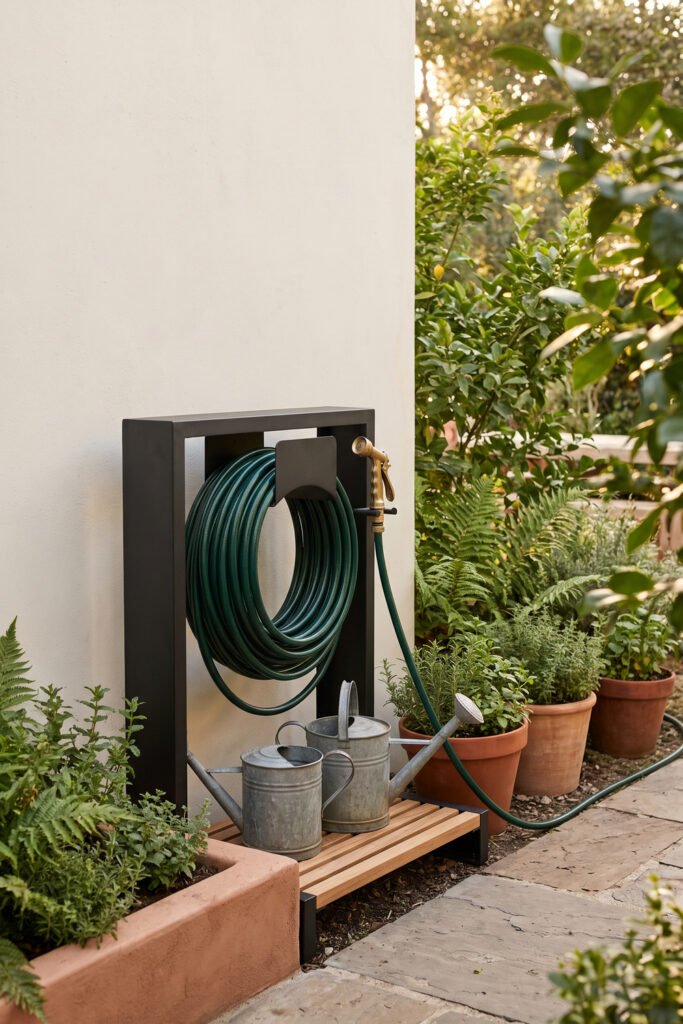
Start with a freestanding hose reel or suitable guide rather than attaching hardware without permission. Add one hook for the nozzle, a low shelf for watering cans, and a closed container for small accessories.
Repeat the finish used elsewhere in the garden. Matte black hardware can connect with a metal trellis, while galvanized pieces suit a potting station with metal tubs.
Keep the hose path away from narrow steps and doorways. The best watering station shortens the route to the plants without placing a loop of hose across normal circulation.
Tidy the Watering Zone
- Freestanding Garden Hose Reel: contains the hose without fixed wall hardware.
- Metal Garden Watering Can: keeps hand-watering equipment within the same zone.
- Garden Hose Nozzle Holder: gives the nozzle a defined storage point.
17. Set Up a Lidded Two-Bin Compost Corner
Two matching lidded bins can create a more orderly composting zone in a garden where an open pile would be impractical.
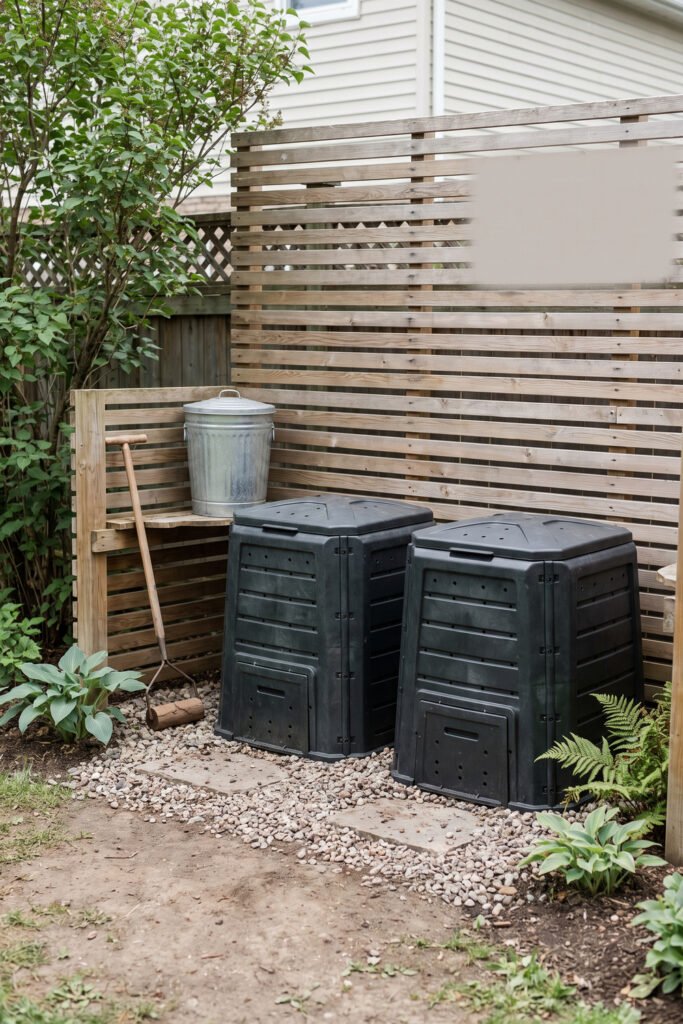
Use one container for current additions and the other for material at a later stage, following a composting method appropriate to the bin and local conditions. Place the pair near the garden but away from the main seating or entrance.
Composting is an oxygen-dependent decomposition process, so the system must be designed and managed for airflow rather than treated as sealed waste storage. Meat, bones, grease, dairy products, pet feces, and diseased or insect-infested plant material are among the items University of Minnesota Extension advises keeping out of a home garden compost pile.
Check municipal, building, and property rules before adding a compost system to a rental or shared outdoor area.
Support the Compost System
- Lidded Outdoor Compost Bin: contains material within a defined garden zone.
- Manual Compost Aerator: helps turn material inside a compatible bin.
- Countertop Compost Scrap Caddy: collects suitable kitchen scraps before outdoor transfer.
Functional Garden Details Worth Making Yourself
Small projects deserve space in the garden when they perform a clear job. Labels improve identification, covers protect selected plants, habitat features introduce texture, and a maintained water basin adds reflection and movement.
The aim is not to fill every bed with crafts. Choose one detail that supports how the garden is planted or used.
18. Make Durable Plant Markers
Consistent plant markers can make a collection of herbs, seedlings, or vegetables look more organized while preventing identification mistakes.
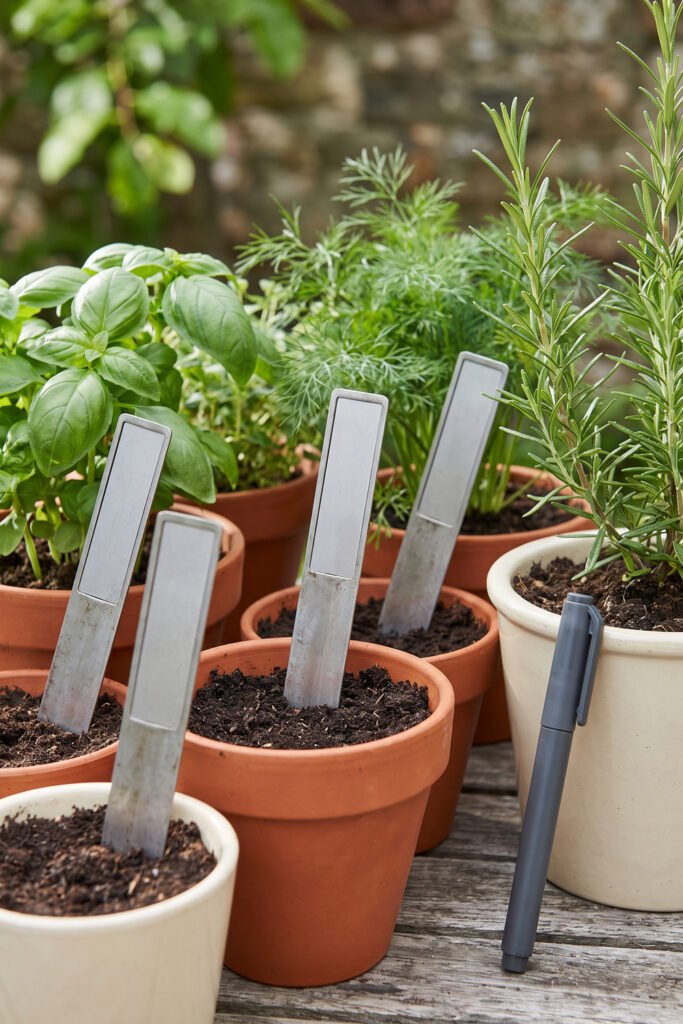
Choose one material and repeat it throughout the planting area. Slim metal labels suit a clean container garden, while short slate or sealed wood markers work with a more rustic setting.
Keep the lettering large enough to read from the normal path. A marker positioned at the back of a dense container will disappear as foliage grows, so place it where it remains visible without covering the plant.
Use outdoor-suitable materials and finishes, especially around edible plants. Avoid flimsy indoor craft sticks that warp quickly or labels with decorative shapes that compete with the planting.
Label the Garden
- Metal Plant Label Set: creates one consistent marker style across the garden.
- Weatherproof Garden Marker Pen: adds clear lettering to compatible label surfaces.
19. Add a Removable Hoop-and-Mesh Plant Cover
A series of hoops covered with suitable garden fabric or mesh can protect a defined planting area without constructing permanent fencing.
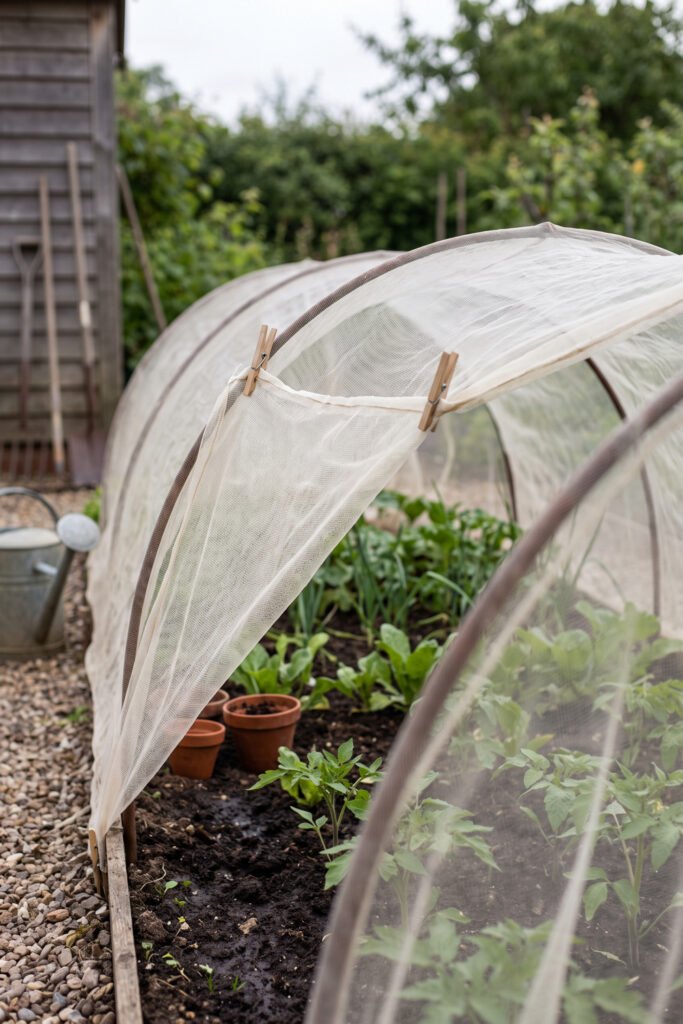
The cover should be chosen for the actual problem. Different materials vary in weight, airflow, light transmission, and the insects or weather conditions they address. Some covers also need to be removed during flowering so pollinators can reach certain crops.
Keep the fabric taut enough that it does not crush the plants, and secure the edges according to the system’s instructions. Clips make the cover easier to open for watering, inspection, and harvesting.
Do not leave the cover in place automatically for the entire season. Monitor the plants and follow crop-specific guidance.
Cover the Crop
- Garden Row-Cover Hoops: form the removable structure above the plants.
- Fine-Mesh Garden Netting: covers the frame when suited to the crop.
- Garden Fabric Clips: secure compatible mesh while preserving access.
20. Build a Small Bug Hotel From Dry Natural Materials
A compact habitat box can add a textural detail to a garden wall, shelf, or freestanding post.
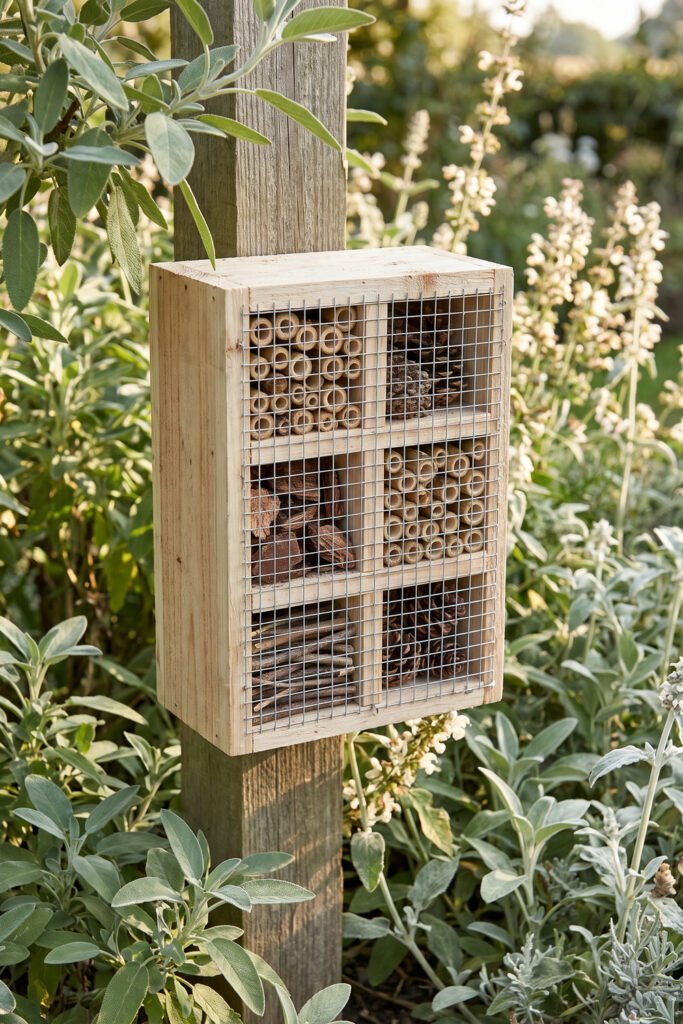
Divide a shallow untreated box into several compartments, then fill them with neatly cut hollow stems, cones, bark, or small pieces of wood appropriate to the intended insects. Keep the materials dry and tightly arranged rather than creating a loose pile.
The strongest visual version uses repeated circular stem openings and a simple frame, allowing the materials to provide the pattern. Avoid bright paint, novelty signs, or an oversized structure that dominates a small garden.
Treat the project as a habitat experiment rather than a guaranteed way to attract a particular species. Local insects, placement, moisture, plant life, and material selection all affect whether it is used.
Assemble the Habitat
- Unfinished Wooden Insect Hotel Kit: provides a compartmented base for natural materials.
- Hollow Bamboo Reed Tubes: create repeated circular openings within the box.
- Galvanized Hardware Cloth Roll: helps retain loose materials in suitable compartments.
21. Assemble a Shallow Container Water Feature
A wide basin with stones and a small compatible pump can introduce reflected light and gentle movement without building a pond.
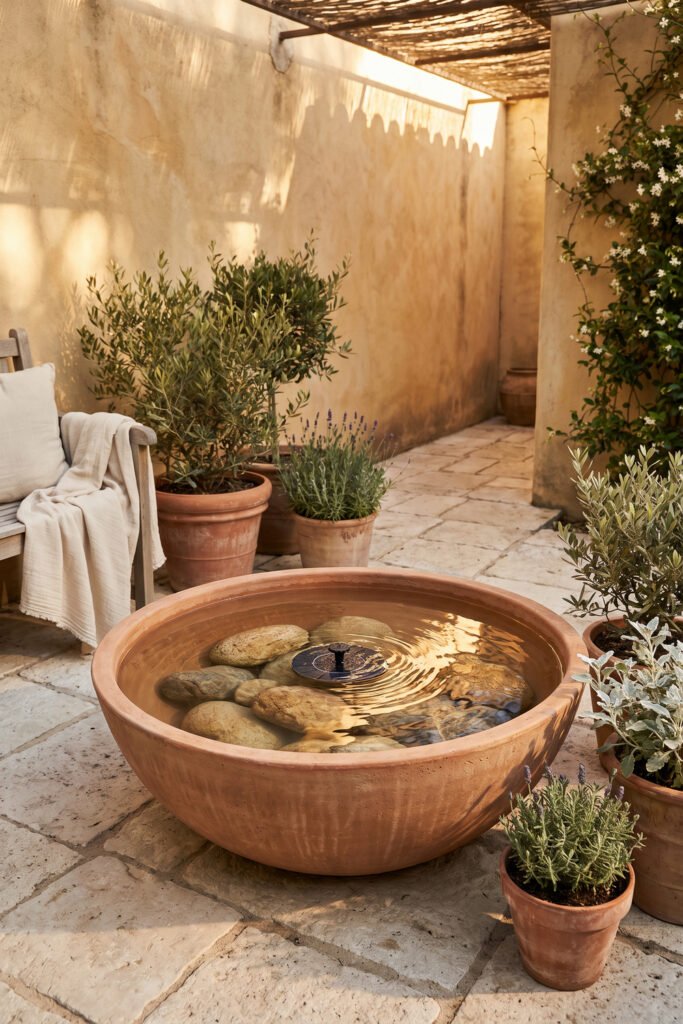
Choose a container with a broad, stable base and position it where the water can be reached for cleaning. Keep the arrangement simple: a few substantial stones, visible open water, and surrounding foliage that does not constantly drop debris into the basin.
Select a pump intended for the location and container, follow its operating instructions, and consider access by children and pets. Do not improvise electrical connections outdoors.
Water features require ongoing care. CDC guidance recommends regularly emptying and scrubbing or otherwise properly managing outdoor items that hold water to reduce mosquito breeding. A maintained circulating feature should still be inspected rather than ignored once installed.
Complete the Water Feature
- Shallow Ceramic Garden Basin: creates a broad, visually stable water surface.
- Solar Fountain Pump for Birdbaths: adds circulation when compatible with the basin.
- Smooth Garden River Rocks: add weight and a simple natural finish.
Before You Start: A Five-Point Garden Project Check
Run through this checklist before buying wood, paint, hooks, containers, or plants.
- Space: Measure the project footprint and confirm that doors, gates, drawers, and paths will remain usable.
- Permanence: Decide whether the project can be removed, relocated, or stored when the lease, season, or garden plan changes.
- Exposure: Check the site’s light, wind, rain, and surface conditions.
- Materials: Verify that wood, paint, hardware, containers, and fasteners suit the intended outdoor and planting use.
- Maintenance: Consider watering, cleaning, refinishing, emptying, pruning, and winter storage before committing.
A project is successful when it continues to work after the first photograph. Choose materials and placement based on daily use, not only the finished appearance.
Frequently Asked Questions
What are the easiest DIY garden ideas for beginners?
Painting and grouping existing pots, making consistent plant markers, arranging grow bags, or creating a small crate herb garden are approachable starting points. Choose a project that uses familiar tools and does not require structural installation.
How can I create a DIY garden on a small budget?
Begin with materials you already own, but reuse them selectively. Group existing pots, refresh a few pavers with an appropriate finish, create a mulch path, or organize tools on a freestanding panel. Spending less works best when you repeat one material or color rather than collecting many unrelated objects.
Which DIY garden projects work in a small space?
Grow bags, railing planters, ladder stands, bamboo supports, narrow potting stations, and freestanding mesh panels make good use of limited floor area. Keep circulation clear and use height without blocking windows, doors, or neighboring spaces.
What can renters change in an outdoor garden?
Portable containers, grow bags, freestanding supports, movable work tables, and removable garden details are generally easier to reverse than fixed structures. Rules still vary, and renters should seek permission before attaching items to a wall or fence or making permanent changes.
Do outdoor garden containers need drainage holes?
Containers need a way for excess water to drain, and the growing medium should suit container planting. Do not allow pots to sit continuously in collected water. Also consider where the drained water will go, particularly on a balcony or finished patio.
Can reclaimed pallets or treated wood be used for edible garden projects?
Do not assume unidentified reclaimed wood is suitable for growing food. Determine how the wood was treated and what it was previously used for, then consult current authoritative guidance for that material. Wood-preservative treatments and permitted uses vary.
Choose One Project That Solves a Real Garden Problem
The best DIY garden ideas begin with a practical need. Build upward when the floor is crowded, add an edge where soil and pathways blur together, or organize the tools that are always left beside the door.
Start with one project that fits your available space, permission level, tools, and maintenance habits. Once it is working well, repeat its material or finish elsewhere to give the garden a stronger visual rhythm.
Save the project that suits your space, list the materials you need, and add the finished idea to your DIY Garden Projects inspiration board.
Love saving practical outdoor projects? Visit our DIY Backyard Projects Pinterest board for more small-space and budget-conscious inspiration, then explore 25 DIY Backyard Ideas for an Outdoor Space You’ll Actually Use for even more ways to improve your patio, yard, or rental garden.