




25 DIY Backyard Ideas for an Outdoor Space You’ll Actually Use
An underused backyard rarely needs dozens of new features at once. It needs a clear reason to step outside: a shaded chair for morning coffee, a small table for dinner, enough privacy to relax, or a dry path across a muddy patch.
- Quick Takeaways
- How to Choose the Right DIY Backyard Project
- Decide What You Want the Yard to Do
- Check the Fixed Conditions
- DIY Backyard Ideas That Establish the Layout
- 1. Zone a Compact Lounge With a Rug and Planter Edge
- 2. Build a Movable Conversation Circle
- 3. Lay a Simple Stepping-Stone Route
- 4. Paint One Concrete Accent Panel
- Upgrade the Furniture You Touch Every Day
- 5. Refinish a Secondhand Bistro Set
- 6. Tile the Top of an Existing Outdoor Table
- 7. Turn a Utility Cart Into a Mobile Serving Station
- 8. Add a Removable Drink Ledge
- Add Flexible Privacy and Shade
- 9. Create Privacy With Tall Planters on Rolling Bases
- 10. Hang Outdoor Curtains From an Existing Structure
- 11. Create a Portable Shade Zone Around an Umbrella
- Make the Backyard Work After Sunset
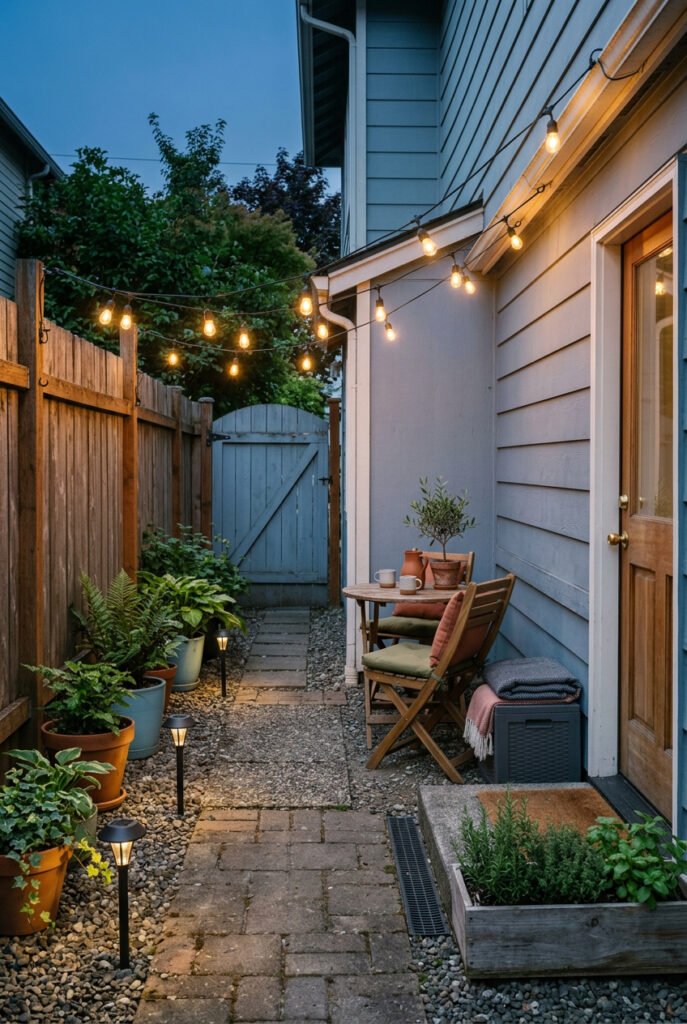
- 12. Install String Lights on Approved Supports
- 13. Trace Paths and Steps With Solar Lights
- 14. Make a Three-Level Cordless Lantern Cluster
- Build Greenery Up, Not Out
- 15. Build One Compact Planter Box
- 16. Make a Narrow Ladder Plant Stand
- 17. Pair a Planter With a Lightweight Trellis
- 18. Plant a Portable Trough Herb Garden
- 19. Add a Self-Watering Reservoir to a Container
- 20. Turn a Known-Source Pallet Into a Vertical Potting Station
- Finish With Storage and Destination Projects
- 21. Build a Freestanding Hose-and-Tool Corral
- 22. Create a Dedicated Cushion-Storage Station
- 23. Make a Roll-Up Outdoor Movie Screen
- 24. Add a Removable Game Top to an Existing Table
- 25. Assemble a Shallow Birdbath or No-Plumb Water Bowl
- Frequently Asked Questions
- What is the easiest DIY backyard idea for a beginner?
- How can I improve a small backyard on a budget?
- Which DIY backyard ideas are renter-friendly?
- What should I do with a muddy or bare-dirt backyard first?
- What should I check before digging or installing posts?
- How can outdoor DIY projects last longer?
- Can I use a fire pit in a small or rental backyard?
- Choose One Project That Changes How You Use the Yard
These DIY backyard ideas are designed for ordinary outdoor spaces, including compact yards, townhome patios, rental backyards, and unfinished corners that need more function. Some projects are removable and beginner-friendly; others require more preparation or permission.
The goal is not to squeeze every idea into one yard. Choose the project that solves your biggest problem first, then let later additions support it.
Quick Takeaways
- Choose one main backyard activity before buying furniture or materials.
- Keep the route from the door to the primary seating area clear.
- Start with movable projects if you rent or remain uncertain about the layout.
- Check permissions before painting, attaching hardware, digging, or adding fire.
- Match paints, finishes, lights, and textiles to their intended outdoor exposure.
- Decide where cushions, tools, and movable decor will go during poor weather.
How to Choose the Right DIY Backyard Project
A beautiful project can still be wrong for your yard. A large dining table will not help if it blocks the only walkway, and a privacy panel is frustrating if it catches every strong gust.
Start by deciding what you want to do outside most often. That answer should determine the first project.
Decide What You Want the Yard to Do
Choose one primary use:
- Relax alone with a book or drink
- Eat outside with one or two other people
- Entertain a small group
- Grow herbs, flowers, or vegetables
- Give children or pets more usable space
- Gain privacy from neighboring windows
- Make a dark route easier to navigate
- Organize gardening and outdoor supplies
A compact backyard can support several activities, but one should lead the layout. The remaining functions can use movable or multipurpose pieces.
Check the Fixed Conditions
Before changing the yard, observe it at different times of day. Note where the sun falls, where rainwater collects, which direction the wind usually comes from, and how people naturally walk through the space.
Renters should also check the lease or ask the property manager before painting concrete, drilling into fencing, attaching curtains, or changing the ground surface. A removable product is not automatically approved for every property.
Use this guide to narrow the options:
| Your Main Goal | Useful Starting Project | Commitment | Main Check |
|---|---|---|---|
| Define an empty corner | Rug and planter lounge zone | Low | Drainage and furniture scale |
| Make group seating easier | Movable conversation circle | Low | Circulation and fire restrictions |
| Improve a muddy route | Stepping-stone path | Medium | Drainage and underground utilities |
| Gain privacy | Tall movable planters | Medium | Wind and combined weight |
| Use the yard after sunset | Layered outdoor lighting | Low | Outdoor ratings and secure placement |
| Add plants without losing floor space | Vertical plant display | Medium | Sun, watering, and stability |
| Reduce visible clutter | Outdoor storage station | Low to medium | Weather exposure and access |
DIY Backyard Ideas That Establish the Layout
The first group of projects gives the yard a visible structure. These ideas define where people sit, how they move, and which area should receive attention without requiring a complete patio installation.
1. Zone a Compact Lounge With a Rug and Planter Edge
An outdoor rug can establish the boundaries of a seating area on an existing patio, deck, or other suitable hard surface. Place the front portions of the chairs over the rug so the furniture reads as one group rather than several unrelated objects.
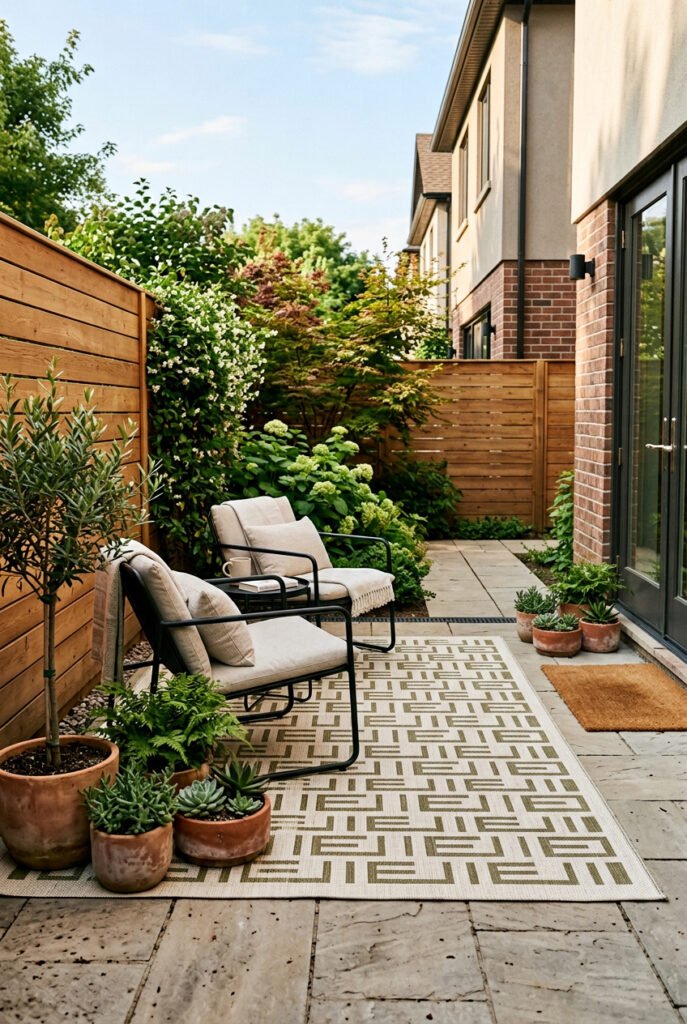
Use two or three planters to reinforce one edge while leaving the route from the door open. Repeating one planter material—matte black metal, pale concrete, or warm terracotta—creates more order than collecting several unrelated finishes.
Check how water moves beneath the rug and allow the surface to dry properly. A rug placed over a consistently damp or uneven area may hide a problem rather than solve it.
Pieces That Define the Zone
- Flat-weave outdoor rug
- Compact lounge chairs
- Low outdoor side table
- Coordinating planters
- Furniture glides suited to the surface
2. Build a Movable Conversation Circle
A conversation circle works when seats face one another instead of lining the perimeter like a waiting room. Use lightweight chairs, stools, or benches that can be moved closer for guests and spread out when more circulation is needed.
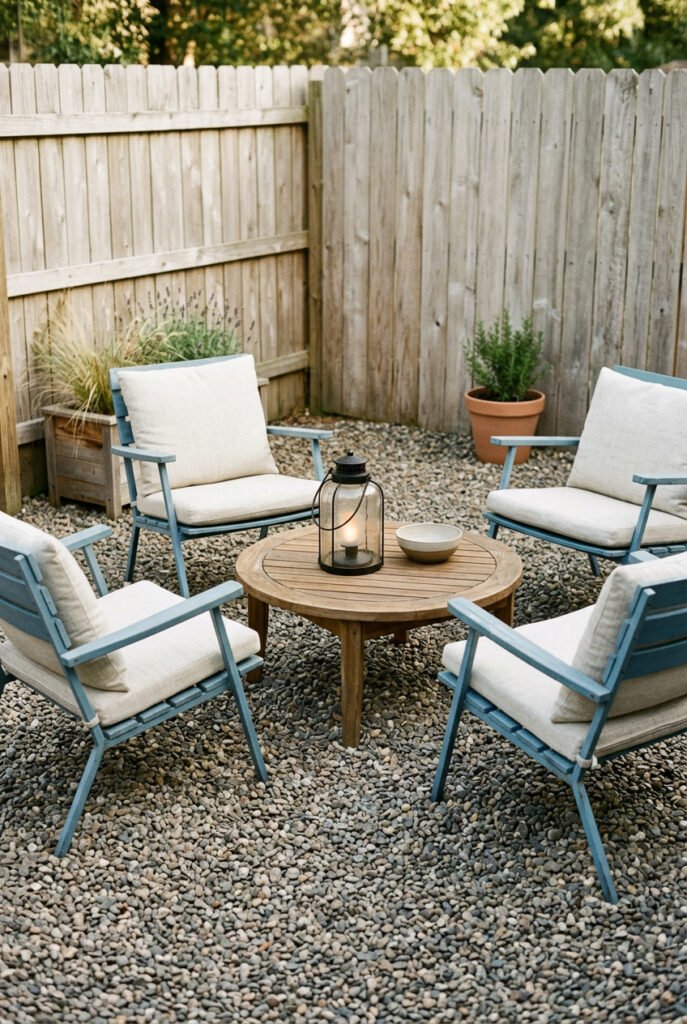
Anchor the middle with a low table, a large cordless lantern, or a planter. This central item gives the arrangement a purpose even when a fire feature is unsuitable.
If a fire pit is permitted, treat it as a safety decision rather than a decorative accessory. NFPA guidance calls for checking local restrictions and keeping a fire pit on a level, noncombustible surface at least 10 feet from anything that can burn. Local rules, leases, and manufacturer instructions may require more.
3. Lay a Simple Stepping-Stone Route
A short path can make an awkward yard feel deliberately planned. Start with the route people already take between the door and the seating, shed, gate, or garden area. A curving path looks natural in a planted yard, while a straighter line suits a narrow or modern space.
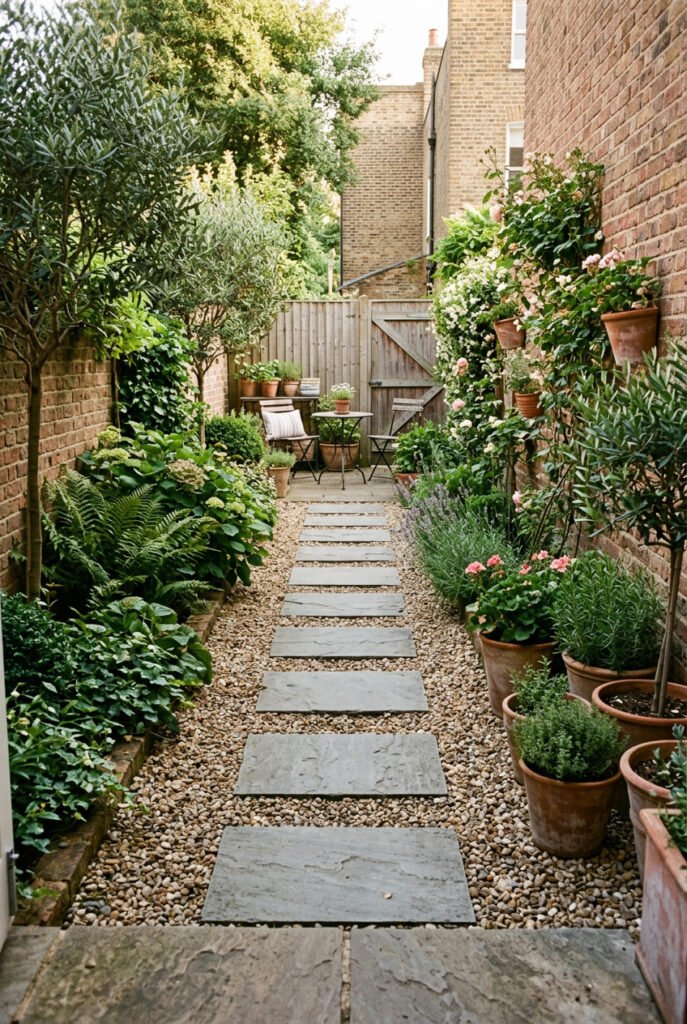
Repeat a material already present nearby. Gray pavers can echo a concrete patio; warm brick can connect with terracotta pots; pale stone can lighten a shaded corner.
This pillar article is not the place for a complete path installation guide. Site preparation depends on soil, drainage, climate, and the chosen material. If the project involves excavation, U.S. readers should contact 811 before digging so underground utilities can be marked.
4. Paint One Concrete Accent Panel
Painting a defined portion of existing concrete can create the visual effect of a rug without adding another loose layer. A checkerboard, wide border, or simple grid works particularly well beneath a small bistro table.
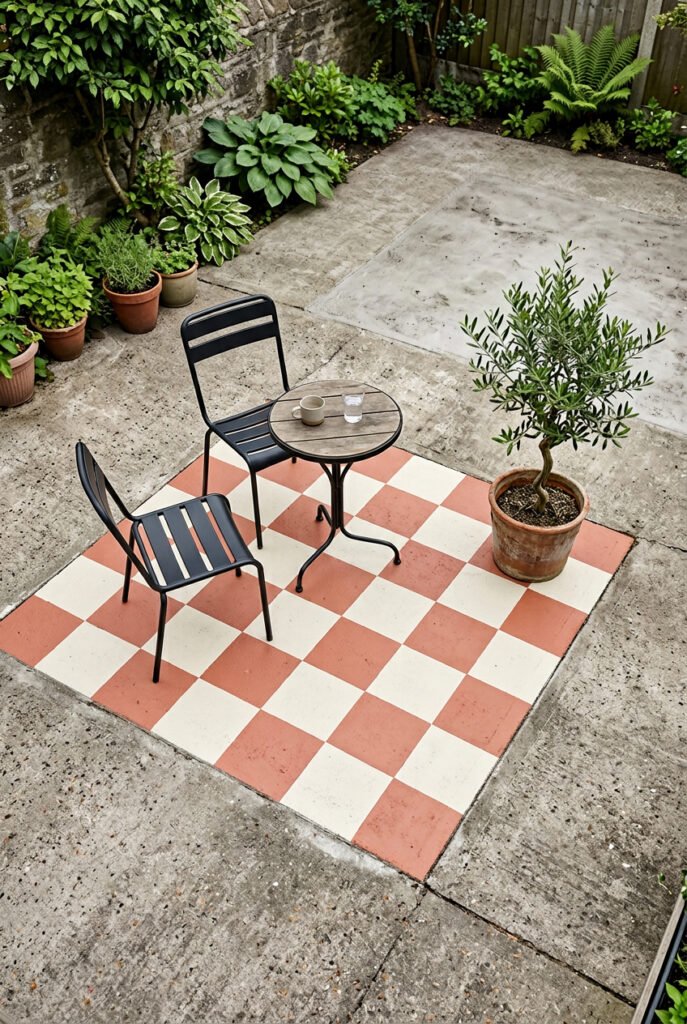
Keep the palette connected to the rest of the yard. Try charcoal and warm white beside black furniture, muted blue beside weathered wood, or terracotta and cream near clay planters. One controlled pattern will usually look stronger than several small motifs scattered across the slab.
The surface must be appropriate for coating and properly prepared. Do not paint over active cracks, flaking material, or persistent moisture. Follow the coating manufacturer’s instructions for surface compatibility, curing, weather conditions, and slip considerations.
Upgrade the Furniture You Touch Every Day
A functional seating or serving piece often changes backyard use more than several decorative purchases. These projects focus on refreshing and repurposing existing furniture without replacing the dedicated DIY outdoor furniture guides.
5. Refinish a Secondhand Bistro Set
A small metal or wood bistro set can turn a forgotten corner into a breakfast or laptop spot. Look for a sound frame and proportions that leave space to pull out the chairs without blocking the main route.
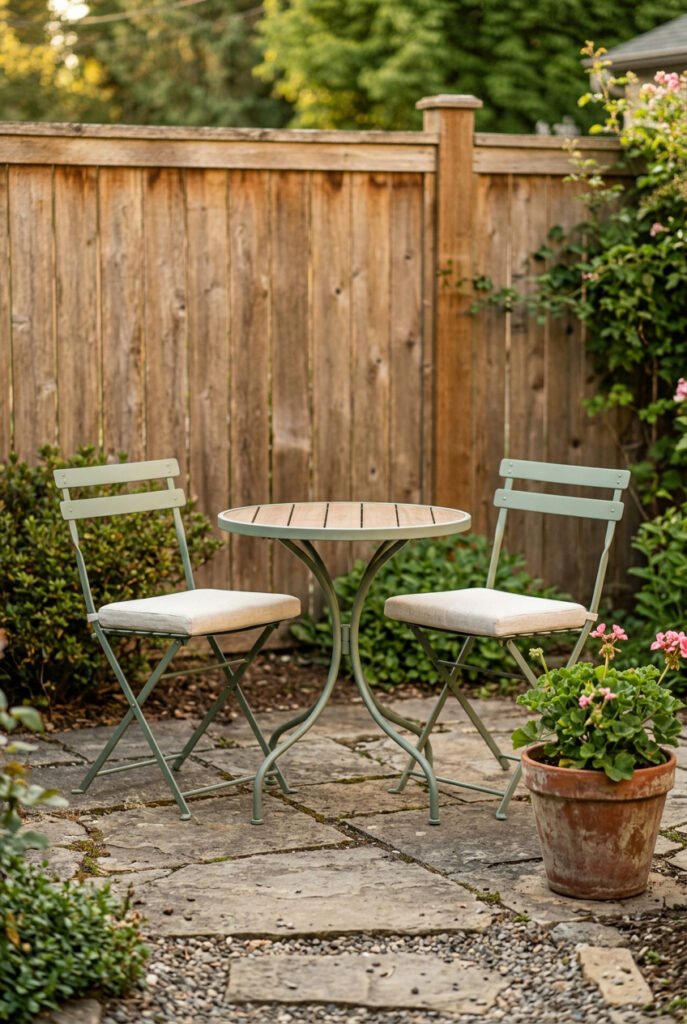
Choose the finish according to the furniture material rather than applying one universal coating. A matte sage or dusty blue set blends into greenery, while charcoal creates a sharper outline against pale fencing or concrete.
Preparation determines how finished the result looks. Remove loose material, clean the piece, and follow the primer or finish instructions for the specific substrate and prior coating. The USDA Forest Products Laboratory notes that outdoor wood finishes vary in protection and maintenance, so avoid assuming one product suits every species or exposure.
Budget-Friendly Finds
- Secondhand bistro table and chairs
- Material-compatible cleaning supplies
- Exterior primer and coating
- Seat cushions made for outdoor use
6. Tile the Top of an Existing Outdoor Table
A tiled surface can give a plain side table a stronger focal role. Use one compact pattern—checkerboard, narrow stripes, or repeating geometric shapes—rather than combining many colors and motifs.
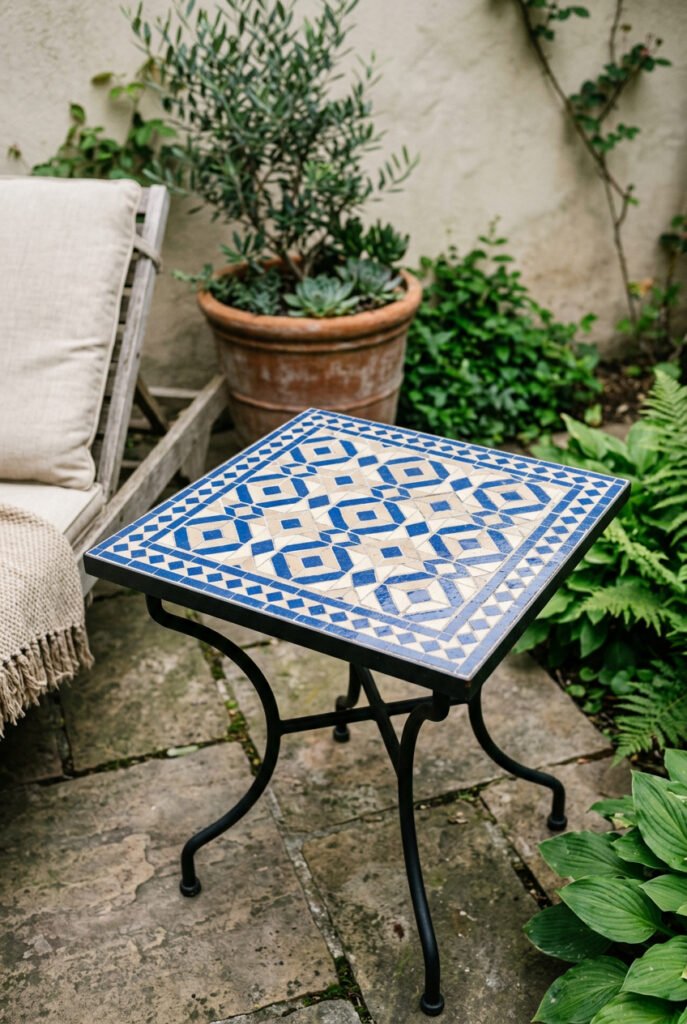
Pull the palette from something already visible. A blue-and-cream top can repeat blue cushions, while rust and sand tones work beside terracotta planters. The material repetition makes the table feel connected to the whole seating area.
Before beginning, confirm that the existing table is stable and that its top, adhesive, grout, and edge treatment are appropriate for the intended exposure. Added weight and temperature changes also matter. If the table cannot support the proposed finish, paint or a removable tray offers a simpler interpretation.
7. Turn a Utility Cart Into a Mobile Serving Station
A compact utility cart earns its footprint by changing roles. It can hold drinks during dinner, potting supplies during gardening, or lanterns and throws during an evening outside.
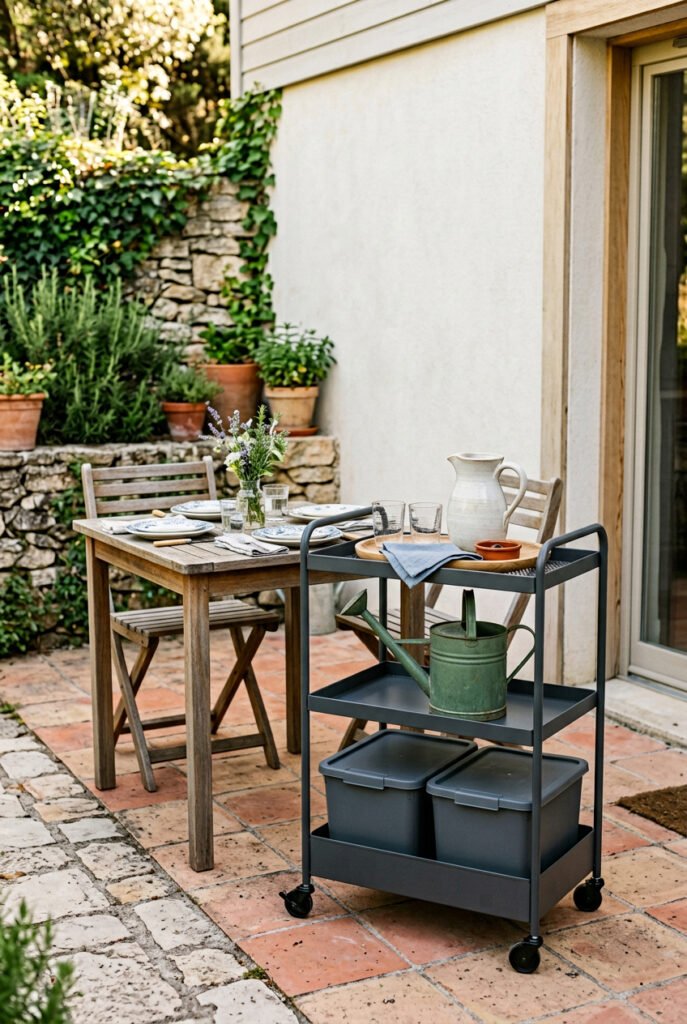
Give each level a clear job. Keep the upper surface open for serving, use the middle shelf for a tray or watering can, and place loose supplies in a lidded container below. This visual hierarchy prevents the cart from becoming a rolling pile of unrelated objects.
Choose a finish that repeats nearby furniture or hardware. Black metal works with modern fencing and lanterns; warm wood connects with natural chairs and planters. Store or cover the cart according to its material and product instructions rather than assuming an indoor cart will tolerate continuous exposure.
8. Add a Removable Drink Ledge
A narrow ledge can serve a small seating area where a full table would obstruct movement. Position it beside existing chairs, along a suitable fence, or near a railing so it can hold a cup, small tray, or lantern.
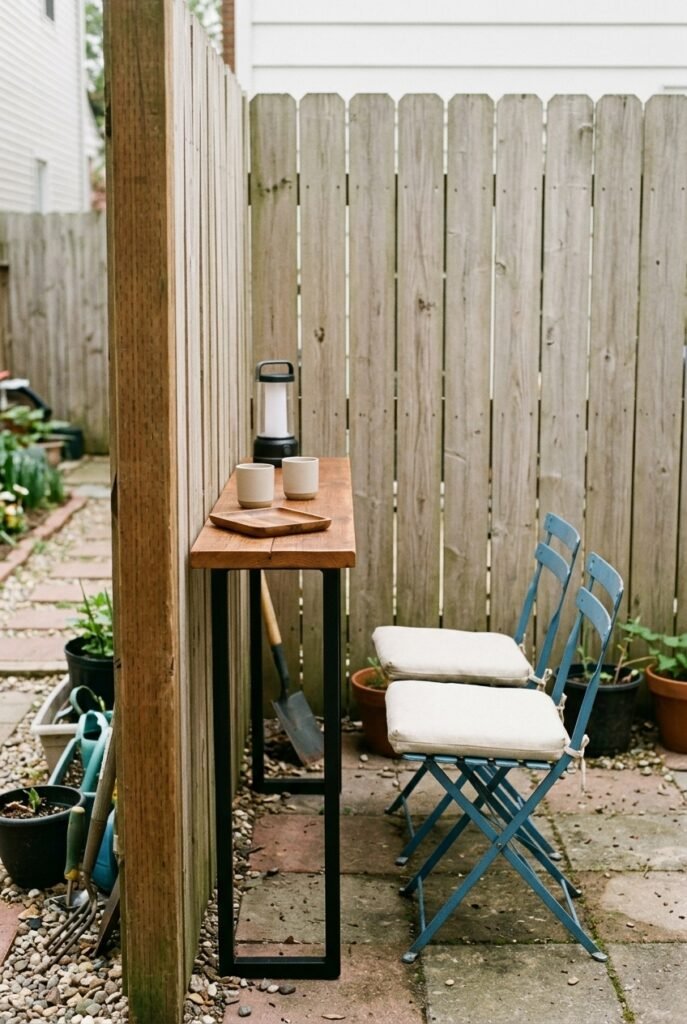
Keep the surface visually quiet. A slim wood top against a dark fence or a painted ledge matching the railing reads as part of the boundary instead of another piece of furniture.
The attachment method, allowable load, and property permission must be confirmed before installation. Do not encourage anyone to lean, sit, or place heavy items on a ledge unless the complete system is specifically designed and installed for that use. Renters can achieve a similar function with a narrow freestanding console or movable tray table.
Add Flexible Privacy and Shade
Privacy is usually needed at one particular sightline, not around every edge of the yard. Targeting that line preserves light, airflow, and valuable floor space.
9. Create Privacy With Tall Planters on Rolling Bases
Tall containers can interrupt the view from a neighboring window while remaining more flexible than a permanent fence extension. Place them where they block the actual sightline from the chair rather than automatically lining the entire boundary.
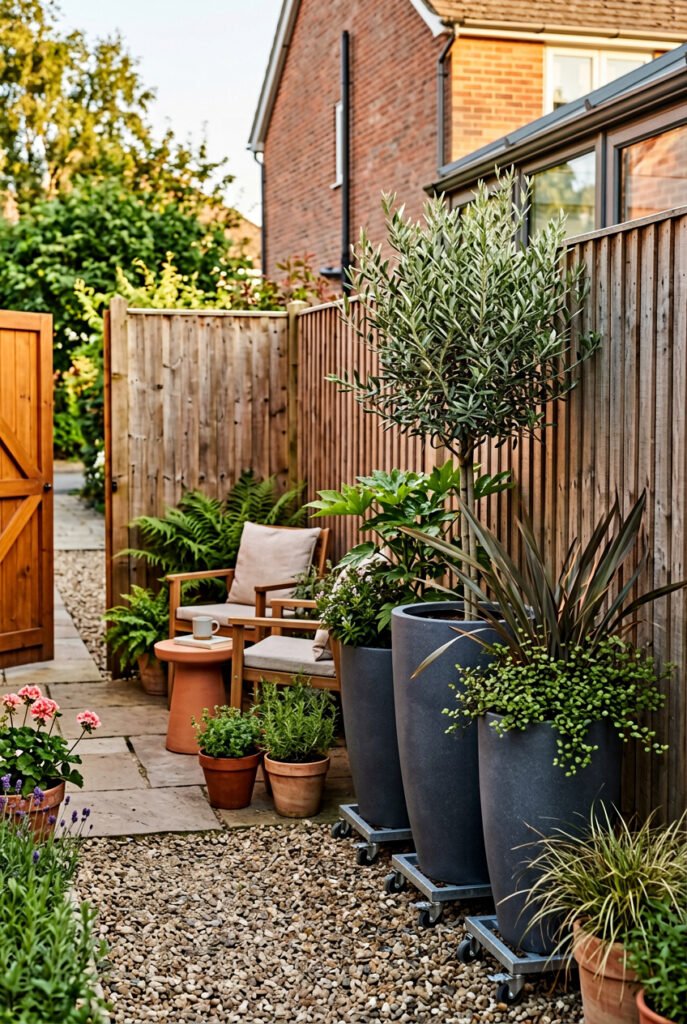
Use containers with similar colors but slightly different heights. A row of identical pots may look rigid, while unrelated colors create visual clutter. Dark containers visually recede; pale stone finishes become a more noticeable architectural feature.
Account for the combined weight of the container, soil, plant, and water. Any rolling base must be suitable for the load and surface. Wind exposure, drainage, climate, and mature plant size also affect the decision.
Renter-Friendly Finds
- Tall outdoor containers
- Rolling planter bases with stated load guidance
- Matching saucers where appropriate
- Plant supports
- Watering tools suited to the container depth
10. Hang Outdoor Curtains From an Existing Structure
Curtain panels can soften one exposed side of a covered patio or pergola and provide adjustable screening. Choose a restrained solid color or narrow stripe so the fabric frames the seating instead of dominating it.
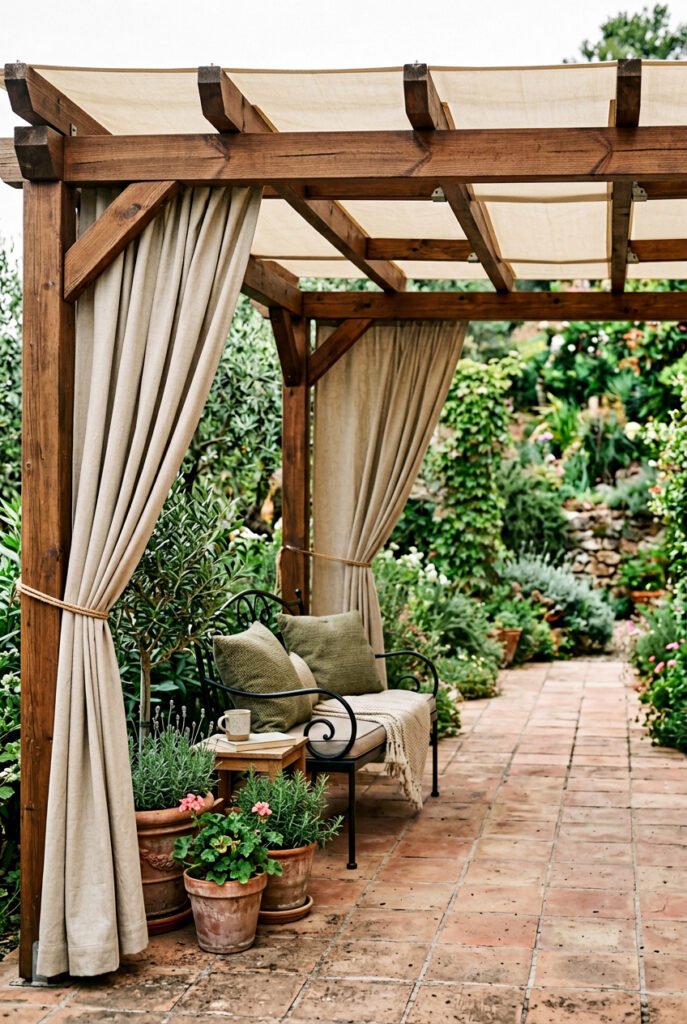
Hang the panels high enough to emphasize the existing structure, and use tiebacks to keep the opening clear when privacy is unnecessary. Warm white, sand, muted olive, and faded blue work easily with wood, black metal, and terracotta.
This idea depends on an existing structure that is suitable for the proposed hardware and load. Confirm permission, product instructions, wind conditions, and proximity to grills or fire. Panels should not drag through standing water or block an important exit.
11. Create a Portable Shade Zone Around an Umbrella
Place shade over the activity that keeps you outside longest. An umbrella centered above a compact dining table supports meals, while one angled toward a lounge chair makes a reading corner more comfortable.
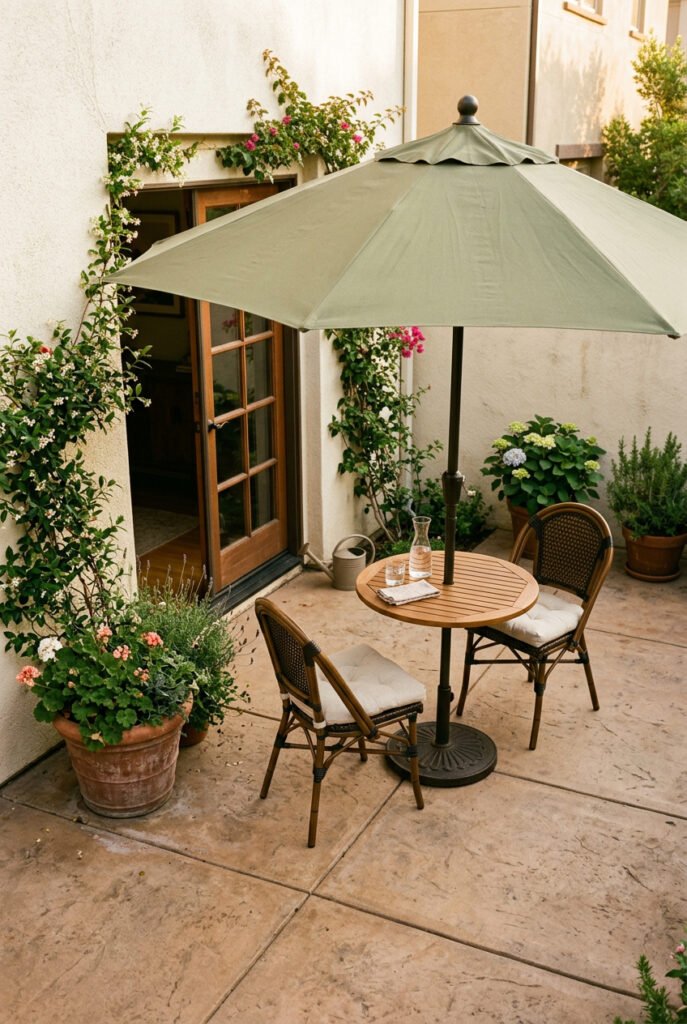
The umbrella color can function as the largest color block in a small yard. A muted stripe adds pattern without covering the ground, while a solid cream or olive canopy keeps the scene calmer.
Use a manufacturer-approved base suited to the umbrella and intended setting. A decorative basket, wood surround, or nearby side table may visually integrate the base, but it should never substitute for proper support or interfere with operation. Close and store the umbrella according to its instructions when conditions require it.
Make the Backyard Work After Sunset
Useful backyard lighting does three different jobs: it marks a route, illuminates an activity, and creates a softer background. One harsh fixture cannot perform all three well.
12. Install String Lights on Approved Supports
String lights are most effective when they define the main seating or dining zone. A single line can emphasize a narrow yard, while a restrained canopy pattern can create a visible ceiling above a larger area.
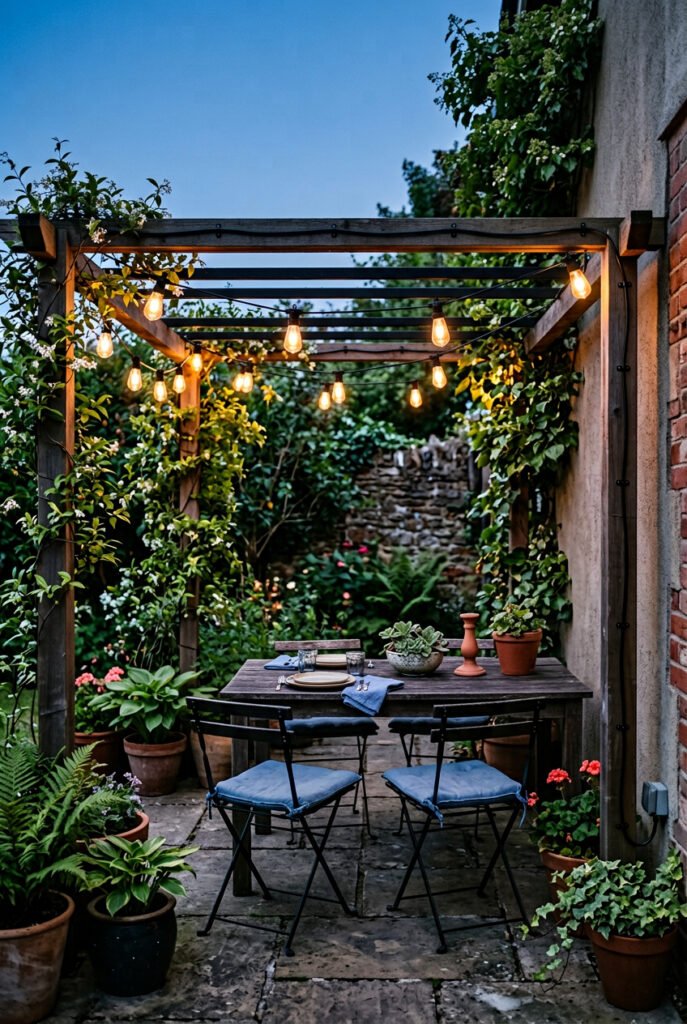
Use warm white light and keep the arrangement simple enough that the furniture remains the focal point. Secure attachment matters more than adding extra strands.
Choose products marked for outdoor use and follow their installation instructions. The U.S. Consumer Product Safety Commission advises using extension cords outdoors only when they are marked for outdoor use and replacing damaged cords rather than attempting improvised repairs. Cords should not cross walkways or sit where water collects.
Lighting Terms to Try
- Outdoor-rated string lights
- Approved outdoor light clips
- Outdoor-rated cord protection
- Solar path lights
- Cordless outdoor lanterns
13. Trace Paths and Steps With Solar Lights
Solar path lights can identify changes in level and guide movement without turning the yard into a brightly lit runway. Place them at useful transitions—near steps, turns, gates, or the approach to seating—instead of spacing them mechanically across every edge.
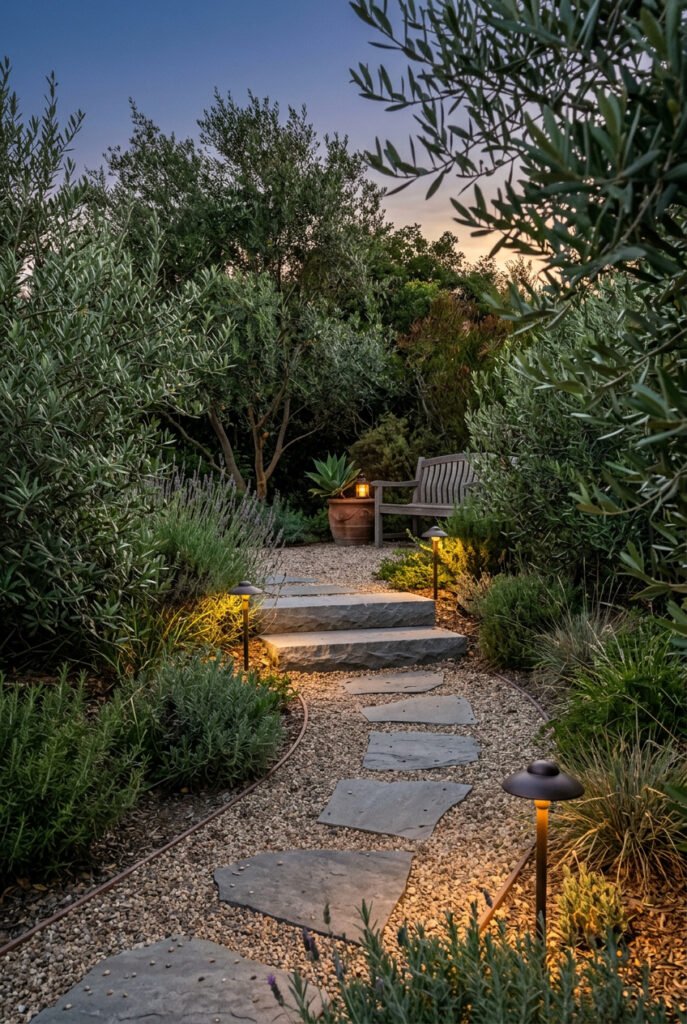
Staggering lights slightly can look more natural in a planted yard. A straighter rhythm suits a geometric path or modern exterior.
Performance depends on the individual product, available sunlight, season, weather, and placement. Check the manufacturer’s instructions and observe the yard after dark before deciding where additional light is necessary. Avoid aiming bright sources directly toward seating or neighboring windows.
14. Make a Three-Level Cordless Lantern Cluster
A group of lanterns at different heights creates foreground, middle, and background light without permanent wiring. Place one on the ground beside a planter, one on a table, and another on a secure shelf or existing ledge.
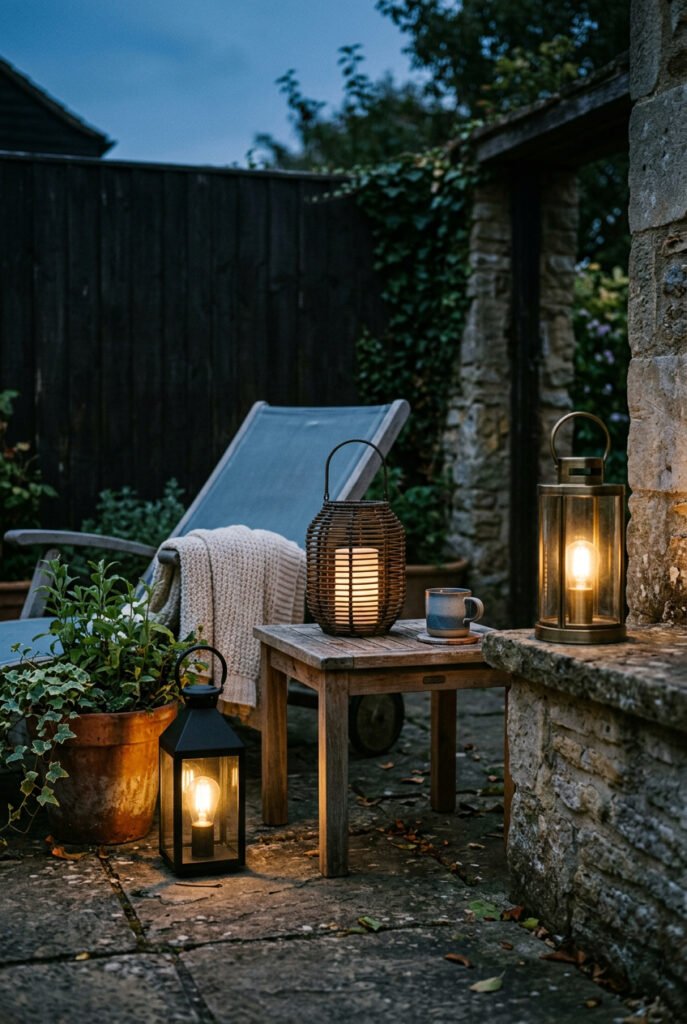
Repeat either the lantern finish or the light color. Matte black frames create a crisp outline, while woven or warm metal finishes soften a wood-heavy seating area. Using the same warm light color keeps mixed lantern shapes connected.
Battery-powered LED lights are generally more practical around fabric, plants, children, and pets than unattended open flames. Set every lantern on a stable surface, protect it according to the product instructions, and store batteries and lights as directed.
Build Greenery Up, Not Out
Planters and vertical supports bring greenery closer to seating without consuming the center of a small yard. The following ideas provide inspiration without replacing the dedicated planter, trellis, plant-stand, or vertical-garden guides.
15. Build One Compact Planter Box
One well-positioned planter box can define the edge of a seating area, soften a blank wall, or mark the transition between a patio and lawn. Match its proportions to the location instead of automatically building the largest container that will fit.
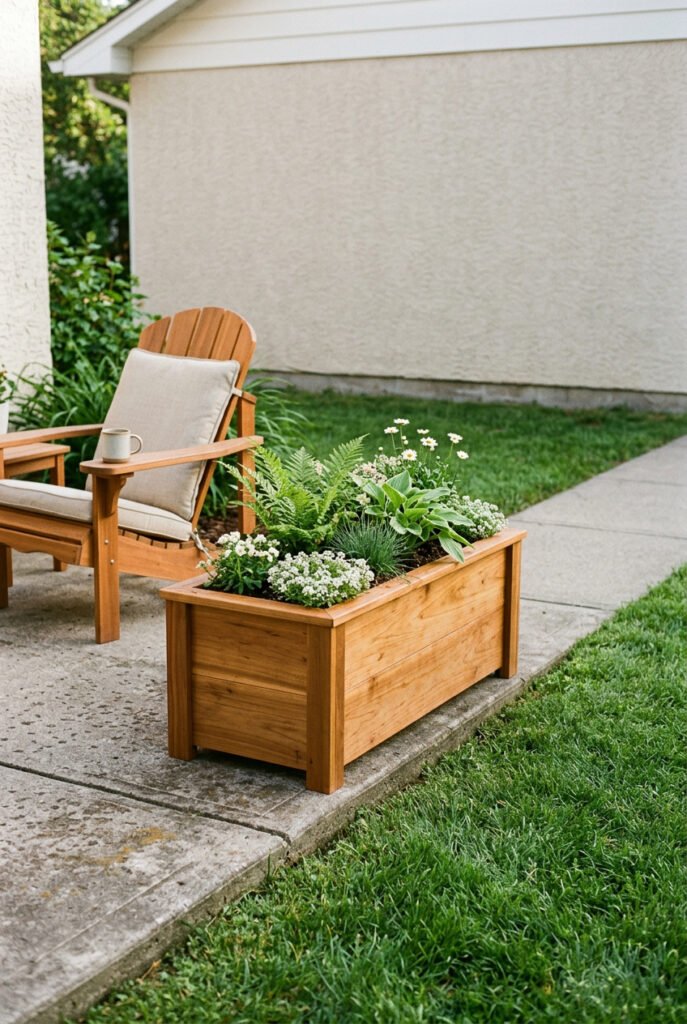
Repeat a visible material. Warm stained wood can connect with a table or fence, while a charcoal finish works beside black metal furniture. Leave negative space around the planter so the plants have a clear silhouette.
The appropriate construction, drainage, liner, wood, and finish depend on what will be planted and where the box will sit. Keep this pillar-level idea focused on placement and appearance; use verified plans before building the actual container.
16. Make a Narrow Ladder Plant Stand
A ladder-style stand uses height while keeping the footprint relatively shallow. Position larger or heavier pots lower and smaller plants higher so the composition feels visually grounded.
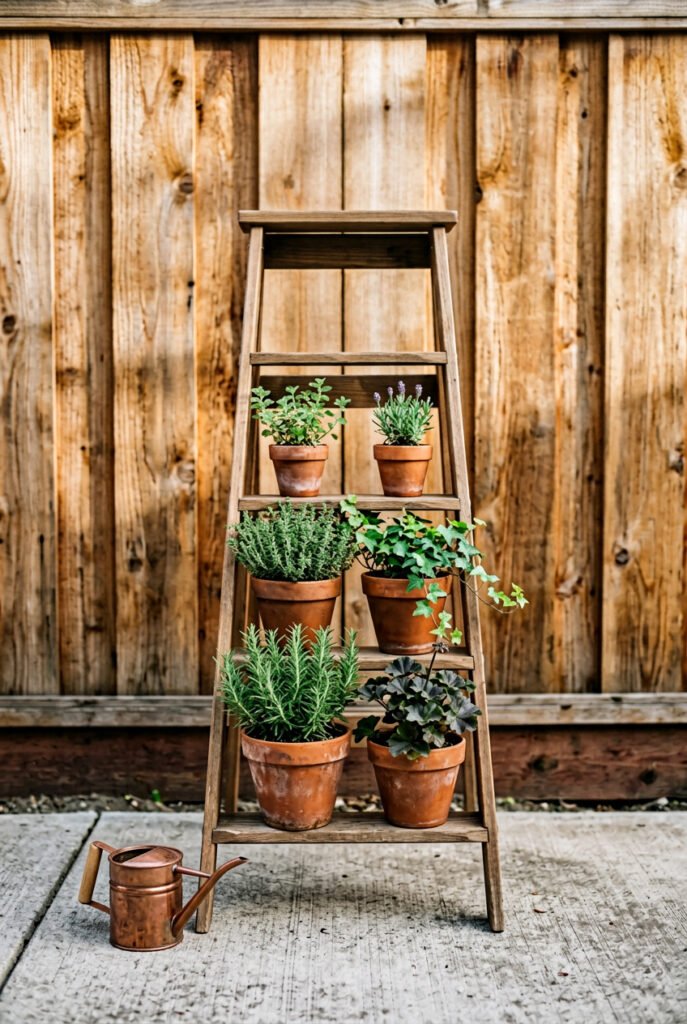
Limit the pot palette to one material or two closely related finishes. Terracotta creates a warm, garden-focused display; matte black or galvanized containers produce a more graphic look. Leave some shelves partially open rather than filling every available space.
The stand must remain stable on its surface and in local wind conditions. Do not overload shelves or rely on decorative leaning furniture that was not designed for the intended use. In exposed yards, a lower, broader plant stand may be more appropriate.
17. Pair a Planter With a Lightweight Trellis
A planter-and-trellis combination gives climbing plants a vertical path and can soften a bare boundary. Position it where the plant will receive suitable conditions without blocking a gate, window, or maintenance route.
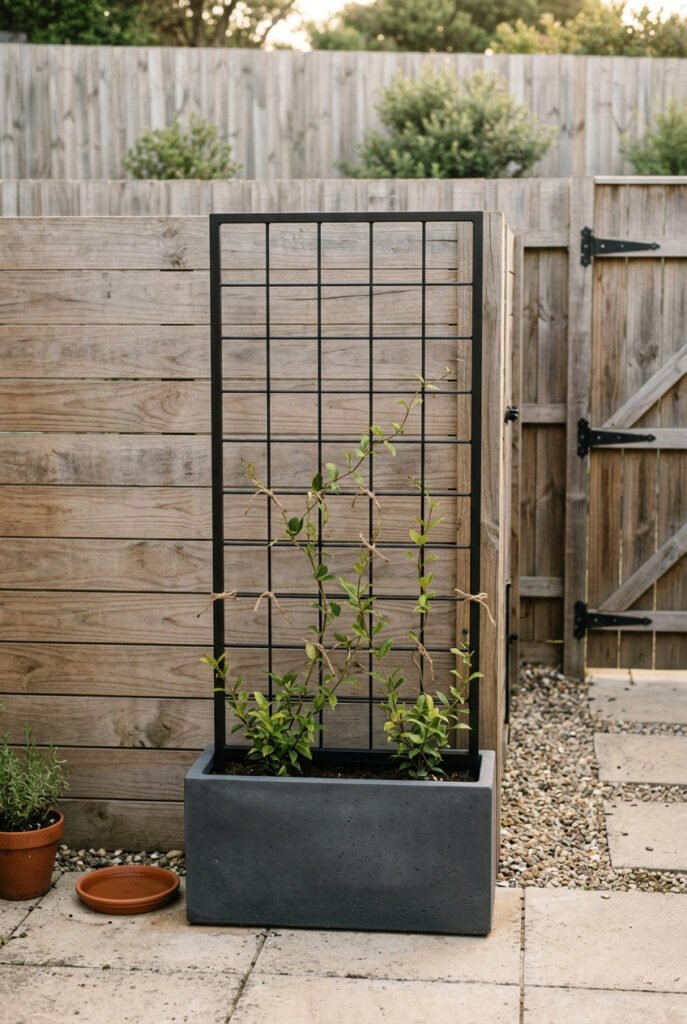
Keep the structure simpler than the foliage. A narrow black grid looks clean against pale siding, while natural wood works with cottage-inspired planting. Repeating the trellis finish in nearby lanterns, furniture, or edging prevents it from looking isolated.
Plant suitability, mature size, support requirements, and local climate need verification. The planter must also be large and stable enough for the complete system. Avoid attaching an unsupported trellis to a rental fence without permission.
18. Plant a Portable Trough Herb Garden
A long trough planter can keep several frequently used herbs near the back door without requiring a permanent garden bed. Choose plants with compatible sun and watering needs rather than selecting them only for appearance.
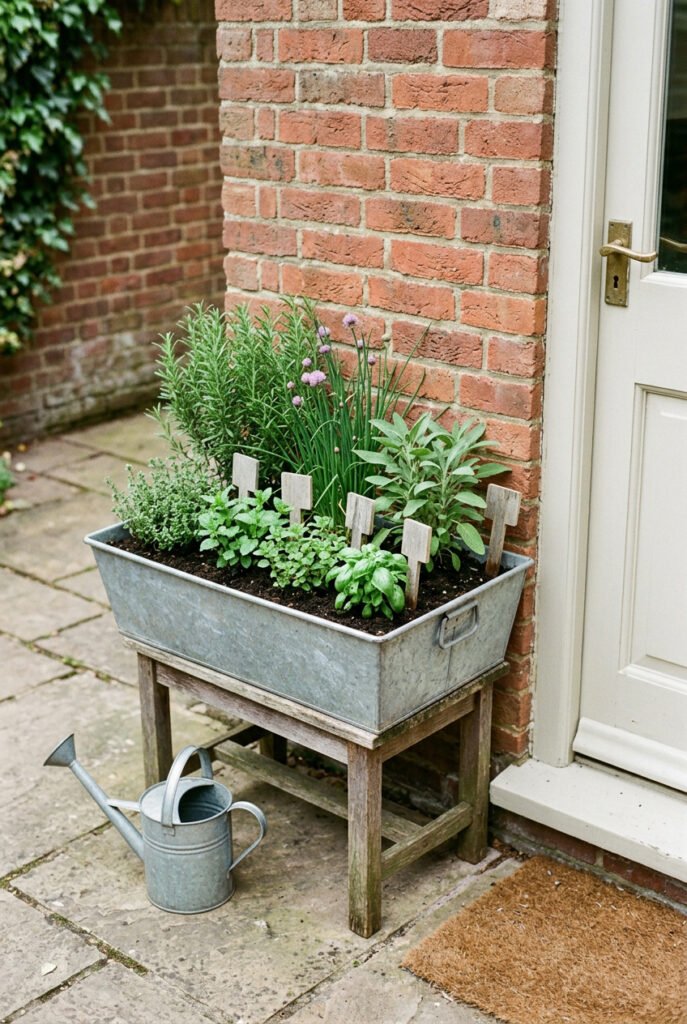
Organize the container with a clear rhythm. Taller plants can sit toward the back or center, with lower plants near the accessible edge. Simple labels in one finish help distinguish the herbs without adding several decorative colors.
Place the trough where watering and harvesting are convenient. Confirm plant safety if children or pets use the yard, and choose a container with suitable drainage for the setting.
Useful Growing Supplies
- Outdoor trough planter
- Plant labels
- Potting mix selected for the plants
- Watering can or narrow-spout container
- Suitable saucer where drainage needs protection
19. Add a Self-Watering Reservoir to a Container
A compatible reservoir insert can make certain container gardens easier to manage during warm periods. This works particularly well in a sunny yard where small pots dry more quickly than expected.
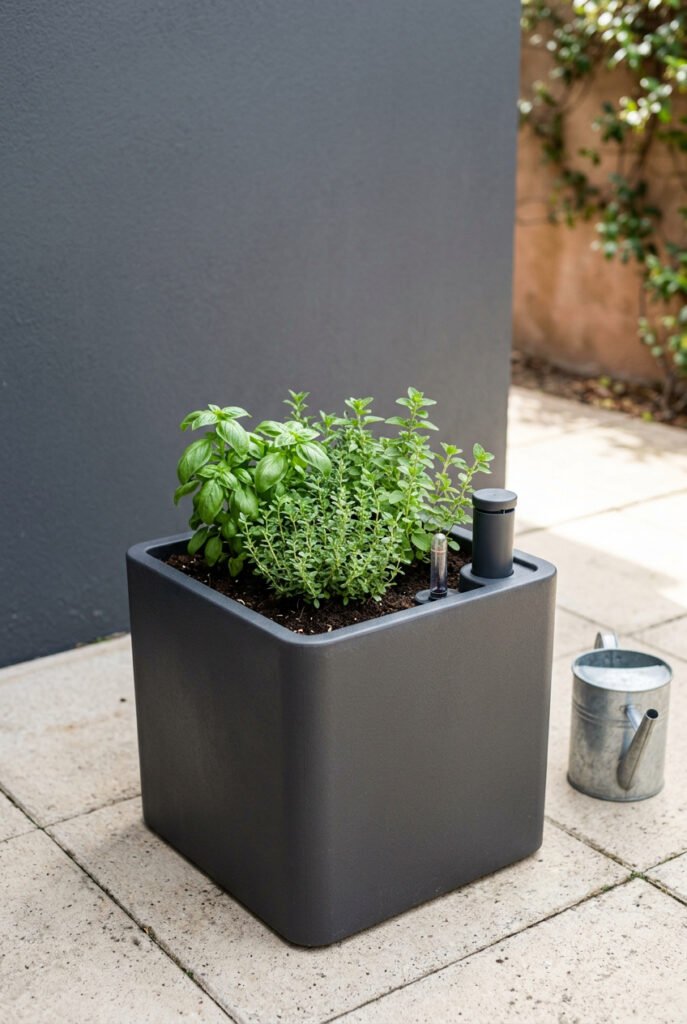
Choose a container and insert designed to work together. The fill point should remain accessible, and any overflow route should not send water across a walkway or against the building.
A self-watering system does not remove the need to monitor the plant. Rain, heat, plant size, growing medium, and reservoir capacity all affect watering. Follow the product instructions and check the soil or recommended indicator rather than promising a fixed interval between refills.
20. Turn a Known-Source Pallet Into a Vertical Potting Station
A pallet can support small pots, lightweight tools, or a narrow potting shelf without becoming structural seating. Sanded wood in a warm finish suits a natural garden, while matte black creates a stronger background for green leaves and terracotta.
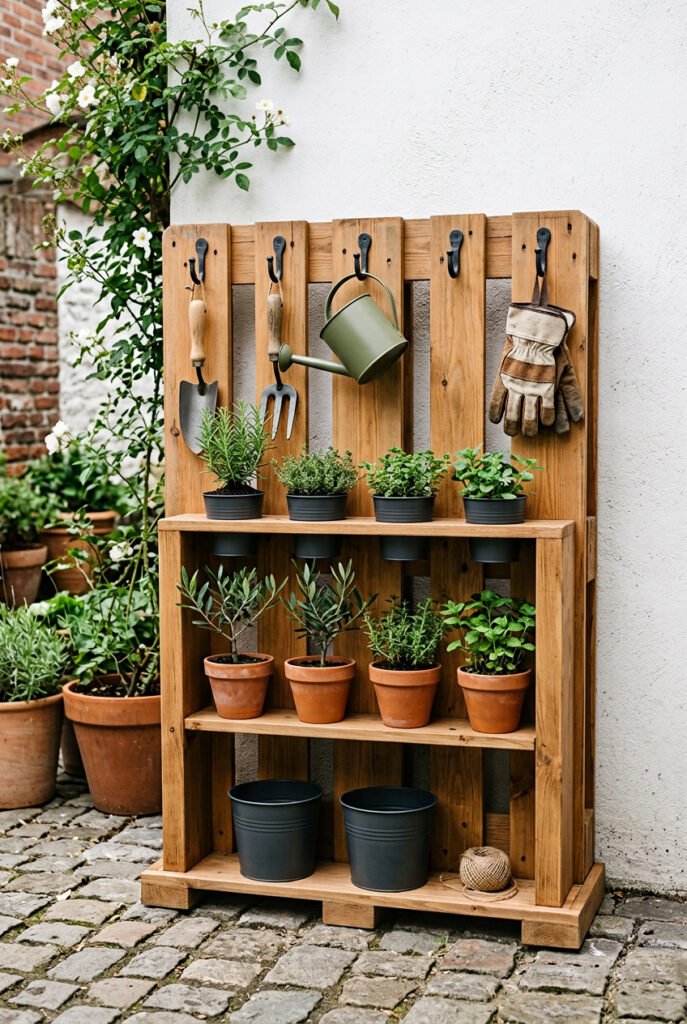
Keep the layout functional: hooks on one side, small containers in the center, and frequently used tools within comfortable reach. Avoid loading every opening.
Only use wood with a known, clean history. USDA APHIS explains that ISPM 15 markings identify pest treatment for international wood packaging; such a mark is not a general certification for furniture, food contact, or an unknown pallet’s previous use. Skip wood with uncertain provenance, chemical staining, odor, damage, or contamination.
Finish With Storage and Destination Projects
The final projects address the practical details that determine how often the yard gets used: visible tools, wet cushions, and activities worth setting up for.
21. Build a Freestanding Hose-and-Tool Corral
A compact utility station keeps the hose, hand tools, and watering supplies from spreading across the main view. Place it near the tap or garden area but outside the focal sightline from the primary seating.
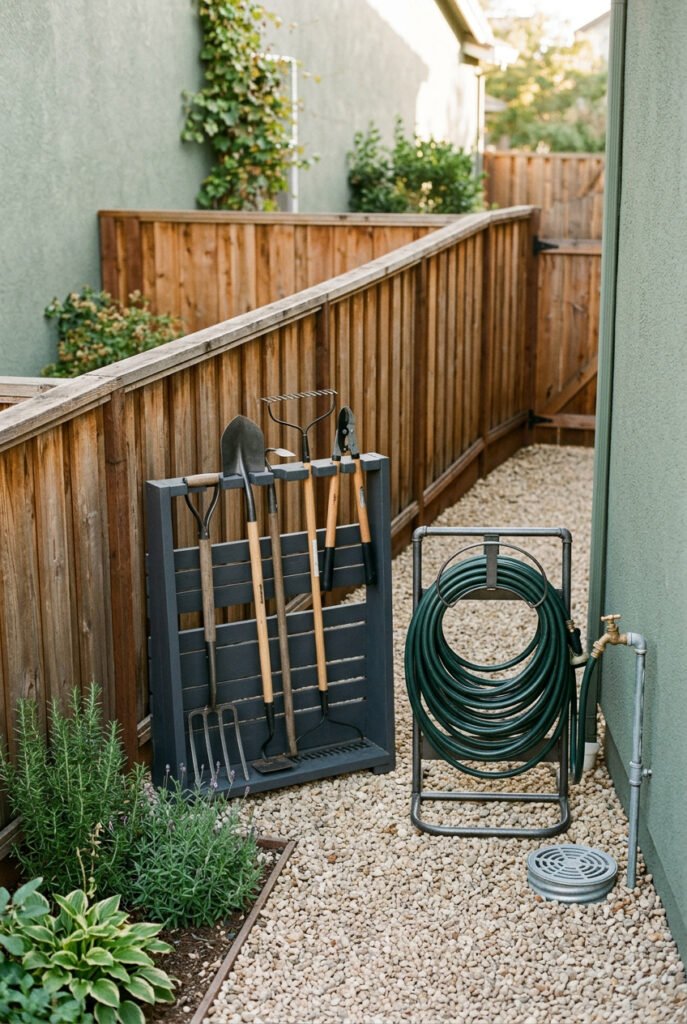
Use a freestanding panel, suitable outdoor hooks, and one container for small tools. Repeating the fence color helps the station visually recede; matching a planter or cart finish makes it feel intentional.
Maintain access to the tap, utility equipment, drains, and gates. The structure must be stable and appropriate for the expected load and weather. If installing posts or anchors requires digging, contact the relevant utility-location service before work begins.
22. Create a Dedicated Cushion-Storage Station
Outdoor cushions are easier to use when storage is close to the seating. Position a weather-resistant storage box against a suitable wall or boundary where its lid can open fully without blocking the door or main path.
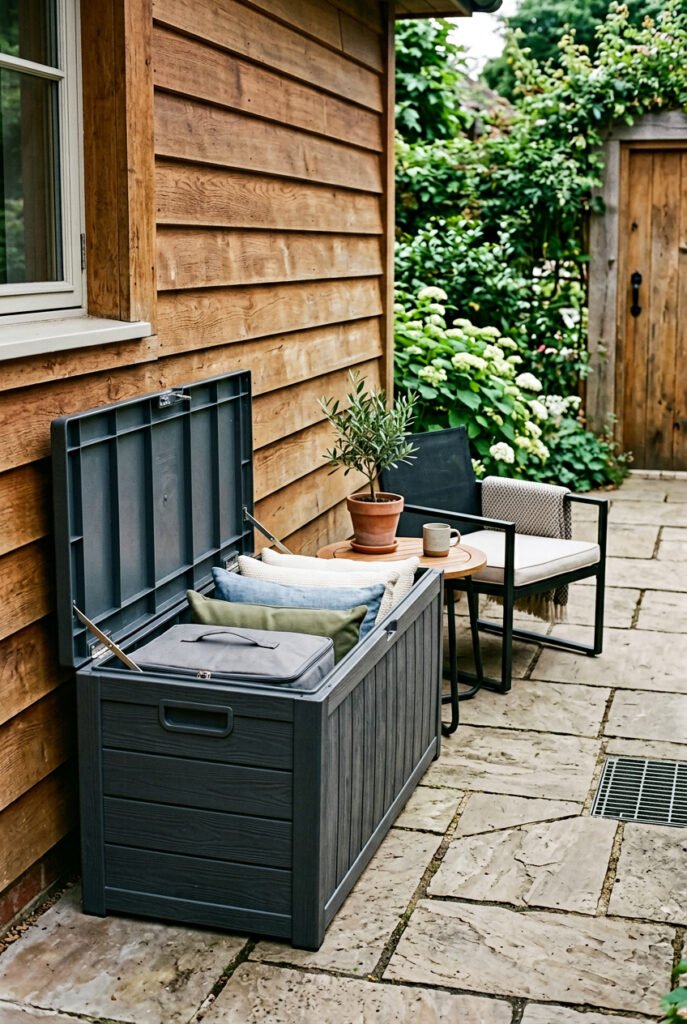
Choose a finish that connects with nearby furniture. A charcoal box can disappear beside dark fencing, while a wood-look surface works with natural chairs and planters. Keep the top visually clear rather than treating it as another display shelf.
Organize the interior by use: seat cushions together, smaller pillows in a bag or basket, and throws separated from gardening supplies. Do not describe or use the box as seating unless the manufacturer explicitly permits that function.
Practical Storage Pieces
- Outdoor storage box
- Cushion organizer bags
- Furniture covers
- Small moisture-resistant organizers
- Labels for seasonal supplies
23. Make a Roll-Up Outdoor Movie Screen
A temporary movie screen can give a small yard an occasional evening function without occupying space every day. Position it against the calmest background and arrange seating so no one blocks the main route.
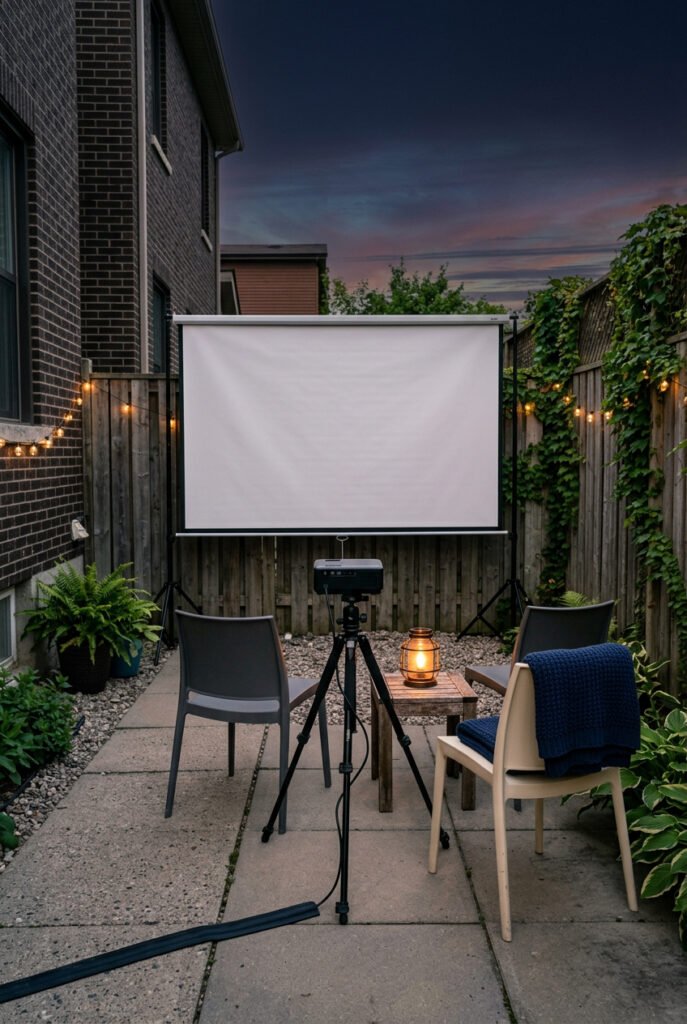
A plain light-colored screen keeps the picture area visually quiet. Store the screen rolled rather than leaving it exposed as permanent wall decor.
Wind, noise, lighting, electricity, and neighbor proximity all affect whether this idea is suitable. Use a stable support designed for the screen, follow the projector and electrical instructions, and keep cords out of walkways and wet areas. A portable screen that packs away is usually more practical for rentals than attaching material permanently to a fence.
24. Add a Removable Game Top to an Existing Table
A removable game top allows a dining or coffee table to support another activity without becoming a single-purpose piece. Paint a checkerboard, simple grid, or other familiar game surface on a separate panel that can be stored indoors.
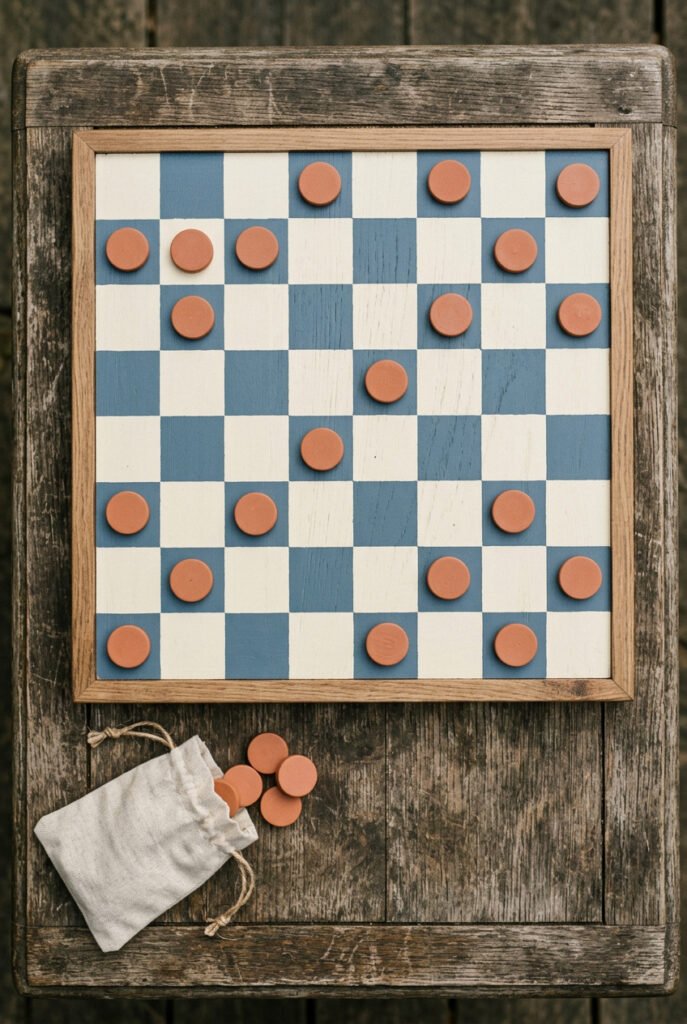
Keep the pattern related to the yard palette. Cream and muted blue feel softer beside natural wood; black and warm white work with modern metal furniture.
The panel must sit securely without sharp edges or excessive weight. Select the material and finish according to the intended exposure, and store it when not in use unless it is specifically designed to remain outdoors. Leave enough clear table surface for drinks and personal items during play.
25. Assemble a Shallow Birdbath or No-Plumb Water Bowl
A shallow basin can become a small focal point among planters without requiring plumbing or a large pond. Set it on a stable, level base and use a few stones to create a more layered, natural-looking surface.
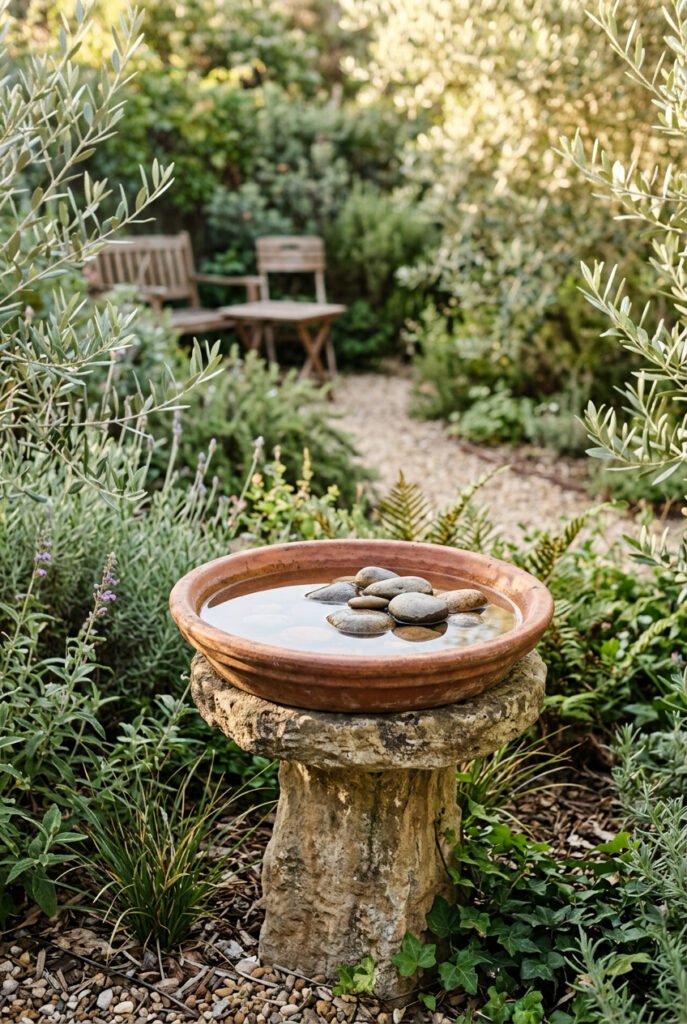
Position it where it can be seen from the seating area but remains easy to reach for cleaning. Avoid placing it directly beneath heavy leaf drop, where debris will collect quickly.
Standing water needs active maintenance. The CDC recommends emptying and scrubbing birdbaths and other water-holding containers at least weekly to reduce mosquito breeding sites. Local conditions may require more frequent attention.
Frequently Asked Questions
What is the easiest DIY backyard idea for a beginner?
Start by defining one existing hard-surface area with movable furniture, an outdoor rug, and two coordinating planters. This requires fewer technical decisions than digging, constructing furniture, or changing drainage. It also allows you to test the layout before making anything permanent.
How can I improve a small backyard on a budget?
Choose one function and reuse what you already own. Refinish a compact table, arrange existing chairs around one focal point, or use movable planters to define a boundary. Spending the available budget on one useful zone usually produces a clearer result than buying many small decorations.
Which DIY backyard ideas are renter-friendly?
Portable carts, cordless lanterns, rugs on suitable surfaces, freestanding storage, movable planters, temporary movie screens, and removable game tops are relatively flexible. You should still check the lease and product instructions. Painting, drilling, attaching hardware, changing surfaces, and installing large structures generally require permission.
What should I do with a muddy or bare-dirt backyard first?
Identify why the area remains bare or muddy before covering it. Observe drainage, sunlight, foot traffic, roof runoff, and low areas after rain. A path or suitable surface may help with normal traffic, but persistent water or erosion can require professional or property-owner assessment.
What should I check before digging or installing posts?
Locate underground utilities, review property boundaries, check local requirements, and obtain the necessary property approval. In the United States, contact 811 a few business days before digging and wait for the relevant utilities to respond. Procedures differ outside the U.S.
How can outdoor DIY projects last longer?
Start with materials intended for the actual location and exposure. Follow preparation, installation, cleaning, storage, and maintenance instructions for each material. Wood, metal, fabric, paint, tile, and electrical products have different requirements, so avoid relying on one universal “weatherproofing” treatment.
Can I use a fire pit in a small or rental backyard?
Only if the lease, HOA, municipality, local fire conditions, and manufacturer instructions allow it. The available clearance, ground surface, overhead branches, fencing, children, pets, and storage also matter. A central table or large cordless lantern can create a similar conversation-focused layout without open flame.
Choose One Project That Changes How You Use the Yard
The strongest first project is not necessarily the most dramatic one. It is the change that makes the yard easier to use next week: a dry route to the chairs, shade where you actually sit, storage beside the cushions, or enough privacy to remain outside comfortably.
Choose one problem, complete the project carefully, and live with the new layout before adding the next layer. Save the ideas that suit your space to your DIY Backyard Projects board, then begin with the change that removes the biggest obstacle between you and the outdoors.
Ready for your next outdoor update? Explore more practical inspiration in our Outdoor & Porch category, then browse the DIY Backyard Projects Pinterest board to save ideas for patios, small yards, rentals, and weekend projects.