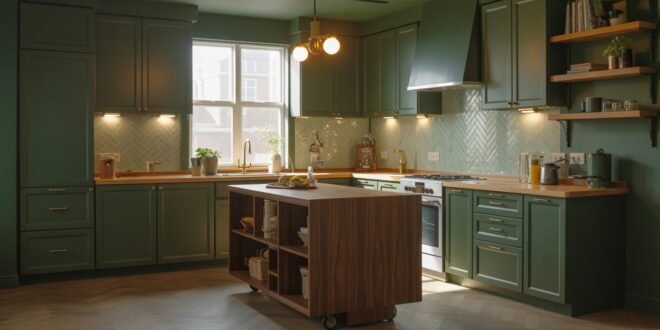
Imagine your tiny galley wrapped in velvet-deep forest green—the cabinet shade topping 2025 trend lists. One $30 sample pot flipped my rental from bland to boutique overnight.
Hang here and you’ll snag the perfect non-glare paint, foolproof lighting layers, and renter-safe swaps that sparkle like custom work. Ready to dial up the drama? Let’s choose your shade next.
Maximize Drama in a Dark Green Kitchen
Dreaming of a Dark Green Kitchen but stuck with a skinny galley? Good news: deep color plus smart details can turn even a rental into a jewel box. First, we’ll nail the paint so the shade looks rich, not cartoony. Then we’ll shape the cabinets so lines stay sleek and dust can’t hide. By the end, you’ll have a space that feels like a velvet curtain pulled across the whole room—without a single demo day.
Select Matte Forest or Hunter Hues
Painting is the fastest way to flip a kitchen mood. A matte forest or hunter shade wraps walls like theater drapes, hiding fingerprints while looking fancy. Let’s make sure the color glows, not glooms.


Pick a matte finish
Matte paint swallows glare, so the green reads soft and deep. It also masks tiny dings—a gift when roommates slam doors or kids bump stools. Eggshell works too, but stay away from high gloss unless you love seeing every crumb. The goal is a smooth, velvety backdrop that begs for close-ups. Picture velvet theater seats; that’s the vibe.
Test color in real light
Tape sample cards where morning and evening sun hit. Watch how the shade shifts during breakfast and dish-washing hour. Blues can pop out at sunrise; browns may appear at dusk. If the color feels too swampy, drop one tone lighter. Testing now saves tears later when the whole room’s coated.
Balance with soft neutrals
Cream ceilings, pale counters, or light-stone floors stop the green from turning dungeon-dark. Think of them as fluffy throw pillows on a dramatic sofa. They bounce light back into the room and let the deep cabinets steal focus. You get drama without the gloom.
A matte forest base delivers luxe color that forgives daily mess and lights up under soft whites. Your rental feels grand, and you haven’t even touched a power tool.
Quick tip: Store leftover paint in a mason jar. If you scuff a door, dab on a fix in seconds.
Anchor Style with Sleek Silhouettes
Bold color needs clean lines or the room can feel busy. Flat doors, hidden pulls, and long hardware keep the deep green looking sharp. Let’s give cabinets a gym workout—trim the bulk, stretch the height.


Go for flat panels
Slab fronts erase grooves where crumbs love to camp. Wipe once, done. The smooth face also acts like one giant sheet of color, so the green stays front and center. Less carving, more wow.
Stretch lines with long pulls
Five- to seven-inch bar handles pull eyes upward, sneaking in extra height. It’s like vertical stripes on pants—instant lift. Pick a warm metal for a little sparkle and comfort grip for late-night snack raids.
Hide the hardware
Finger rails or push latches keep doors looking seamless. Your hand finds the edge, opens the cabinet, and the hardware stays invisible. The green gets to be the star, not a row of knobs.
Sleek shapes let the bold shade shine while making ceilings seem taller. It’s a boutique-hotel trick that fits right into an apartment galley.
How to: If new pulls need wider holes, grab stick-on backplates. They hide the old marks and peel off when you move.
Four closing sentences for H2 section: Deep green pairs best with smooth shapes; together they make a tiny kitchen feel grown-up, not cramped. Every wipe is easy, every line is clean. You’ll cook spaghetti in a space that feels like a design showroom. And when the lease ends, you’ve added style, not damage.
Illuminate Depth with Layered Lighting
Dark color needs the right glow or it turns into a cave. First we’ll splash gentle light along counters, then we’ll drop shiny pendants for sparkle. Stack these lighting layers and the green will look plush morning to midnight.
Install Under-Cabinet Glow Strips
Overhead bulbs flatten rich paint. Skinny LED tape under uppers spreads an even wash, so the green stays lush. You don’t need to hard-wire—just plug, stick, and shine.


Choose warm-white LEDs
A 2700-3000 K strip casts a cozy glow. Cool white can feel like a dentist office—no thanks. Warm light boosts wood tones and keeps brass from looking harsh. Your soup will look tasty too.
Run strips end to end
Gaps create “headlight” spots that chop up the color. Measure the whole cabinet length, then trim the strip to fit. Continuous light makes the backsplash glow like stage lighting.
Go dimmable
A small slider switch lets you crank brightness for chopping onions and dial it down for late-night ice-cream raids. Mood control without rewiring.
Under-cab LEDs act like selfie lights for your cabinets—flattering and forgiving. Stick them up, plug them in, and your Dark Green Kitchen goes from shadowy to show-ready.
Pros & Cons: Battery strips skip cords but need recharging; plug-ins last longer but want an outlet. Choose your battle.
Suspend Sculptural Pendants for Sparkle
Task lighting is useful; statement lighting is fun. Pendants drop glow right on the work zone and double as jewelry against the green backdrop.


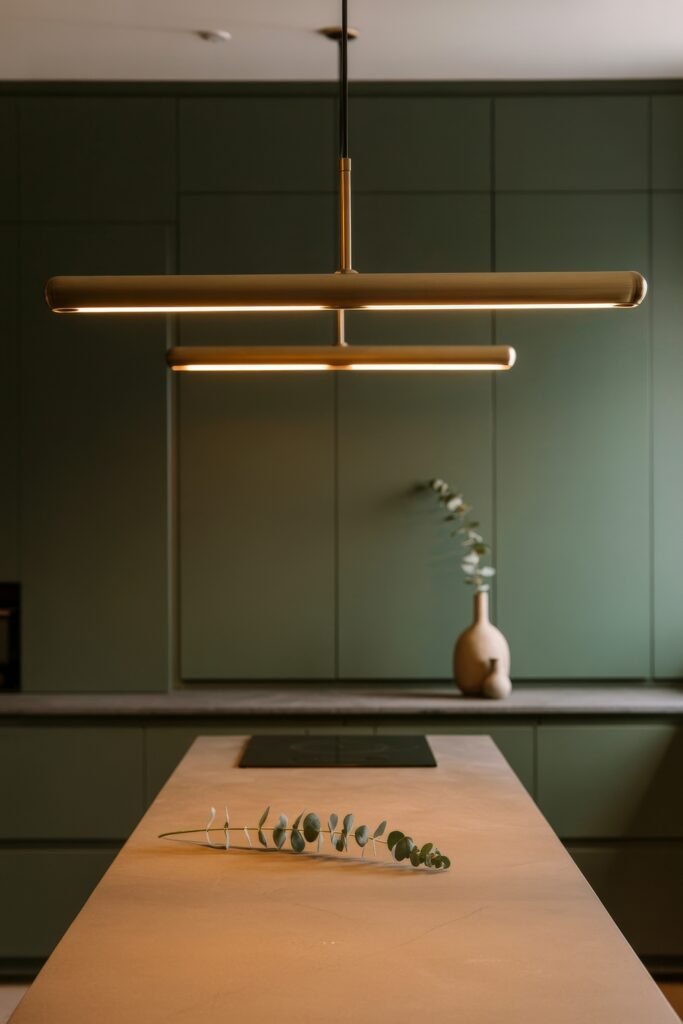
Hang at the right height
Place fixtures 30-36 inches above the island or table. That keeps sightlines clear yet lights the countertop. Too high and you’re in the dark; too low and you’re bonking heads.
Pick slim shapes
Tall cylinders or narrow cones feel airy in a galley. They light evenly without blocking views. Think of them as earrings, not helmets.
Mix warm metal finishes
Brass or bronze shades bounce a golden shimmer onto cabinets. The metal echoes hardware without screaming “matchy.” One or two tones are plenty.
Pendants give a gentle sparkle and make dinner feel like an event. Pair them with soft under-cabinet lights and the room glows from floor to ceiling.
Quick tip: Can’t hard-wire? Use plug-in swag pendants and drape the cord neatly along tiny adhesive hooks.
Layered lighting keeps deep color from turning murky. With strip lights as the base and pendants for dazzle, your kitchen stays bright, cozy, and photo-ready—even in a rental where ceiling wiring is off-limits.
Sparkle Up with Luxe Metallic Accents
Deep greens feel like velvet gowns; metals are the statement jewelry. We’ll start with hardware that pops, then add a faucet that gleams. These shiny bits bounce light and give instant glam.
Mix Brass and Bronze Hardware
Small pieces, big punch. Warm metals wake up dark paint without clutter. The trick is using them on purpose, not by accident.


Select a lead metal
Choose brass or bronze as the main player. Use it on about two-thirds of knobs and pulls. The second metal shows up like backup singers—present but not crowding the mic.
Use long pulls
Extended bars stretch the cabinet lines upward. They’re easier to grab with messy hands too. Bonus: they cover the old screw holes if you’re swapping from tiny knobs.
Match sheens
Satin with satin; brushed with brushed. Mixed gloss levels can look noisy. Keep finishes in the same family so the sparkle feels smooth.
A planned mix of metals looks designer, not flea-market. Best part? The switch takes minutes and all the old hardware fits back before move-out.
How to: Store original knobs in a freezer bag with the screws taped inside, so nothing vanishes between now and deposit day.
Showcase Gold Faucets as Jewelry
A gold faucet against hunter green grabs every eye. It’s the necklace your kitchen wears every day.


Pick the right gold tone
Brushed gold feels mellow; polished is full bling. Match the faucet’s warmth to the cabinet hardware so they play nice together.
Frame with light surfaces
White or marble-look splash backs bounce shine onto the faucet. The metal glows like sunshine at the sink.
Limit the bling
One or two gold accents sing; a dozen shout. Let the faucet be the star and keep nearby pieces simple.
A single glowing faucet can elevate the whole room, turning daily dish duty into a moment of sparkle.
Quick tip: Add a stick-on LED sconce above the sink. It spotlights the faucet without calling an electrician.
Warm metals reflect light onto deep greens, adding shimmer that feels custom yet renter-friendly. You get glam without breaking tiles or the bank.
Warm the Palette with Natural Wood Touches
A Dark Green Kitchen can feel like a forest at dusk. Wood acts like a campfire—warm, inviting, and just rustic enough. We’ll float slim shelves to lighten walls and tuck in walnut stools for texture.
Float Slim Oak Shelves for Airiness
Open shelves slice through long runs of color and give dishes a stage. Light oak keeps things bright.


Leave breathing room
Space shelves 10–12 inches apart so daylight slips between. Too tight and the wall feels cluttered; too loose and you waste storage.
Style with mixed textures
Glass jars, rattan trays, and trailing plants bounce light in different ways. The green backdrop makes each item pop.
Use renter-safe anchors
Heavy-duty adhesive brackets or hollow-wall anchors hold weight but pop out clean later. Keep a little spackle on hand for tiny holes.
Oak shelves break up the green block, add storage, and can come down when you move. Pretty and practical.
Pros & Cons: Open shelves force you to dust more, but they’re also a great excuse to buy cute mugs.
Invite Walnut Stools for Texture
Movable pieces add warmth with zero commitment. Walnut’s grain sings next to emerald cabinets.


Choose mid-tone walnut
Too dark and it disappears; too light and it clashes. A medium shade ties the room together.
Keep seats low-back
Low backs slide under islands, saving walk space. They also keep sightlines clear in a narrow galley.
Add a woven pad
A small cushion softens the wood and sprinkles in café vibes. Pick a washable cover—spills happen.
Walnut stools add depth, can travel to the next home, and need no drill holes. Win-win.
Quick tip: Stick felt pads under stool legs. Your downstairs neighbor will thank you.
Wood tones soften the drama of dark paint, making the kitchen feel cozy instead of stern. Better yet, every piece is easy to remove or reuse, perfect for life on a lease.
Keep It Light with Creamy Contrasts
Deep green loves a pale partner. Light counters and see-through cabinets bounce brightness around, keeping small kitchens airy. First up: creamy quartz. Then we’ll peek inside glass uppers.
Top Cabinets with Pale Quartz Counters
A soft-white counter is like a skylight you can wipe. It brightens tasks and shows off the green.


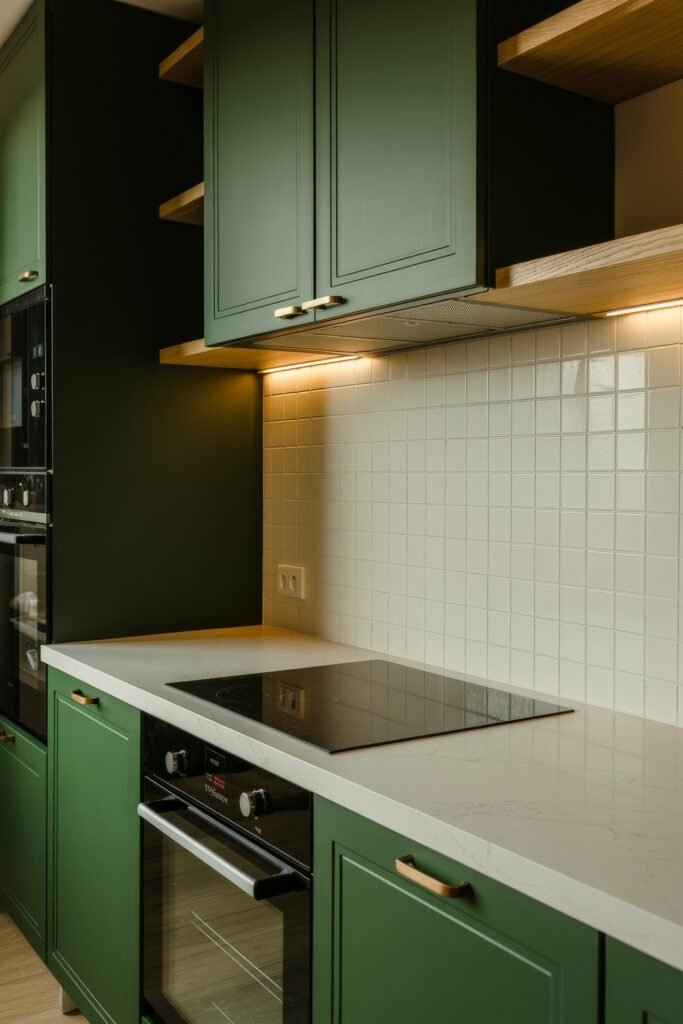
Pick soft-white quartz
Quartz resists stains and never asks for sealing. The gentle color reflects under-cab lights so the room feels open.
Look for subtle veining
Tiny gray or taupe swirls add movement without stealing the spotlight. It’s texture minus the fuss.
Let counters bridge colors
The pale slab sits between dark lowers and a lighter backsplash, easing the eye from one shade to the next.
Light-catching quartz turns meal prep into a bright affair and keeps things low-maintenance for busy renters.
How to: If swapping counters isn’t allowed, lay down extra-thick cutting boards in pale wood. Instant brightness, zero install.
Break Runs with Glass-Front Uppers
Glass doors cut visual weight and put favorite dishes on show.


Swap a few doors for glass
You don’t need a full row. Even two doors lighten the wall.
Mix clear and ribbed
Clear glass shows off pretty plates; ribbed hides cereal boxes. Best of both worlds.
Light the inside
Stick-on pucks make every shelf a tiny spotlight. At night the cabinets glow like lanterns.
See-through uppers catch and spread light, turning storage into display without adding bulk.
Quick tip: If replacing doors isn’t possible, pop out center panels and slip frosted film behind the frame.
Creamy counters and peek-a-boo uppers keep deep green lively. Your kitchen feels big, bright, and still full of personality.
Style Smart for Renter-Friendly Flexibility
Leases change, styles evolve—so choose upgrades that leave no scars. We’ll swap pulls and stick on backsplashes, then light corners with plug-ins.
Swap Pulls and Stick-On Backsplashes
Fast, cheap, and totally reversible. Tiny tweaks, huge impact.


Stash the originals
Unscrew old knobs, bag them, and label the bag. Restoration day will be painless.
Press on peel-and-stick tile
Panels go up like stickers and peel off with heat. Choose a pattern that flatters the green but won’t scare landlords.
Try contact paper counters
Marble-look film rolls on, seals at edges, and wipes clean. When it’s time to go, lift a corner and peel.
Roll in an island cart
Need more prep space? A wheeled cart parks where you want it, then doubles as a bar for Friday pizza night.
Each swap layers charm over the Dark Green Kitchen, yet every piece can leave with you. Style now, stress later (or never).
Pros & Cons: Stick-on projects are fast but can lift at edges near heat. Seal with clear caulk and check once a month.
Use Portable Lighting to Avoid Wiring
Light belongs everywhere, even in rentals. Plug-ins and battery LEDs make it happen.

Plug-in sconces
Clamp-arm fixtures screw into the wall and run on a cord. Angle them over shelves or art.
Stick-on pucks
Rechargeable LEDs press under cabinets or inside glass doors. Tap, light, done.
Easy removal
Most fixtures use two screws or adhesive strips. A dab of spackle hides the evidence at move-out.
Portable lights create layers, mood, and sparkle—all without breaking the lease.
Quick tip: Use cord covers painted wall color so plugs look intentional, not messy.
Flexible fixes let you chase style today and freedom tomorrow. When the moving truck arrives, your kitchen packs up pretty and your deposit stays intact.ExpandGoodBad
Conclusion
Your Dark Green Kitchen is closer than you think—and it’s ready to glow.
- Matte forest or hunter tones crank up drama without glare.
- Layered LEDs and warm brass hardware bounce light and luxe sparkle.
- Peel-and-stick tile backsplashes and long bar pulls make renter upgrades painless.
Grab two paint swatches and tape them under tonight’s lamplight—your eyes will tell you which green sings first. What detail are you itching to try, or do you have a clever trick I should test? For even more inspo about Dark Green Kitchen, hop over to our Pinterest board on Green-Themed Kitchens and start pinning!
